Hot!

Other News

More news for your entertainment

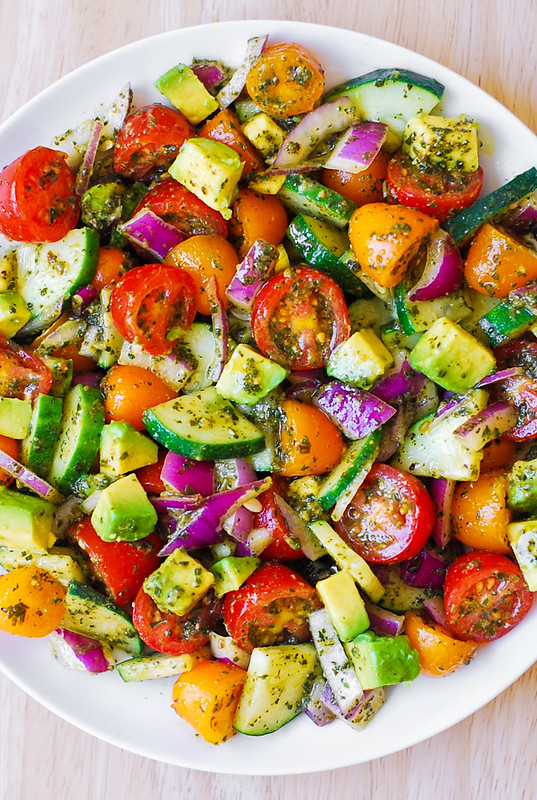
Tomato Cucumber Avocado Salad with Basil Pesto

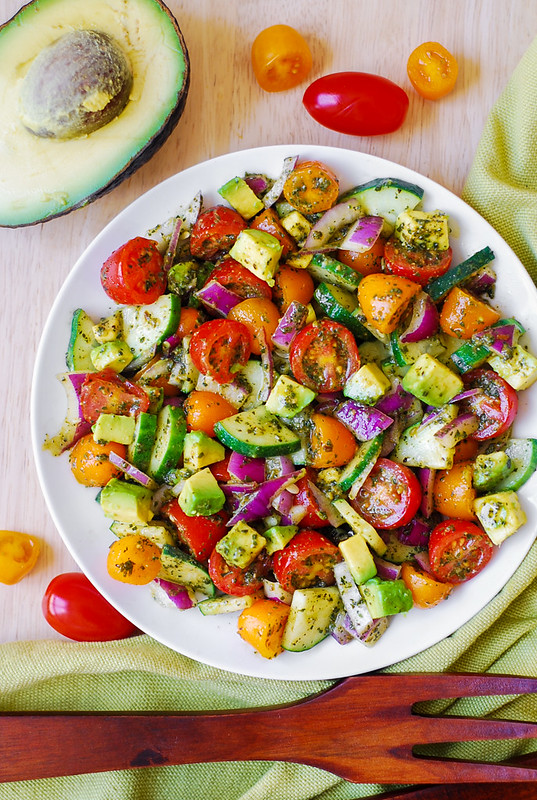
Tomato Cucumber Avocado Salad with Basil Pesto – Healthy, Mediterranean recipe with lots of fresh vegetables.   This recipe uses just a few ingredients, it’s easy to make, and the salad looks beautiful on the table for so little effort.  Use both red and yellow cherry tomatoes (or grape tomatoes) to add colors!

Tomato Cucumber Avocado Pesto Salad, best avocado salad, easy avocado salad

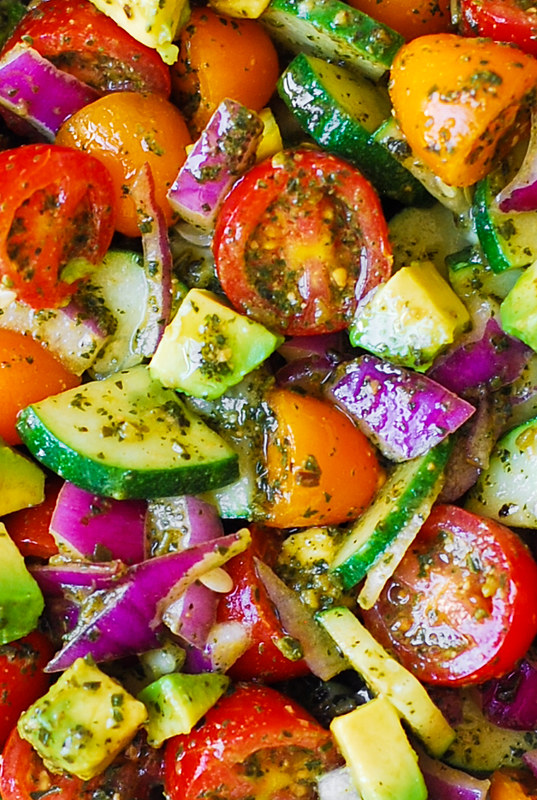
I love basil pesto. I’ve used it in so many dinner recipes, like in this pesto chicken and mushroom pasta or this shrimp pesto pasta, or pesto chicken and veggies.   The basil pesto makes the simplest of the recipes taste so good.  Just like this avocado salad.  I pretty much use the basil pesto as the salad dressing here, because the pesto already has olive oil.  I just add a little bit of lemon juice, salt and pepper, and that’s it!  The salad is ready.

I used to make my own basil pesto all the time but these days there are so many good store-made pesto sauces, that I just buy one in the store and use it with my favorite recipes.

easy avocado salad, fresh vegetables salad

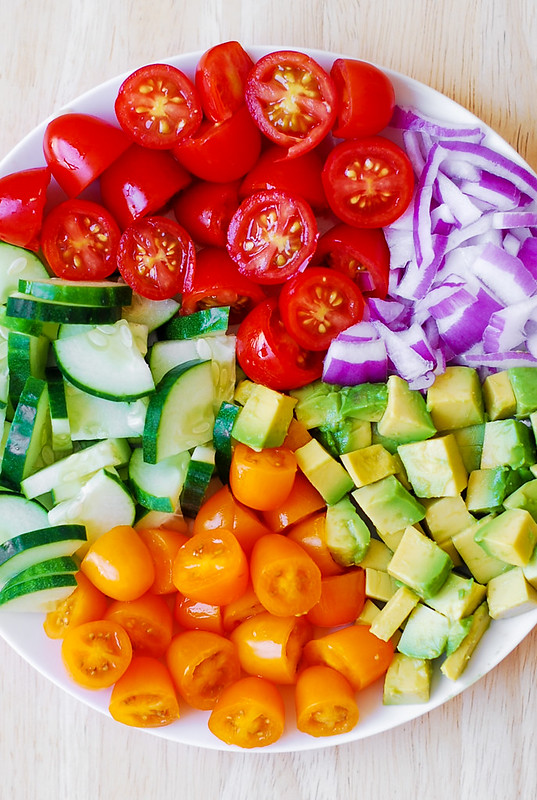
If you look at the ingredients list in this avocado salad, there are very few ingredients. But, the salad look super colorful and refreshing because I am combining both red and yellow cherry tomatoes (or grape tomatoes), avocados, cucumber and then mixing everything with the basil pesto.

best avocado salad

This avocado salad is packed with nutrients and flavor!

Tomato Cucumber Avocado Pesto Salad, simple avocado salad, healthy avocado salad, quick avocado recipes


Tomato Cucumber Avocado Salad with Basil Pesto

Healthy, Mediterranean salad with lots of fresh vegetables.  Tomato Cucumber Avocado Salad with Basil Pesto – just a few ingredients, easy to make, and looks beautiful on the table for so little effort.  Use both red and yellow cherry tomatoes (or grape tomatoes) to add colors!

  • 1/2 pound red cherry tomatoes (or grape tomatoes, halved)
  • 1/2 pound yellow cherry tomatoes (or grape tomatoes, halved)
  • 2 avocados (, diced)
  • 1 cucumber (, sliced)
  • 1/3 cup red onion (, diced)
  • 1/4 cup basil pesto
  • 1 tablespoon lemon juice
  • salt and pepper (to taste)
  1. In a large bowl, combine halved red and yellow cherry or grape tomatoes, diced avocado, sliced cucumber, diced red onion.  

  2. Add basil pesto and lemon juice to the salad and toss to combine.  Season with salt and pepper, if desired.  Use more basil pesto, if desired.  

The post Tomato Cucumber Avocado Salad with Basil Pesto appeared first on Julia's Album.


from Julia's Album https://ift.tt/2J9ppTN
via IFTTT

6 Side Plank Variations That Will Clobber Your Core

If your current bodyweight-exercise menu stops after pushupspull-upssquats, and lunges, it’s time to shake things up a little. Enter: the oft-forgotten side plank exercise — in which you hold your body rigid, supporting your weight on your feet and one forearm while your opposite shoulder and hip point toward the sky.

The side plank is usually considered a core exercise, focused on stabilizing the spine. But it also hammers all of the stabilizers in your hips and shoulders, and relies heavily on your quads and glutes as well. With a little imagination, you can make the plank do almost anything.

Fortunately, creativity is what Beachbody is all about. Below are six side plank variations pulled from our files, along with the Beachbody On Demand programs in which you can find them. Plug in 2-4 variations at the end of your workout — or any time you need core moves that will also blast other parts of your body.


6 Side Plank Variations for Strength and Stability

Bodyweight moves like the side plank exercise aren’t just convenient and time efficient. They’re also the best way to build relative strengththat is, how strong you are in relation to your bodyweight. If you’re an athlete — or just hope to look like one — moves like these are indispensable.

Side plank reach

Muscles targeted: Obliques, abdominals, back, shoulders.

Found in: CORE DE FORCE >> 5-Minute Core on the Floor

  • Assume a low plank position: forearms and balls of your feet on the floor, shoulders directly above your elbows, head neutral, and your entire body straight from head to heels.
  • Keeping your body straight and your core engaged, roll into a left side plank. Keep both feet on the floor (right foot forward), and extend your arm toward the ceiling.
  • Maintaining the elevation of your hips and position of your feet, then reach your right arm underneath your torso without allowing your hips to rotate.
  • Repeat for reps, then switch sides, performing equal reps on each.


Plank to single-arm plank to side bridge

Muscles targeted: Obliques, abdominals, transverse abdominis, and gluteus medius.

Found in: Brazil Butt Lift >> Sculpt

  • Assume a low plank position: forearms and balls of your feet on the floor, shoulders directly above your elbows, head neutral, and your entire body straight from head to heels. Hold for 15 seconds.
  • Lift your left arm off the floor, and place it behind your back, holding a single-arm plank for 15 seconds.
  • Keeping your body straight and your core engaged, roll into a right side plank position: right forearm on the floor, shoulders and feet stacked, and your left arm extended toward the ceiling. Hold for 15 seconds.
  • Return to the starting position, and repeat the entire sequence for reps.
  • Switch sides, performing equal reps on both.

Make it easier: Perform the entire series with your knees on the floor.


Side plank leg raise

Muscles targeted: Obliques, abdominals, and gluteus medius.

Appears in: 21 Day Fix >> Dirty 30

  • Assume a left side plank position: left forearm on the floor, shoulders and feet stacked, and your body straight from head to heels. Extend your right arm toward the ceiling.
  • Lift your right leg as high as you can, then slowly return it to the starting position.
  • Repeat the movement for reps, then switch sides, performing equal reps on each.

Make it easier: Keep your left knee on the floor throughout the move.


Side plank hip lift

Muscles targeted: Obliques, abdominals, hips and gluteus medius.

Found in: FOCUS: T25 >> Ab Intervals

  • Assume a right side plank position: right forearm on the floor, shoulders and feet stacked, left hand on your left hip, and your body straight from head to heels.
  • Keeping your core engaged, raise your left hip toward the ceiling.
  • Lower your hips to the starting position without letting them drop, and repeat for reps.
  • Switch sides, performing equal reps on both.


Weighted side plank hip drop

Muscles targeted: Obliques, abdominals, and gluteus medius.

Found in: 21 Day Fix Extreme >> 10 Min HardCORE

  • Lie on your left side propped up on your left elbow and forearm, shoulders stacked over your elbow, feet stacked on top of each other.
  • Grab a lightweight dumbbell with your right hand and hold it on your right hip, then raise your hips so that your body forms a straight line from your head to your heels.
  • Slowly lower your left hip, and gently tap it on the floor.
  • Reverse the move, returning to starting position.
  • Continue for reps, and switch sides, performing equal reps on each.

Make it easier: Perform the move without a dumbbell, and/or keep your left knee on the floor throughout the move.


Side plank hip drop with crunch

Muscles targeted: Obliques, abdominals, and glutes

Found in: The Master’s Hammer and Chisel >> 10 Min Ab Hammer

  • Assume a right side plank position: right forearm on the floor, shoulders and feet stacked, and your body straight from head to heels. Place the fingertips of your left hand lightly behind your left ear.
  • Lower your right hip to the floor, and then return to the starting position.
  • Bring your left knee to your left elbow as you contract your abs.
  • Return to the starting position, and repeat for reps.
  • Switch sides, performing equal reps on each.


from The Beachbody Blog https://ift.tt/2GpImzM
via IFTTT

Sweet Potato Chicken Wraps

If you’ve ever grabbed chicken wraps at an airport or a coffee shop, you’ll know the sinking disappointment that is a soggy chicken wrap.

Wraps just don’t keep well, no matter what you put inside, so historically, they don’t make good meal prep foods. (Don’t even get us started on trying to meal prep a sandwich. Those barely last an afternoon and are probably not going to make it to the end of the week.)

Enter 21 Day Fix creator Autumn Calabrese and her brother, chef Bobby Calabrese. This culinary duo has set out to solve this chicken wraps conundrum in delicious fashion. Their Sweet Potato Chicken Wraps address that old soggy wrap with a bit of healthy ingenuity.

Chopped sweet potatoes

In this episode of FIXATE, Autumn and Bobby use hearty collard greens to take the place of that absorbent tortilla or lavash wrap.

This better-for-you wrap eliminates empty carbs from your lunch, leaving more room for nutritious ingredients like a savory sweet potato mash, fresh bell pepper, and succulent chicken breast.

A touch of melted ghee adds a nutty flavor and buttery texture to the wrap, while a basil-honey mustard dressing adds that tangy finish.

(Okay, we know what you’re thinking, collards have a crazy thick stem. Bobby has a clever trick for reducing the center stem, allowing for easy wrapping.)

Not only is this is an excellent 80 Day Obsession recipe, it’s also designed to be an ideal meal prep recipe.

To get the recipe and find out the Portion Fix Containers and nutritional information, watch the FIXATE episode on Beachbody On Demand!


from The Beachbody Blog https://ift.tt/2GlyLOD
via IFTTT

How to Do the Preacher Curl

If you really want to give your biceps a run for their money, look no further than the preacher curl. In fact, few exercises target the biceps as directly and effectively.

Unlike other biceps curl variations, preacher curls force you to rely solely on the strength of your biceps to curl the weight. This is because the preacher curl bench prevents you from using any momentum to complete the rep. “This move allows you to take the stability factor out of the exercise, which concentrates almost all of the force on the biceps,” says Cody Braun, Beachbody fitness expert.

Since the preacher curl limits your ability to use momentum to help you curl the weight, you may find you can’t lift as much as you can with other biceps curl variations, like the classic standing dumbbell curl. And this is okay! What matters is that you’re able to engage your biceps with each and every rep—ultimately making them bigger and stronger. Here’s how to do a preacher curl properly, and some other helpful tips about this move and the muscles it works.

How to Do the Biceps Preacher Curl With Perfect Form


Appears in: Sagi’s BOD exclusives >> Bis and Tris

  • Position yourself on a preacher curl bench with your elbows bent and an EZ bar held in both hands with an underhand grip.
  • Lower the bar, stopping just before your elbows lock out.
  • Curl the bar back up to the starting position, and repeat.

Preacher Curl Variations

One of the most common preacher curl variations is the EZ bar preacher curl, as demonstrated in the video clip above. The EZ curl bar is a W-shaped barbell that allows for a more natural movement pattern without putting added stress on the elbow joint, Braun says. If you don’t have an EZ curl bar on hand, you can also use dumbbells to complete this move. Or, if you have access to a gym, you’ll often find preacher curl machines that combine the bench, bar, and weights all into one.

How to Make the Preacher Curl Easier or Harder

Make it easier:

  • Use a lighter weight.

Make it harder:

  • Use a heavier weight
  • Slow your lifting tempo.

Bonus tips for doing the preacher curl:

  • Always work your muscles through the full range of motion, Braun says. Do this by making sure to fully lower the weights, but stopping just before elbow lock-out.
  • Keep in mind that the preacher curl can place a lot of stress on the elbow joints, so go lighter on the weights in the beginning to avoid injury.

The Benefits of the Preacher Curl

Since the preacher curl really hones in on the biceps muscle, it’s excellent for increasing strength and size. And since the move concentrates on one motion, you can really focus on doing it with correct form.

Why should you bother with building stronger biceps? Only because you use them every single day! Anytime you pick something up — like grocery bags, moving boxes, or babies — you’re engaging your biceps. And if you work to make them stronger, then it will make these daily tasks much easier and more efficient.

What Muscles Do Preacher Curls Work?

The preacher curl is classified as an isolation exercise, meaning it only involves one joint and one muscle: the biceps. But that doesn’t mean it’s the only muscle worked. The brachialis and brachioradialis (two other elbow flexors) also assist with the movement of the preacher curl exercise.

Your biceps muscles (biceps brachii to be specific) have two heads (short and long), both of which attach separately to the scapula, then fuse together to form the “belly” of the muscle. Then they attach via a tendon to the upper forearm. The biceps help you flex your elbow (bring your arm in, like for a biceps curl) and supinate your hand (turning it from a palm-down to a palm-up position).

The brachialis runs beneath your biceps brachii, and the brachioradialis runs from the bottom of your upper arm to the bottom of your forearm. The brachialis is located underneath the biceps brachii toward the outside of the upper arm, is actually the stronger flexor, due to its proximity to the elbow.


from The Beachbody Blog https://ift.tt/2pSakgx
via IFTTT

13 Things You Need to Know Before Starting a Weightlifting Program

Weightlifting is straightforward in theory (you just, erm…lift weights, right?). But it’s a bit more complicated in practice. As a beginner to weightlifting, it’s confusing (not to mention intimidating) to figure out which muscles to target, how much to lift, and how often to work out. How are you supposed to know where to even begin with finding a good weightlifting program?

Although it might seem daunting at first, the benefits of lifting weights far outweigh any hurdles you might have to getting started. William P. Kelley, C.S.C.S, ATC, says some major benefits of weightlifting include improved strength, bone density, and heart health. Studies even suggest that it can help keep your brain sharp, as well as increase energy levels and decrease stress.

Trevor Thieme, C.S.C.S., Beachbody’s senior manager of fitness and nutrition content, notes that lifting weights is also an effective way to lose weight: “Weightlifting can help you lose fat faster than steady state cardio because it keeps your metabolism elevated for longer post workout,” he explains. “The result is that it helps you burn more total calories.”

But before you get to enjoy all the benefits of lifting weights, you first have to get started. The first step? Creating smart goals.

What Are Your Weightlifting Goals?

“Goal-setting is critical to guiding your weightlifting path,” Kelley says. Before you even choose a weightlifting program, consider what you want to get out of it. Are you training for a specific event, for general health, or with aesthetics in mind? Do you want to lose weight, build strength, pack on muscle, or achieve a combination of any or all three of those goals?

“Each objective requires a different strategy, and by identifying your goal or goals, you can identify the most effective training program to achieve it,” Thieme says. The tips below will help you do that.

If you need some extra guidance to help you get started, check out Beachbody On Demand’s weightlifting programs, like Body Beast (which focuses on muscle building) and A Week of Hard Labor (an intense, five-day weightlifting routine). Both programs can help you achieve the lean, muscular physique you’ve always dreamed of building. (See the results for yourself!)

13 Common Questions About Starting a Weightlifting Program

These 13 questions and answers will give you the information you need to start lifting weights, including basic training tips and mistakes to avoid.

1. What equipment do I need for a weightlifting program?

If you’re starting an at-home weightlifting program, dumbbells are a necessity — but having just a single pair may not cut it.

Thieme says you need different weights to effectively challenge different muscle groups. Your legs should be able to handle heavier weights than your triceps, for example. That’s why he recommends investing in a pair of selectorized (AKA adjustable) dumbbells (like this set of Bowflex dumbbells). “A single pair of dumbbells can replace an entire dumbbell rack, saving you hundreds of dollars—not to mention lots of floor space,” he says.

A bench is another useful piece of equipment for developing overall strength and power, Kelly says, although you could get by without one if you’re short on space.

Weightlifting program - equiptment

2. How much weight should I lift?

“You should always lift the heaviest amount of weight that allows you to complete all of your reps and sets for all of the exercises in your workout,” Thieme says.

If you can’t maintain proper form for the last several reps of an exercise, go lighter. If you can breeze through your reps with the last few feeling as comfortable as the first few, go heavier. The key to achieving muscle growth is to find your sweet spot, which in this case means a weight that challenges you without forcing you to sacrifice good form.

3. How many reps and sets should I do for each weightlifting exercise?

First, consider your weightlifting goals. “If you want increased strength, you should do from two to six reps per set. For hypertrophy [muscle growth] do eight to 12 reps. And for endurance, do 15 to 20 reps,” Kelley says.

As for sets, Thieme says it’s important to do multiple sets of each exercise, no matter your goal. Three sets per exercise is generally a good number, but don’t lock yourself into that. As long as you’re doing at least two and not more than five or six, you’re good. And if you want to increase your strength, build bigger muscles, and improve your muscular endurance, regularly vary the number of reps and sets you do.

“Optimal muscle growth occurs when you target both of the major muscle fiber types—I and II—and the best way achieve that is by lifting across the entire rep spectrum,” says Thieme. “Incorporate both heavy weight/low rep sets and light weight/high rep sets in your training program.”

4. Should I focus on one or two body parts a day, or do full-body workouts every time?

Both are effective strategies for packing on muscle. “The key is to work each body part or muscle group at least twice a week,” says Thieme, who suggests alternating between the two training strategies. “Do split training for two or three months, and then do total body training for two or three months.”

Your schedule is also a determining factor, Kelley notes. “If you can only work out two to three times per week, then a total body lifting program may be more efficient,” he says.

5. How many days per week should I lift weights?

How often you lift weights comes down to your goals and schedule as well, Kelley says. (Doe we sound like a broken record yet?)

“The ratio of exercise to recovery days that maximizes results and minimizes injury and overtraining risks depends largely on your current fitness level and the type, intensity, and duration of your workouts,” Thieme says. He recommends lifting a minimum of two days a week a maximum of six days.

6. Do I need to take rest days during a weightlifting program?

Yes! Giving yourself a day off from training is crucial to your weightlifting success. “Lifting days are where you [purposefully] damage muscle tissue,” Kelley says, while “rest/recovery days are when muscles repair and rebuild.” Both days are needed to become stronger.

If you don’t give yourself sufficient recovery time, you’ll sabotage your workout performance and hinder your results. “Training adaptations don’t happen during workouts, they happen between them, making recovery days just as important as training days,” says Thieme. “What people often forget is that, when it comes to exercise, more isn’t always better. You have to give your body the time it needs to respond to the training stimulus that each workout provides.”

How often you should take a recovery day depends on your fitness level, primary exercise type and intensity, age, and sleep habits, but a good rule of thumb is to take one or two rest/recovery days a week.

If you feel energized on your designated rest days, Kelley recommends active recovery activities, which facilitate blood flow to your muscles without overloading them. Yoga and light cardio (e.g., an easy jog, leisurely bike ride, or short hike) are good options. Also, don’t limit warm-up and cool-down activities to warm-ups and cool-downs. Perform dynamic stretching and foam rolling every day, regardless of whether or not you’re working out.

Weightlifting program - working out

7. How do I avoid a muscle-building plateau?

There are numerous factors that contribute to muscle growth, but the key to achieving consistent gains is to regularly increase the challenge to your muscles, Kelley says. “By increasing the stress on a muscle through a principle called ‘progressive overload,’ you illicit changes in that muscle, including greater size, greater contraction force, and improved motor recruitment,” he explains.

Lifting progressively heavier weights isn’t the only way to do that. “Other ways to achieve progressive overload include decreasing the rest periods between sets, performing more complex exercise variations, and switching up the exercises you do,” says Thieme. “Even changing up your grip (e.g., from underhand to neutral) can increase the challenge to your muscles and trigger fresh growth.”

8. Can I do my weightlifting program and still do cardio and other workouts?

The short answer: yes. But you need to be strategic about it. “If your focus is weightlifting, then you should use cardio as a form of ‘active recovery,'” says Thieme.

If you do a heavy weightlifting session one day, and then go for an easy run the next, you can actually enhance your recovery (and results) from the weightlifting session by boosting blood flow—and the vital nutrient delivery and waste removal services it provides. “But a heavy weightlifting workout followed by a long, hard run or HIIT session the next day can do more harm than good,” says Thieme.

If you don’t allow your body sufficient time to recover between intense workouts, the only thing you’ll achieve is an increased risk of burnout and injury.

9. Will weightlifting make me bulky?

Lifting weights can cause men to become bulky if they focus solely and intensely on bodybuilding or pure strength training, Thieme explains, but this is rarely the case for women. Why? Genetics.

Men typically have a higher percentage of type II muscle fibers, which are bigger and have a higher growth potential than type I fibers. Plus, men produce more testosterone, which is critical for muscle building. “Women do not produce testosterone at high enough levels naturally to get bulky,” Kelley says, even if they’re lifting heavy amounts of weight. That said, a woman can still increase her muscle size through weightlifting if that’s her goal. “Studies also show that while most women can’t build as much muscle as most men, they can achieve similar increases in strength,” says Thieme.

10. How do I make sure I’m lifting with proper form?

Practicing correct weightlifting form is key to preventing injury and getting the results you want. The best way to guarantee good form? “Utilize a fitness professional [like a trainer] until you feel safe and confident in the staple lifts of your program,” Kelley says.

If you’re working out on Beachbody On Demand, pay attention to the trainers as they explain the correct starting stance, movement pattern, and key form points for each exercise, as well as which muscles to engage during the moves. Having a friend observe you can also help you keep your form on point.

Weightlifting program - proper form

11. How long should I follow a weightlifting program?

In general, Kelley recommends maintaining a specific weightlifting program for three to five weeks before you mix it up. “This gives the muscles time to adapt and grow in the current program; then, just as they acclimate, you tweak the program slightly to keep progressing,” he explains.

Perhaps more important than the timeline, however, is paying attention to the way your routine makes you feel. “If you haven’t increased the weight you’re lifting after a few weeks, or if you’ve noticed a significant drop in your motivation, it’s time to switch things up,” Thieme says.

Of course, if you follow a professionally designed program, like you’ll find on Beachbody On Demand, knowing when to switch things up isn’t even a concern. “Such variation is built into the program, eliminating the stress and guesswork for you,” says Thieme.

12. What should I eat before and after a workout to maximize my performance?

Before a weightlifting workout, focus on carbs, which will help top off your energy stores. The key is to choose something that you can digest before you start exercising. A piece of fruit is a good choice if you have 30 minutes or less until you work out. If your workout is still an hour out, our go-to recommendation is a piece of whole grain toast with nut butter.

Post-workout, the most important factor is protein, which can help facilitate muscle growth and speed recovery, Thieme says. Aim for 20 grams of fast-absorbing protein (like whey) within 30 minutes of exercising. A protein supplement such as Beachbody Performance Recover makes that easy.

13. How do I know if my weightlifting program is working?

To get the most accurate and objective measure of progress, Kelley suggests recording your workouts and tracking the numbers. “If you can increase the weight you lift by five percent—or the number of reps you perform at the same weight by two reps—each week (or two), you know you are increasing strength in that specific move and group of muscles,” he explains.

Other signs your weightlifting program is working include increased appetite and physical changes like fat loss, increases in muscle size, and greater muscle definition. You can track this data by recording it in a journal or taking before and after pictures. If you don’t see signs of progress within four to six weeks of starting your weightlifting program, you may need to reassess your workout routine to see what’s going wrong.


from The Beachbody Blog https://ift.tt/2pUuKqb
via IFTTT
Vegan Tofu Omelet Recipe

How is it possible to turn a single block of tofu into the light, fluffy texture of a delicious vegan breakfast omelet? We’re glad you asked!

With all of the egg substitutes out there, we know it’s hard to know what you’re actually getting.

Many are filled with unpronounceable ingredients, and even fewer are vegan, not to mention organic. 21 Day Fix creator Autumn Calabrese and her brother, chef Bobby Calabrese, have devised a method of creating the perfect base for a tofu omelet that’s egg-free and dairy-free.

For this quick and easy recipe, you’ll want to begin with silken tofu. For our tofu newbies out there, read your tofu label carefully before tossing it into the cart.

Tofu varies in firmness and type. Silken tofu is categorically different from regular or Chinese-style tofu. It not only contains more water than other varieties, but its silky texture is a sharp contrast to the more spongy nature of regular Chinese-style tofu.

Silken tofu on a plate

So if your container reads “soft,” “medium,” “firm,” or “extra firm,” it’s not silken tofu and won’t yield a desirable result.

The spice blend for this vegan breakfast is the key to its flavor. Bobby first adds turmeric, not only for its good-for-you health benefits but for its vibrancy: The color gives this vegan breakfast its perfect “omelet-like” hue.

Nutritional yeast, garlic powder, onion powder, and a touch of salt complete the eggy flavor profile.

Just like an egg-based omelet, our tofu omelet cooks up in about five minutes. If you prefer your omelet packed with delicious veggies, you’ll want to saute those separate from your batter as they won’t have enough time to cook through.

To get the recipe and find out the Portion Fix Containers and nutritional information, watch the FIXATE episode on Beachbody On Demand!


from The Beachbody Blog https://ift.tt/2GiAYdl
via IFTTT

Thai Iced Tea Shakeology

In Southeast Asia, where temperatures climb to feverish highs, locals reach for plenty of icy beverages.

Thai Iced Tea is one of their favorites, and you can buy one on almost every street corner. If you’re not familiar, it’s a refreshing, sweetened drink made with black tea, spices and served over condensed milk.

Unfortunately, Thai Iced Tea harder to find back at home, but with this recipe, you can whip up your own batch in no time.

Not only is this recipe a healthier spin on the original, but it’s also a waistline-friendly alternative to blended coffee shop drinks.

To make the iced tea base, you’ll need black tea bags and loose spices like cloves, star anise, and cardamom. For an easy shortcut, you could tea bags that already contain Thai spices. If you’re avoiding caffeine, go with decaffeinated black tea bags.

We recommend making a large batch of the brewed black tea and keeping it in your fridge. That way, when the craving hits, you won’t need to wait for the steeped tea to cool down.

And trust us, you’ll want to make this drink again and again!

Since condensed milk is loaded with sugar, this recipe calls for Vanilla Shakeology instead. Not only does Vanilla Shakeology provide the right amount of sweetness and creaminess, but it also provides a source of protein.

For extra indulgence, add a splash of canned coconut milk. Canned coconut milk can usually be found in the ethnic foods aisle; it’s creamier than boxed coconut milks found in the refrigerated section of the store.

Pro tips:
• Store remaining tea in the refrigerator in an airtight container.
• There are tea bags that have Thai tea spices if you don’t want to buy entire containers of anise, cardamom, and cloves.

Don’t have Shakeology yet? Get all of the Shakeology flavors here!

This refreshing Thai Iced Tea Shakeology smoothie features Thai spices like cloves, star anise, and cardamom blended with creamy Vanilla Shakeology.

Thai Iced Tea Shakeology

This refreshing Thai Iced Tea Shakeology smoothie features Thai spices like cloves, star anise, and cardamom blended with creamy Vanilla Shakeology.

  • 4 cups water
  • 4 black tea bags
  • 2 anise stars
  • 1 green cardamom pod, smashed ((or ½ tsp. ground cardamom))
  • 2 whole cloves
  • 1 cup ice
  • 1 scoop Vanilla Shakeology
  • 2 Tbsp. canned coconut milk ((optional))
  1. Bring water to a boil in medium saucepan over high heat. Remove from heat.

  2. Add tea bags, anise, cardamom, and cloves. Allow to steep, covered, for 30 minutes. 

  3. Cool tea in refrigerator for 2 hours. Strain to remove anise, cardamom, and cloves.

  4. Place 1 cup brewed tea, ice, Shakeology, and coconut milk (if desired) in blender; cover. Blend until smooth.

The Nutrition Facts box below provides estimated nutritional information for this recipe.

P90X/P90X2 Portions
½ Fat
1½ Protein

P90X3 Portions
1½ Protein
1 Fat

Portion Fix Containers
1 Red
½ Blue

Not familiar with Portion Fix? Find out how Portion Fix can make losing weight simple.

If you have questions about the portions, please click here to post a question in our forums so our experts can help. Please include a link to the recipe.

This refreshing Thai Iced Tea Shakeology smoothie features Thai spices like cloves, star anise, and cardamom blended with creamy Vanilla Shakeology.

Photographs by Anguel Dimov


from The Beachbody Blog https://ift.tt/2E5regx
via IFTTT

How to Not Lose Yourself in Social Media

Are you losing yourself in social media?

This topic is very dear to me because as a mother, I’m watching how my son lives with social media and all his gadgets, which is different from how I was raised.

But first, I have to say that I absolutely see the value in social media. I discover and listen to wonderful human beings that perhaps I wouldn’t have had a chance to get to know if it wasn’t for social media.

It’s lovely to keep track and to see people’s results in my line of work, their feedback, their day-in, day-out challenges or successes. It helps me see what is needed from me, what I can provide, what is being asked for.

Woman taking selfie at the gym

The Positive Side of Social Media

Social media also helps us keep in touch with events in the world — little, wonderful events, not just the big ones that we are being fed that are often negative, but the good stuff.

There’s a lot of good stuff that is happening and often we are being left out of these good moments when human beings are shining and coming up with great solutions, great actions, or great thoughts.

It’s also a place where you can find a community that perhaps you would not have access to in your neighborhood, where you live, the kind of people around you who perhaps you don’t feel a great affinity with, but now you can reach out and find these people all around the world.

Woman taking photo of a sunset

The Negative Side of Social Media

And in that spirit, I’d like to get into a specific area of social media, where we forget that real life happens when the camera is off.

I see people losing their ability to be by themselves alone and feel, emote, participate, not participate, or witness life by themselves. Instead, it’s “ooh, what a great moment. Let me capture and let me share it.”

It’s as if people feel like they have to be their own reality show — and that can be quite unhealthy.

You don’t have to share every moment of your life. It doesn’t necessarily make you closer to others, and it can definitely harm you if you lose your sense of authenticity – that which is yours to live, to ponder on, to witness, to watch without thinking of a performance-based life.

Living an Authentic Life

In my neighborhood, I see tourists who are hardly able to spend a moment simply looking. They’re looking through a lens and they’re busy sharing it right away.

They came from miles and miles away to see this view, but they watch it for less than a minute. Within 30 seconds, their phone is out and they’re filming, editing, typing, and walking away from this beautiful view, without pausing and feeling all this with all their senses and more.

They had to record that moment and it was more important to have it witnessed by others, to have it commented on, rather than being there, just being in that moment.

I see it also in our business; people who think that every moment of their lives has to be shared with everyone.

It’s one thing to share getting through a workout, or drinking a shake, or eating a delicious meal and sharing a challenge that is connected to your business.

But you don’t have to share every event of your daughter’s, son’s, uncle’s life. You don’t have to share everything when you get up in the morning.

I think it’s important to pause here and see if you’ve lost yourself in social media; if you’ve lost the ability to truly be intimate with yourself, intimate with the moments in your life, intimate with your partner and your kids.

You Don’t Need to Share Everything

Sharing everything is not making you more authentic. It’s actually avoiding authenticity of the day-to-day, moment-by-moment life that is yours.

Some of those moments are yours alone to experience; that’s enough. There’s no need to share everything you eat, every thought you have. I think it’s a very subtle thing that’s happening to us all; we underestimate the destructiveness of this behavior.

There are more and more gadgets and tools that, yes, are helpful, but can take away your spirit; you’re never just living your life – you’re the director and producer and actor of your life.

Some people may mistake this for being authentic — “Look, I show everything I go through.”

It’s something that I am seeing more and more of – your ego can fool you into thinking that sharing moments on social media is being real, that it’s “sharing” yourself.

But I think there’s a very tricky line there, and I’m hoping that this post will make you take a beat.

Can you try for six hours to not have your phone on? Or four hours or three hours? Try to live your life without making a “commercial” of it.

Learn to Just “Be”

Not sharing everything that you feel, think or going through — that’s a luxury nowadays. Give yourself that luxury. Give it enough time to see the benefits.

Ask yourself: What are you running from? What is it that you’re NOT filming? That you’re not “proud” of? Not putting on Instagram? Those may be the moments that need your time, attention, and love — for your own sense of well-being.

I hope this brought some perspective on social media taking over our lives. Perhaps we can start establishing healthier boundaries!


from The Beachbody Blog https://ift.tt/2pNEi57
via IFTTT

Turkey Taco Lettuce Wraps

You probably didn’t expect that tacos could be part of your healthy meal plan.

But these Turkey Taco Lettuce Wraps make family taco night a whole lot healthier and delicious to boot.

With a perfect blend of spices, 93 percent lean ground turkey, and our FIXATE Marinara as a base, these lettuce wraps are bursting with that authentic flavor your whole family’s sure to love.

Odds are, when you think of tacos, “healthy” isn’t necessarily the word that comes to mind.

The types of ingredients that usually accompany tacos can throw your healthy meal plan off the rails: Fried taco shells, globs of sour cream, and mounds of cheese come to mind.

But tacos don’t have to be unhealthy. Fresh veggies, ground lean protein, and a flavorful spice blend are all you need to make killer, healthier tacos.

In this episode of FIXATE, 21 Day Fix creator Autumn Calabrese and her brother, chef Bobby Calabrese have created a taco recipe that omits the diet busters and shines a spotlight on most important aspect this meal, the filling.

Rather than reach for ground beef, Autumn and Bobby call for 93 percent lean ground turkey. While there is nothing wrong with beef (we use lean ground beef in a ton of recipes on the blog) it does have a higher fat content.

To keep these tacos as healthy as possible and still maintain a rich authentic flavor ground turkey is the ideal choice.

To build a deep, rich flavor profile, Autumn and Bobby begin by sauteeing freshly diced onions and bell peppers and then layer on the spices. Cumin, chili powder, paprika, and oregano are just a few of the many spices Autumn and Bobby use to create that classic taco flavor.

To get the recipe and find out the Portion Fix Containers and nutritional information, watch the FIXATE episode on Beachbody On Demand!


from The Beachbody Blog https://ift.tt/2pO30Di
via IFTTT

Cashew ‘N Oat Hotcakes

If waffles and pancakes are your breakfast weakness, you’ll be glad to hear that 21 Day Fix creator Autumn Calabrese and her brother, chef Bobby Calabrese have created this recipe for Cashew ‘N Oat Hotcakes that’s sure to have you whipping up batches of batter on the regular.

This fun twist on the classic hotcake is strikingly similar to the pancake recipes you know and love, with a few key exceptions.

To achieve the perfect rich and creamy texture, cashews are blended into the dry ingredients along with rolled oats, cinnamon, baking powder, and a touch of sea salt.

You’ll notice that cashews are often used in healthy recipes when your dish needs to have a creamy, batter-like consistency.

Cashews have a lower fat content than most nuts and are mostly heart-healthy monounsaturated fatty acids so they are a good-for-you ingredient to have handy in the pantry.

Pancake batter in a bowl

In lieu of milk, Autumn and Bobby use almond milk and just like your quick and easy pancake mix, this recipe calls for a single egg.

After a quick blitz in the food processor, the consistency of your batter should be spreadable.

Like your average pancake batter, it should spread out in all directions when ladled out onto your pan or griddle. These oatcakes will also bubble at the top when they are ready to flip.

Gently heat an array of your favorite dark-colored berries in a bit of water and burst them with a wooden spoon or a spatula.

This mixed-berry compote will add a touch of sweetness and a bit of tart to this healthy breakfast.

To get the recipe and find out the Portion Fix Containers and nutritional information, watch the FIXATE episode on Beachbody On Demand!


from The Beachbody Blog https://ift.tt/2pKLE9D
via IFTTT

New 21 Day Beginners Jump Start Starts April 1st - First 100 Pre-Orders Gets 25% Off


from Millionaire Hoy https://www.youtube.com/watch?v=ja4c8Nq5pOA
via IFTTT

24hr Beginners Stream Party - 25% Off New Beginners Program [LINK BELOW]


from Millionaire Hoy https://www.youtube.com/watch?v=Fn7fiGj-pOE
via IFTTT

How to Do the Triceps Kickback (Video)

When it comes to building bigger arms, the biceps get most of the attention. But the triceps comprise two-thirds of the mass of the upper arm. So whether you want stronger arms or to look better in sleeveless shirts, you need to pay more attention to your tris. And the triceps kickbacks are an excellent way to do that, because they hit every part of the muscle.

“The triceps muscle has three heads — the long, lateral, and medial,” explains Trevor Thieme, C.S.C.S., Beachbody’s senior manager of fitness and nutrition content. “Most triceps exercises tend to favor one or two of the heads, but the kickback hammers all three, making it highly effective for developing that muscle and sculpting the classic horseshoe shape.”


How to Do the Triceps Kickback with Perfect Form


Appears in: P90X >> Shoulders and Arms

  • Stand holding a pair of dumbbells in front of your shoulders (palms facing inward) with your elbows bent and at your sides.
  • Step one foot back, and bend your knees slightly. Hinge forward at your hips so that your chest is almost parallel to the floor. This is the starting position.
  • Keeping your back flat, core engaged, and upper arms firmly at your sides, straighten your elbows, pushing the weights back as you fully extend your forearms behind you.
  • Bring the dumbbells back to the starting position, and repeat. Alternate your forward leg with each set.


How to Make the Triceps Kickback Easier

Besides using a lighter weight, you can do a supported triceps kickback one arm at a time. Place your knee and corresponding hand on a bench, and perform the move with your other arm, maintaining the same form described above.


How to Make the Triceps Kickback Harder

Increasing the weight as much as possible without compromising form is the most obvious way to intensify the triceps kickback. An additional option would be to hold the top of the arm extension for a count or two before returning to the starting position.


Bonus Tips for Doing the Triceps Kickback

Be sure to keep your core engaged and your back flat as you perform the exercise. You shouldn’t feel any strain in your lower back, and there shouldn’t be any extraneous movement. The only parts of your body that should move are your forearms.


Benefits of the Triceps Kickback

Whether you choose to do the triceps dumbbell kickback or cable tricep kickbacks, this exercise allows you to work each arm independently, promoting greater muscular balance by preventing either arm from doing a larger share of the work.


What Muscles Does the Triceps Kickback Work?

The triceps kickback primarily targets the triceps brachii. Located on the back of each of your upper arms, the muscle’s three heads run from the shoulder blade and upper humerus to your forearm. In concert, they work to extend your elbow and help extend your shoulder.


from The Beachbody Blog https://ift.tt/2DVfygw
via IFTTT

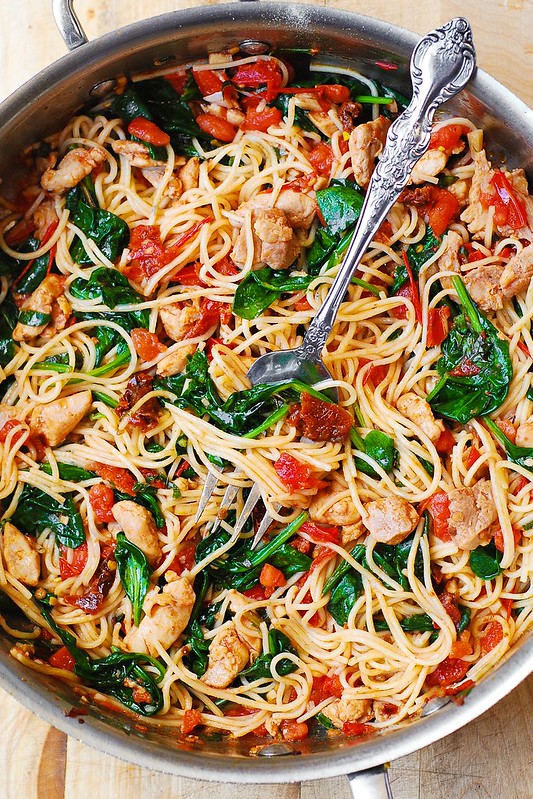
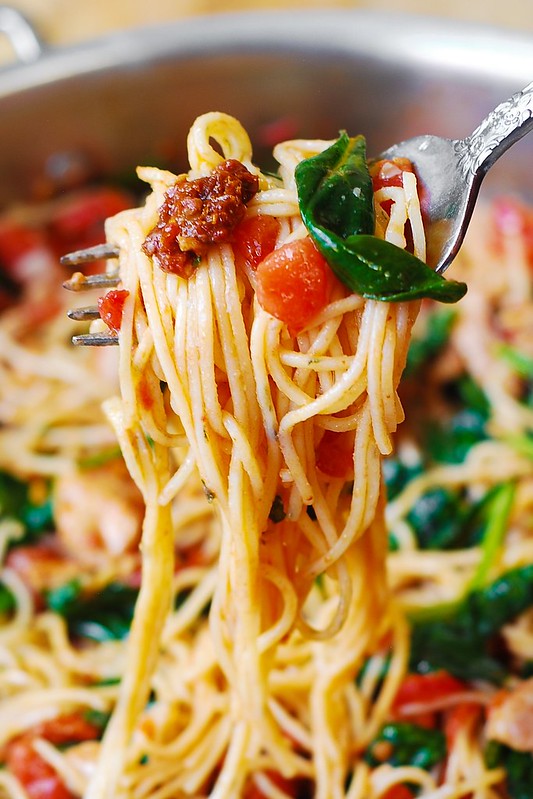
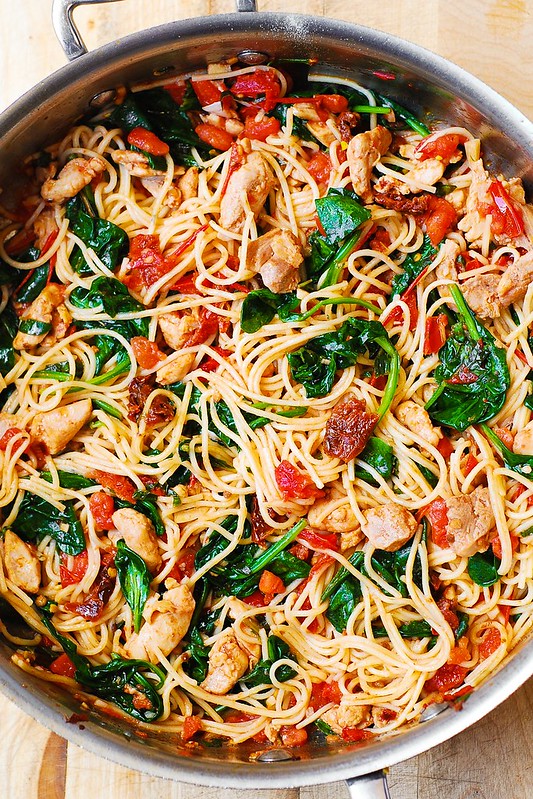
Tomato Spinach Chicken Spaghetti

Tomato Spinach Chicken Spaghetti – this recipe features fresh tomatoes, sun-dried tomatoes, fresh basil, spinach, garlic, and olive oil.   It’s a great Summer pasta recipe!  Easy and delicious way to cook spaghetti using fresh vegetables and chicken!

best chicken spaghetti, best chicken pasta, easy chicken pasta, quick chicken dinners

This Chicken Spaghetti has a good variety of fresh ingredients:  spinach, tomatoes, basil, garlic.  Add chicken, sun-dried tomatoes and good quality olive oil to the mix – and you get a healthy, light, Mediterranean style dinner, packed with vegetables, protein and good oils. 

chicken pasta and veggies, vegetables, chicken pasta with tomatoes, spinach, and basil

When we think about chicken spaghetti, we usually picture a pasta dish with lots of cream sauce and white cheese.  Well, not in this recipe.  This is a healthy version of chicken spaghetti but really it tastes like comfort food.  It’s one of the most popular recipes on my site – it’s been pinned 1.6 million times and visited by millions of people.  I hope you try this Tomato and Spinach Chicken Spaghetti Pasta and see for yourself why it is so popular!

chicken pasta, chicken spaghetti, chicken and veggie spaghetti, pasta recipe

Did I forget to mention that this chicken spaghetti recipe is easy and takes only 30 minutes from start to finish? Not bad for a good-looking dish that tastes like comfort food and looks beautiful thanks to all the colors!

What makes this chicken spaghetti very special is that in addition to fresh tomatoes, basil, garlic, and spinach, I also used sun-dried tomatoes and red pepper flakes to add lots of flavor!  Once the dish is completely cooked, I highly recommend that you add 3 tablespoons of high quality olive oil to stir into the final dish, off heat. It’s so tasty and so good for you!

easy chicken dinners, chicken and vegetables, quick chicken dinners, best spaghetti sauce, best pasta sauce

By the way this is the ideal recipe for trying out all sorts of artisanal pasta that we often see in the stores: that green spinach pasta, or orangy-looking sun-dried tomato fettuccine, artichoke pasta, you get the idea.  All those colorful unusual pastas we see in the stores – this recipe is perfect for trying those out!

I hope you’ll make this easy tomato spinach chicken spaghetti.  It makes a truly Mediterranean dinner!

If you enjoyed this chicken spaghetti recipe, make sure to check out these, too:

Parmesan Zucchini Tomato Chicken Spaghetti

Spinach and Artichoke Chicken Pasta with Bacon and Tomatoes in Asiago Cream Sauce

Pesto Chicken, Tortellini, Asparagus, and Tomatoes

Tomato Spinach Chicken Spaghetti

This chicken spaghetti recipe has lots of fresh ingredients: tomatoes and spinach, as well as comfort food ingredients, such as bacon and chicken.  You’ll love the flavors of this pasta!  

  • 1/4 cup sun-dried tomatoes (chopped, drained of oil)
  • 2 tablespoons olive oil (drained from sun-dried tomatoes)
  • 1/2 lb chicken (boneless and skinless (preferably, boneless skinless thighs), chopped)
  • 1/4 teaspoon salt
  • 1/4 teaspoon red pepper flakes
  • 1/4 teaspoon salt
  • 4 roma tomatoes (chopped)
  • 1/4 cup fresh basil leaves (chopped)
  • 8 oz spinach (fresh)
  • 3 garlic cloves (chopped)
  • 8 oz spaghetti pasta
  • 3 tablespoons olive oil ((use high quality olive oil or oil from the sun-dried tomatoes jar))
  1. Add chopped sun-dried tomatoes and 2 tablespoons of olive oil, drained from sun-dried tomatoes, to a large skillet, on medium-low heat. Add chopped chicken (I used boneless skinless chicken thighs and prefer to use them, but you can use chopped chicken breast, as well), red pepper flakes, and salt over all of the ingredients in the skillet, and cook on medium heat until chicken is cooked through and no longer pink, about 5 minutes.
  2. Add chopped tomatoes, chopped fresh basil leaves, fresh spinach, and chopped garlic to the skillet with chicken, cook on medium heat about 3- 5 minutes until spinach wilts just a little, and tomatoes release some of their juices. Remove from heat. Taste, and add more salt to taste, if needed. Cover with lid and keep off heat.
  3. Cook pasta according to package instructions, until al dente. Drain, and add cooked and drained pasta to the skillet with the chicken and vegetables. Reheat on low heat, mix everything well, add more seasonings (salt and pepper), if desired. Remove from heat.
  4. At this point, when the pasta and vegetables are off heat, you can add more high quality olive oil, which is really tasty. Or you can add more olive oil from the jar from the sun-dried tomatoes.

Follow Julia on Pinterest and Facebook to get more recipes and dinner ideas for your weekly meal planning!

The post Tomato Spinach Chicken Spaghetti appeared first on Julia's Album.


from Julia's Album https://ift.tt/2GeuuZ4
via IFTTT

Raspberry-Filled Cookie Bites

When looking for recipes that fit perfectly into the FIXATE healthy meal plan, 21 Day Fix creator Autumn Calabrese her brother, chef Bobby Calabrese seek out recipes that feature healthy ingredients from the outset.

These Raspberry-Filled Cookie Bites are a prime example. Based on the classic French Macaron recipe, these delectable little cookies feature all-natural ingredients and taste like they fell from an idyllic French patisserie.

The traditional recipe begins with egg whites and almond flour which, for a cookie, is a good healthy start!

If you’ve had a look through the many recipes on the Beachbody Blog, you see where we’re going. How can a decadent French cookie be healthy?

Well, the short answer is these cookies are healthier than your average macaron thanks to their tart, simple raspberry filling and the use of honey instead of processed white sugar.

This is where the FIXATE recipe and the traditional version diverge: Autumn and Bobby have chosen to go with an Italian meringue which, unlike a traditional French meringue, is cooked so it allows for the use sweet all-natural honey.

Yes, this alters the recipes usual execution a bit. So if you’re used to the traditional macaron recipe, making these FIX-approved Raspberry-Filled Cookie Bites may take a little getting used to.

But don’t worry: Bobby has all the techniques covered in this episode of FIXATE. If you’ve never made macarons before, this detailed walkthrough is essential.

As Autumn so aptly points out, “The recipe instructions for this look more intimidating than they really are.”

That’s why having this episode of FIXATE on demand is clutch — watching Autumn and Bobby move through the stages of the recipe is an ideal way to learn the proper technique and execution.

This recipe makes 18 impressive little cookies that no one will ever know are healthier than the average cookie!

To get the recipe and find out the Portion Fix Containers and nutritional information, watch the FIXATE episode on Beachbody On Demand!


from The Beachbody Blog https://ift.tt/2GgDdd2
via IFTTT

Cheesy Steak Skillet

Steak for dinner? Yes, please!

This Cheesy Steak Skillet isn’t a cheesesteak, but it has all the yummy flavor of one, draped over a bed of brown rice with vegetables and topped with shredded Colby Jack cheese.

As per usual, this episode of FIXATE is full of handy tips and tricks that help take your weeknight dinners over the top. 21 Day Fix creator Autumn Calabrese and her brother, chef Bobby Calabrese cook up a skillet of skirt steak that’s know-your-socks-off good!

Bobby offers a mini master class in searing, complete with pro tips on everything from ideal cooking surface to a slicing technique that will ensure your skirt steak is never tough and chewy.

Cast iron pan on black background

Bobby’s approach to this flavor-rich recipe is executed in stages, beginning with the use of a cast-iron skillet. “To put a really good sear on your skirt steak, refrain from salting your beef until after you’ve placed it in the pan. Give it a minute to get nice and hot, then apply a little salt,” he recommends.

This prevents any moisture from drawing out of the meat, which will prevent a good sear.

Not only is the skillet ideal for achieving a perfect sear on your meat, it’s a great way to cook your veggies and rice. This recipe is much like a paella, but instead of saffron and seafood, this hearty meal features a Moroccan-inspired spice mix and beef.

When compared to a very popular restaurant version, this FIX-approved Cheesy Steak Skillet our skillet has 48 percent fewer calories, 50 percent less fat, and 70 percent less sodium.

That’s not bad for an easy weeknight dinner that’s also perfect for weekly meal prep!

Pro tip: For those of you doing 80 Day Obsession, take note of this recipe, especially folks in the higher calorie brackets.

To get the recipe and find out the Portion Fix Containers and nutritional information, watch the FIXATE episode on Beachbody On Demand!


from The Beachbody Blog https://ift.tt/2I7tuqh
via IFTTT

24hr Beginners Stream Party - 25% Off New Beginners Program [LINK BELOW]


from Millionaire Hoy https://www.youtube.com/watch?v=q9d8fgIGpyw
via IFTTT

How to Do an Incline Push-Up (Video)

The push-up may be as close to a perfect exercise as it gets. You don’t need equipment, you can do them anywhere, and when done correctly, they work muscles throughout your body (not just in your chest and arms).

If you have trouble banging out at least 10 consecutive reps of the classic push-up with good form (hands in line with shoulders, body straight, elbows tucked, chest to within a few inches of the floor), then the typical advice is to drop to your knees. There’s only one problem with that.

“The knee push-up doesn’t work the same muscles in the same way as the classic push-up,” says Trevor Thieme, C.S.C.S., Beachbody’s senior manager of fitness and nutrition content. “So it doesn’t help you build the strength you need to eventually progress to the classic push-up.”

A better option: The incline push-up. Like the knee push-up, it’s an easier variation of the classic exercise. But because it shares the same body position and movement pattern with the classic push up, it works the same muscles in a similar way.

It’s also more adaptable to your current fitness level. “The greater the angle of your body to the ground, the easier the exercise becomes,” says Thieme.” As you become stronger, you can move your hands progressively closer to the floor.”


How to Do the Incline Push-up with Perfect Form


Appears in: The 20s >> Megan’s Workouts >> Pyrashape

  • Place your hands slightly wider than shoulder-width apart on a bench or other stable, elevated surface, and assume a high plank position with your feet together and body straight from head to heels.
  • Keeping your back flat and core engaged, lower your chest to within a few inches of the bench.
  • Pause, and then push yourself back up to starting position.


How to Make the Incline Push-up Easier (or Harder)

There are several ways to modify or progress the incline push-up.

Change the angle

As noted above, you can perform incline push-ups at nearly any angle: the steeper the incline, the easier the move becomes. People new to strength training can even perform the incline push-up with their hands on the vertical surface of a wall.

Change the tempo

The slower you perform any exercise — including the incline push-up — the greater your muscles’ time under tension will be, and the more challenging the exercise will become. Try taking three to four seconds to lower your body, and see if you don’t agree.

Add Some Instability

To increase the challenge to your balance and core, lift one foot off of the ground as you perform the move, alternating legs every rep. Another option: Place your hands on a stability ball instead of a stable surface.

Be Explosive

Want a serious challenge? Push yourself up as fast and hard as possible, perhaps even with enough force for your hands to leave the bench for a split-second. In so doing, you’ll work your type II muscle fibers (which have the most growth potential) even harder.


Benefits of the Incline Push-up

As mentioned previously, incline push-ups work the same muscles as classic push-ups, but are easier to perform, making them more accessible to beginners. Also like classic push-ups, they hammer a muscle group that typically gets off easy with other chest exercises like the bench press: your core. Indeed, you can even think of the incline push-up as a plank variation, as both exercises (plank and push-up) share the same starting position.


What Muscles Does the Incline Push-up Work?

Pecs

Chief among the muscles worked by the incline push-up are the pecs. The larger of the two, the pectoralis major, has three primary functions: To raise your upper arms, to rotate them inward, and to bring them toward the midline of your body (like when you clap or hug). Located underneath the pec major is the pectoralis minor, which helps draw the shoulder blade forward and downward.

Deltoids

Your shoulder joints are each controlled primarily by the deltoid and the rotator cuff. The rotator cuff is a group of muscles and tendons that helps stabilize the shoulder joint. The deltoid sits on top of the rotator cuff, giving your shoulders their size, definition, strength, and power.

Triceps

The triceps brachii are the muscles found on the backs of your upper arms, and which connect your shoulder blade (scapula) to your upper arm (humerus) and forearm. Together they straighten your elbow.

Core

Distinguishing the push-up from other chest-centric moves like the bench press and fly is its engagement of the core muscles, principally the rectus abdominis (i.e., “abs”). This sheet of muscle extending from the bottom of your rib cage to the top of your pelvis pulls your chest toward your hips, and vice versa. Also involved in the incline push-up are the internal and external obliques flanking your torso, the transverse abdominis (embedded beneath the rectus), and the spinal erectors of the lower back.


from The Beachbody Blog https://ift.tt/2G7YdTv
via IFTTT

Gluten-Free Pepperoni Pizza

Thanks to 21 Day Fix creator Autumn Calabrese and her brother, chef Bobby Calabrese, eating gluten-free doesn’t mean pizza is off the table.

Having grown up with pizza very much a part of their lives (their father owned an Italian pizza restaurant), Autumn and Bobby know a thing or two about how to make a killer pizza.

With their wealth of pizza knowledge and Bobby’s training as a chef, this culinary team has put together a flavorful alternative to traditional pizza.

Whether you’re choosing a gluten-free lifestyle or need to avoid gluten for medical reasons, this recipe is a must-have, especially if you have kids. No parent wants to deprive their kids of pizza, but we all hesitate a bit when we reach for that plastic package of processed pepperoni at the grocery store.

(I don’t think anyone really wants to know for sure what went into making those little circles of “meat”!)

They healthy answer to this pizza conundrum is to make your own pepperoni. This homemade pepperoni is nitrate-free, very low in fat, and contains no preservatives.

Using healthy, lean ground chicken, Autumn and Bobby show us how quickly and easily it is to put together a beautifully spiced ground pepperoni. Sweet paprika, black pepper, ground fennel seed, and a touch of cayenne pepper create that authentic pepperoni flavor.

Using their gluten-free bread in lieu of pizza dough and FIX Marinara sauce, Autumn and Bobby put together a completely FIX-approved pizza that won’t bog you down.

If you compare this FIX-ed pizza to half of a personal take-out pizza, this FIXATE pizza has 43 percent fewer calories, 46 percent less fat, and 50 percent less sodium.

Those are pretty impressive numbers — how’s that for good goals?!

To get the recipe and find out the Portion Fix Containers and nutritional information, watch the FIXATE episode on Beachbody On Demand!


from The Beachbody Blog http://ift.tt/2pyPQtb
via IFTTT

How to Do a Skull Crusher (Video)

Doing “skull crushers” might not sound particularly good for you, but if you’re looking to add size and strength to your arms, this triceps-intensive exercise is a great option.

“The skull crusher is an effective way to work all three heads of your triceps,” says Trevor Thieme, C.S.C.S., Beachbody’s senior manager of fitness and nutrition content. “Especially if you use dumbbells, which work each arm independently, increasing the instability of the exercise and, thus, muscle recruitment in your arms, shoulders, and core.”

Plus, change up your grip and/or the angle of your bench, and you can emphasize different heads with the skull crusher exercise to build balanced, strong triceps that turn heads.


How to Do the Dumbbell Skull Crusher with Perfect Form


Appears in: Body Beast >> Chest/Tris

  • Lie down on a bench or the floor holding a pair of dumbbells directly above your chest, palms facing each other. Your feet should be flat on the floor.
  • Without moving your upper arms, bend your elbows and slowly lower the weights toward the sides of your head. Avoid flaring your elbows.
  • Reverse the move to return to the starting position.


How to Make the Skull Crusher Easier

Besides using lighter weights, you can do EZ bar or barbell skull crushers. The bar transfers the work of stabilizing the weight across both arms, allowing you to lift slightly more.


How to Make the Skull Crusher Harder

Increasing the amount of weight is the simplest way to intensify skull crushers, but slowing down the pace of movement will also make the move more challenging.


Bonus Tips for Doing the Skull Crusher

Your upper arms should remain vertical to the floor for the duration of each set. The only parts of your body that should move are your forearms. Also, speed is not your friend with this exercise. It’s not a power-building move. Lower and lift the weights slowly and under control. Not only will that increase your triceps’ time under tension — a key muscle growth stimulus — but it will also reduce your risk of injury.


Variations on the Skull Crusher

Effective variations on the move include changing your grip (e.g., from neutral to overhand), and changing the angle of the bench (e.g., from flat to incline or decline). Switching up how you perform the exercise can change which head of the triceps is emphasized, enhancing overall muscle development and strength gains.


Benefits of the Skull Crusher

In addition to being a highly effective triceps builder, the skull crusher can be performed with a variety of equipment. Whether you do a dumbbell skull crusher, barbell skull crusher, or use an EZ bar, go as heavy as you safely can, and you’ll see results.


What Muscles Does the Skull Crusher Work?

Two thirds of your upper-arm musculature is occupied by your triceps, and the skull crusher is one of the most effective ways to build them. All three heads of the triceps (lateral, medial, and long) fuse together and attach to the top of your forearm, with the lateral and medial heads originating at the humerus (upper arm bone) near the shoulder, and the long head originating at the scapula (shoulder blade).

The lateral and long heads are the most visible ones, forming the classic “horseshoe” shape associated with well-developed triceps (long on the inside, lateral on the outside). The medial head lies under the other two, and while it doesn’t contribute much to the shape of the muscle, it adds substantially to its overall mass.


from The Beachbody Blog http://ift.tt/2pxxvg1
via IFTTT

How to Do Hammer Curls

To get a set of strong, shapely, head-turning arms that you’ll be proud – nay, want – to show off, you’re going to have to work for it. And you’ll likely get reach your goals faster if you pick up a set of weights. Classic biceps curls are a great way to exercise your arms, but to switch things up and accelerate your results, don’t limit yourself to them. Take dumbbell hammer curls as an example of a potent variation on the classic move.

“Doing different variations of any exercise, including the biceps curl, will help optimize your training adaptations,” says Trevor Thieme, C.S.C.S., Beachbody’s senior manager of fitness and nutrition content. In short, by targeting the same muscle (or muscles) in different ways, you’ll get stronger and more defined in less time.

Here’s a break down of how to do hammer curls properly, as well as tips for adding the move to your workout routine, and multiple reasons why everyone—including you—should be doing it.

Appears in: Clean Week >> Strength

How to Do Hammer Curls With Perfect Form

  • Stand holding a pair of dumbbells at arms length by your sides with your palms facing inward.
  • Keeping your elbows tucked, your upper arms locked in place (only your hands and forearms should move), and your palms facing each other, curl the dumbbells as close to your shoulders as you can.
  • Pause, and then slowly lower the weights back to the starting position.

How to Make Hammer Curls Easier or Harder

Whether you’re new to this move or not, there are a few ways you can alter the hammer curl to make it easier or harder, depending on what your fitness level and goals are.

Make it easier:

  • Use a lighter weight.
  • Perform an alternating hammer curl, lifting one dumbbell at a time.

Make it harder:

  • Slow your lifting tempo.
  • Use a heavier weight. To help you lift the heaviest weight, try a seated, one-arm braced hammer curl: Sit in a chair with your feet flat, your knees spread wide, and a dumbbell in your right hand. Bend forward and brace the back of your right elbow against the inside of your right knee, with your right palm facing inward. Keeping the rest of your body still, curl the weight toward your shoulder. Pause, and then reverse the movement to return to the starting position.

Hammer Curl Variations

Switch things up by incorporating hammer curl variations into your routine: seated hammer curls (curling both weights at once or one at a time, as described above), incline hammer curls (lie face-up on a bench set to a 45-degree incline, letting your arms hang to the side), and cross body hammer curls (alternately curling each dumbbell to the opposite shoulder).

“There are many ways to riff on the basic movement, and no one way is necessarily better than the others,” Thieme says. “The only rule is to regularly change how you perform the exercise to avoid hitting a strength plateau.”

What Muscles Do Hammer Curls Work?

Biceps

The dumbbell hammer curl uses a neutral grip position (palms facing inward), which is different from the underhand grip used for the classic biceps curl. By switching from an underhand grip to a neutral grip, you shift more the work from your biceps (also known as biceps brachii) to two other elbow flexors: the brachialis and brachioradialis. The brachialis runs beneath your biceps brachii, and the brachioradialis runs from the bottom of your upper arm to the bottom of your forearm.

The Benefits of Hammer Curls

“The biceps might be the most visible, but the brachialis is significantly more powerful,” says Trevor Thieme, C.S.C.S., Beachbody’s senior manager of fitness and nutrition content. As such, dumbbell hammer curls are a solid choice for building arm strength and shape, whether you’re looking to show them off or boost your functional ability. Because strong biceps don’t just look good, they also make everyday tasks—like lifting heavy grocery bags and carrying little tykes—a lot easier.


from The Beachbody Blog http://ift.tt/2GcJqKh
via IFTTT