Hot!

Other News

More news for your entertainment

Pumpkin Banana Bread with Apples

Pumpkin Banana Bread with Apples – perfect recipe for the Fall season and the holidays. This is a low-fat recipe with only 2 oz of butter (4 tablespoons) used to make a whole loaf ( 9×5 inch loaf pan), the rest of the butter is replaced with pumpkin puree, mashed bananas, and Greek yogurt.

pumpkin banana bread with apples made with Greek Yogurt

This is one of my favorite dessert and breakfast recipes to make in the Fall and in the Winter.  This PUMPKIN banana bread is stuffed with apple chunks, flavored with cinnamon and vanilla, and baked to perfection, with a gorgeous top crust!  This recipe rivals my other Fall favorite: Banana Apple Bread with Caramel Sauce and Pecans.

pumpkin banana bread with apples with Greek yogurt

Pumpkin Banana Bread – moist and low-fat recipe

  • This recipe combines so many of my favorite things: bananas, pumpkin, apples, cinnamon, vanilla, and Greek yogurt. Yes, since I mentioned Greek yogurt, that means that this bread is also low-fat, with only 4 tablespoons of butter (2 oz) used for a whole loaf!
  • If you bake lots of banana breads, you know that ripe bananas and Greek yogurt work great as butter replacement. We’re keeping only 2 oz of butter (4 tablespoons of butter) in the whole loaf (for texture). In place of butter, I am using mashed bananas, Greek yogurt, and pumpkin puree – all of these ingredients make this bread really moist, soft and tasty.

Recipe notes

  • Do not over mix banana bread batter.  The lumps will work themselves out during baking.
  • Use a 9×5 inch bread loaf pan.  You can also use a smaller, 8×4 inch loaf pan, and pour the remaining banana bread batter into 3 muffin cups. You can also, of course, use mini loaf pans.
  • Butter a loaf pan. Line the bottom of the pan with parchment paper, butter the parchment paper too. Lining the bottom of the pan with parchment paper ensures that the bottom of the bread will not get stuck.

pumpkin banana bread with apples with Greek Yogurt

What kind of apples to use in pumpkin banana bread?

  • You can add any kind of apples, as long as they are crisp (not soft or mushy).
  • Use sweet kind of apples (such as Gala), and you’ll get a sweeter loaf.
  • Use tart apples (such as Granny Smiths), and you’ll get a sweet loaf too, with a touch of pleasant tartness from baked apples.

For this pumpkin banana bread loaf, I actually used 2 completely different apples: one very tart Granny Smith apple and one very sweet Gala apple. Chopped up into chunks and folded into the cake batter, these sweet and tart apple chunks add an unforgettable contrast of flavor!  You don’t even need to peel the apples: after being baked in the bread for about an hour, they get very soft, including the peel, there is really no need to peel them. Plus, I think the peel holds the apple chunks together better: they don’t get so mushy.

Why make this recipe

Dear friends, please try this Fall pumpkin banana bread: you won’t be disappointed! The pumpkin flavor is so subtle and perfect in this bread, I am convinced this could become a favorite recipe even for those who don’t like pumpkin in their desserts: try this recipe and you’ll change your mind!  And, don’t even get me started on what a great breakfast this bread makes!

Other pumpkin banana bread recipes

If you enjoyed this pumpkin banana bread, you might like these recipes:

Pumpkin Banana Bread with Apples

Pumpkin Banana Bread with Apples – perfect Autumn treat. This is a low-fat bread with only 2 oz of butter used to make a whole loaf ( 9×5 inch loaf pan).  The rest of the butter is replaced with pumpkin puree, mashed bananas, and Greek yogurt.

  • 2 oz unsalted butter ((4 tablespoons butter), very soft, room temperature)
  • 1 cup white sugar
  • 2 eggs
  • 2 bananas (, very ripe, mashed)
  • 1/2 cup Greek yogurt
  • 1/2 cup pumpkin puree
  • 1 teaspoon vanilla extract
  • 2 cups all-purpose flour (, sifted)
  • 1 teaspoon baking soda
  • 1 teaspoon baking powder
  • 1 teaspoon cinnamon
  • 2 cups apples (, sliced into chunks)
  1. Preheat oven to 350 Fahrenheit. 

  2. In a medium bowl, using electric mixer, beat 4 tablespoons of butter and 1 cup of white sugar on high speed for 1 minute until well-combined. You will get coarse looking mixture (not creamy).

  3. Add 2 eggs to the butter-sugar mixture and continue beating for another minute until very creamy and very smooth.
  4. Add mashed bananas, Greek yogurt, pumpkin puree, and vanilla extract to the butter-sugar-eggs mixture, and continue beating, using electric mixer, until well combined – for about another minute.
  5. In a separate medium bowl, combine sifted flour (do not overpack the flour, when measuring it using measuring cups!), baking powder, baking soda and cinnamon. Mix until well combined.
  6. Add dry ingredients into wet ingredients, and mix, using large spoon, just until combined. DO NOT OVERMIX. If there are lumps – they will work themselves out during baking. Fold in apple chunks.
  7. Butter a 9×5 inch loaf pan. Line the bottom of the pan with parchment paper, butter the parchment paper too. Note: lining the bottom of the pan with parchment paper ensures that the bottom of the bread will not get stuck. 

  8. Pour the batter in the pan. Bake for 1 hour. Cool on a rack. Remove from pan and slice to serve.

  9. Note: I have also used a 8×4 inch loaf pan, plus 3 muffin cups with this recipe. You can also, of course, use mini loaf pans.

This recipe was originally published on October 9, 2013, and republished in November 2018 with updates.

The post Pumpkin Banana Bread with Apples appeared first on Julia's Album.


from Julia's Album https://ift.tt/2DQUc7o
via IFTTT

Thanksgiving Butternut Squash Salad with Roasted Brussels Sprouts, Pecans, and Cranberries

Thanksgiving Butternut Squash Salad with Roasted Brussels sprouts, Pecans, and Cranberries is one of the best holiday side dishes you’ll ever try! Perfect recipe for Thanksgiving, Christmas, New Year’s Eve or any time you like! This salad is full of vegetables and nuts. It’s healthy, gluten free, vegetarian, and packed with fiber!

Thanksgiving Salad with Roasted Brussels Sprouts, Cinnamon Butternut Squash, Pecans, and Cranberries

Thanksgiving and Christmas are two of my favorite holidays! I love the kinds of food we cook this time of year, bursting with Fall and holiday flavors. While we all love good old regular side dish recipes that we are so accustomed to this time of year (green beans, mashed potatoes, sweet potatoes, stuffing, etc.) I hope you will also give a try to this Thanksgiving Butternut Squash Salad.

This holiday side dish recipe will bring so many colors and lots of flavors to your holiday menu thanks to the roasted Brussels Sprouts, Cinnamon Butternut Squash, Pecans, and Cranberries.

Thanksgiving Main Course to serve with this side dish:

  • Roast Duck – an ultimate Thanksgiving main course!  This Roast Whole Duck has tender and juicy meat, crispy skin, and it’s glazed with the honey-balsamic glaze to give the duck a beautiful roasted look.

Don’t want to use pecans? Try this recipe with pumpkin seeds:

Other amazing Thanksgiving salads:

Other delicious Thanksgiving Side Dishes:

Thanksgiving Side Dish with Roasted Brussels Sprouts, Cinnamon Butternut Squash, Pecans, and Cranberries

What I love the best about this butternut squash salad is that it fits so well with classic Thanksgiving side dishes. It’s such a perfect addition to a holiday table. It will look (and taste!) perfect next to traditional Thanksgiving recipes, such as green beans, potatoes, and stuffing.

And, I love the combination of ingredients here!  Even if you don’t like Brussels sprouts, you’ll love them here. Roasted Brussels sprouts taste great when combined with all the classic Autumn flavors. Cinnamon butternut squash provides a nice, sweeter contrast to the Brussels Sprouts. And, you get a little bit of crunch from pecans and dried cranberries.

Potato Side Dishes for Thanksgiving:

Thanksgiving Salad with Roasted Brussels Sprouts, Cinnamon Butternut Squash, Pecans, and Cranberries

This Butternut Squash Salad makes a beautiful presentation, too – it’s a perfect Holiday side dish that will make a great addition to both Thanksgiving and Christmas menus.

How to make butternut squash salad:

  1. Toss Brussels sprouts in olive oil and salt. Roast in the preheated oven at 400 F for about 20 minutes.
  2. Toss cubed butternut squash in olive oil, maple syrup, and cinnamon. Roast in the preheated oven at 400 F for about 20 minutes.
  3. In a large bowl, combine roasted Brussels sprouts, roasted cinnamon butternut squash, cranberries, and lightly toasted pecans.
  4. Add a small amount of maple syrup and toss!

The video shows how to make this delicious Thanksgiving Butternut Squash Salad with Roasted Brussels Sprouts, Pecans, and Cranberries:

Tips and Tricks

  • To save time, roast both Brussels sprouts and butternut squash on 2 separate baking sheets at the same time, on the same rack in the oven.
  • Adding maple syrup to the salad at the end is optional. If you do decide to add it, add small amounts.  Start with 2 tablespoons of maple syrup, then add more, if desired, and toss with the salad ingredients to combine.

Butternut Squash Salad with Roasted Brussels sprouts, Pecans, and Cranberries

If you want a healthy side dish for Thanksgiving, Christmas, or New Year’s Eve, try this Butternut Squash Salad with Roasted Brussels sprouts, Pecans, and Cranberries!   is one of the best holiday side dishes you’ll ever try!    This salad is full of vegetables and nuts. It’s healthy, gluten free, vegetarian, and packed with fiber!

Roasted Brussels Sprouts:

  • 3 cups Brussels sprouts (ends trimmed, yellow leaves removed)
  • 3 tablespoons olive oil
  • 1/4 teaspoon Salt (to taste)

Roasted Butternut Squash:

  • 1 1/2 lb butternut squash (peeled, seeded, and cubed into 1-inch cubes (Yields about 4 cups of uncooked cubed butternut squash))
  • 2 tablespoons olive oil
  • 3 tablespoons maple syrup
  • ½ teaspoon ground cinnamon

Other Ingredients:

  • 2 cups pecan halves
  • 1 cup dried cranberries
  • 2-4 tablespoons maple syrup (optional)

How to roast Brussels Sprouts:

  1. Preheat oven to 400 F.  Lightly grease the foil-lined baking sheet with 1 tablespoon of olive oil.

  2. Trim ends of Brussels sprouts  and remove yellow leaves. 

  3. Then, slice all Brussels sprouts in half. 

  4. In a medium bowl, combine halved Brussels sprouts, 2 tablespoons of olive oil, salt (to taste), and toss to combine. 

  5. Place onto a foil-lined baking sheet, cut side down, and roast in the oven at 400 F for about 20-25 minutes. During the last 5-10 minutes of roasting, turn them over for even browning, the cut sides should be nicely and partially charred but not blackened (see my photos).

How to roast Butternut Squash:

  1. Preheat oven to 400 F. Lightly grease the foil-lined baking sheet with 1 tablespoon of olive oil.
  2. In a medium bowl, combine cubed butternut squash (peeled and seeded),1 tablespoon of olive oil, maple syrup, and cinnamon, and toss to mix.
  3. Place butternut squash in a single layer on the baking sheet. Bake for 20-25 minutes, turning once half-way through baking, until softened.
  4. Note: You can roast both Brussels sprouts and butternut squash on 2 separate baking sheets at the same time, on the same rack in the oven – that’s what I did.

Assembly:

  1. In a large bowl, combine roasted Brussels sprouts, roasted butternut squash, pecans, and cranberries, and mix to combine. 

  2. (OPTIONAL): For more sweetness, add 2 or 4 tablespoons of maple syrup, if desired – do not add all maple syrup at once, start with 2 tablespoons, then add more, if desired, and toss with the salad ingredients to combine.

Follow Julia on Pinterest and Facebook to get more recipes and dinner ideas for your weekly meal planning!

Other Butternut Squash Recipes:

The post Thanksgiving Butternut Squash Salad with Roasted Brussels Sprouts, Pecans, and Cranberries appeared first on Julia's Album.


from Julia's Album https://ift.tt/2NAmeWk
via IFTTT

Baked Ranch Chicken with Broccoli and Bacon

This easy Baked Ranch Chicken with Broccoli and Bacon is a one-pan meal made in a casserole dish. Minimal clean-up.  Perfect for busy weeknight dinners, as meal prep, or to freeze.  Only 6 ingredients.  30-40 minutes to make.  Low-carb, high protein recipe.

Baked Ranch Chicken with Broccoli and Bacon

Sometimes all you need is a simple recipe for dinner.  This ranch chicken bake is exactly this kind of basic recipe.    There is nothing complicated about this ranch chicken.  All you have to do is add all the ingredients in a casserole dish and bake.   Use boneless and skinless chicken meat, such as chicken breasts or chicken thighs.   Without breadcrumbs, with nothing extra.  What you get is a delicious oven baked ranch chicken that not only tastes good but also looks good!

Cooking Tips

  • I recommend to blanch the broccoli before adding it on top of chicken (blanching means adding broccoli to boiling water just for a couple of minutes, removing it and draining it well). Blanching the broccoli makes it moist and brighter in color.
  • Use skinless, boneless chicken breasts.   Use thin chicken breasts.  Or, if you have large chicken breasts, slice each chicken breast in half horizontally.  You can also use skinless, boneless chicken thighs.
  • You can use either store-bought Ranch dressing or make your own.
  • No need to add salt.  Bacon, Ranch dressing, and the Cheddar cheese add enough saltiness to the dish.

What to serve with Baked Ranch Chicken

  • Oven-roasted vegetables, such as asparagus, broccoli, green beans, sliced bell peppers, red onions.
  • Potatoes. Serve mashed potatoes or oven-baked potatoes roasted with herbs and garlic in olive oil.
  • Rice.  Make Jasmine rice or brown rice.  For more flavor, serve wild rice or flavored rice.
  • Cauliflower “mashed potatoes”.   Mash cooked cauliflower, add minced garlic and butter, and serve just like regular potatoes.
  • Pasta, such as spaghetti or angel hair pasta.

Side Dishes

I recommend the side dishes below.  They all have veggies, and each of them will go beautifully with oven baked ranch chicken:

Baked Ranch Chicken with Broccoli and Bacon

What to do if you don’t have Ranch Dressing

  • Make your own ranch dressing from scratch.   Combine 1/2 cup of mayonnaise with 1/2 cup of sour cream. Add 1 clove of minced garlic,  1/2 teaspoon each of (chopped fresh or dried) dill, parsley, chives, onion powder.  Season with 1 teaspoon of lemon juice, salt and pepper to taste.  Mix to combine.
  • Make ranch dressing using dry ranch dressing mix.  Combine 1/2 cup of mayonnaise with 1/2 cup of sour cream.   Gradually add dry ranch dressing mix (to taste) to the mixture, and stir to combine.

How to make baked Ranch chicken KETO friendly

  • Do not use breadcrumbs or crushed crackers as topping over your chicken bake.
  • Make your own homemade Ranch dressing that does not include sugar.  Combine 1/2 cup of full-fat mayonnaise with 1/2 cup of full-fat sour cream. Add 1 clove of minced garlic,  1/2 teaspoon each of  (chopped fresh or dried) dill, parsley, chives, onion powder.  Season with 1 teaspoon of lemon juice, salt and pepper to taste.  Mix to combine.

Baked Ranch Chicken with Broccoli and Bacon

How do you bake chicken with Ranch seasoning

1) Preheat oven to 375 F.

2) Add skinless, boneless chicken breasts (or chicken thighs) to the casserole dish.
add raw chicken to the casserole dish
3) Top with chopped raw broccoli and chopped cooked bacon.
top chicken breasts with cooked bacon and broccoli
4) Spread Ranch dressing over the chicken.

add Ranch dressing over broccoli and bacon chicken breasts in a casserole dish
5) Top with shredded Cheddar and Mozzarella cheese.

add Cheddar and Mozzarella cheese of broccoli and bacon ranch chicken breasts in a casserole dish
6) Bake in the preheated oven at 375 F for about 30 minutes until the chicken is cooked through.
bake broccoli and bacon ranch chicken in the oven in the casserole dish
Use the juices from the oven-baked ranch chicken to pour over mashed potatoes or cooked rice or veggies.
Baked Ranch Chicken with Broccoli and Bacon in a casserole dish

Other chicken bake recipes

Broccoli Bacon Cheddar Chicken Bake

Bacon Cream Cheese Chicken Bake

Chicken Florentine Bake


Baked Ranch Chicken with Broccoli and Bacon

This easy Baked Ranch Chicken with Broccoli and Bacon is a one-pan meal made in a casserole dish.  There are only 6 ingredients, and the recipe takes 30-40 minutes to make.  Low-carb, high protein recipe.  

  • 4 chicken breasts ((use 4 thin chicken breasts, or use 2 large chicken breasts, sliced in half, horizontally))
  • 2 cups broccoli florets (, blanched, chopped)
  • 6 strips bacon (, cooked, chopped)
  • 1/2 cup Ranch dressing
  • 1 cup Cheddar cheese (, shredded)
  • 1/3 cup Mozzarella cheese (, shredded)
  1. Preheat the oven to 375 F.
  2. Add chicken breasts to the casserole dish. I used the the oval casserole dish measured 13 inches x 9 inches x 4 inches deep.
  3. Note about chicken: use 4 thin chicken breasts, or use 2 large thick chicken breasts, sliced in half horizontally each to make 4 thin chicken breasts.
  4. Top with chopped and blanched broccoli florets.
  5. Top with chopped cooked bacon.
  6. Spread Ranch dressing on top.

  7. Top with shredded Cheddar and Mozzarella cheese.
  8. Bake, uncovered, for about 20-30 minutes, until the chicken is cooked through. The cooking time will depend on the thickness of your chicken breasts.

The post Baked Ranch Chicken with Broccoli and Bacon appeared first on Julia's Album.


from Julia's Album https://ift.tt/2BdMa77
via IFTTT

Chicken and Bacon Pasta Bake

This easy Chicken and Bacon Pasta Bake is made with the homemade Spinach dip combined with elbow macaroni, chicken and bacon!    Creamy and cheesy pasta is smothered in a Parmesan and Mozzarella cheese sauce and then baked in a casserole dish until the perfect golden crust forms on top.  Family favorite dinner recipe!

chicken bacon pasta bake with spinach dip

Tips and Tricks

  • What kind of chicken meat to use? Use boneless and skinless chicken meat, such as chicken breast, chicken tenderloins, or dark chicken meat.  You can also use leftover cooked chicken.
  • You can use either fresh or frozen spinach.
  • Use store-bought spinach dip if you like.  You can also use pre-made spinach and artichoke dip.
  • Use any kind of short pasta: elbow macaroni, penne, rigatoni, small pasta shells.
  • This is a super versatile recipe, and you can add all kinds of veggies to this pasta bake.  Add artichokes, tomatoes, onions, broccoli, bell peppers, or asparagus.
  • You can easily freeze this pasta bake right in the casserole dish.  Use it as meal prep dish.

Make this pasta bake gluten free

Because everything is made from scratch in this recipe, to make it gluten free all you have to do is use gluten free elbow pasta. Gluten free brown rice elbow macaroni or penne pasta will work great. Tip: After cooking gluten free pasta al dente, make sure to rinse it with cold water to prevent it from getting mushy.

Creamy and cheesy chicken and bacon pasta bake

Can you put raw chicken in a pasta bake?

No.  There is too much of a risk that you’ll end up with undercooked chicken.  Use either cooked sliced chicken (good way to use up some leftover chicken!).  Or, quickly saute small-sized pieces of skinless, boneless chicken meat for about 3 minutes, without overcooking them.  Baking the casserole dish in the oven for another 30 minutes will be enough to cook the chicken through.

Do you cook pasta before pasta bake?

  • It depends on the type of sauce you use and how long you cook the pasta bake in the oven.  Remember that dry pasta needs to hydrate.
  • If you use a very runny liquid/sauce for your baked pasta, such as milk or chicken broth, you can probably use uncooked pasta in your pasta bake. The pasta will easily absorb all the liquid during the baking process.
  • If you use a thicker, creamier sauce, such as spinach dip, or other cheese-based sauce, you have to cook pasta before adding it to the pasta bake.

How do you not overcook pasta

  • Cook pasta al dente, just long enough so that it is not hard but not soft either.  The pasta should have a firm texture.
  • Test the pasta 3 minutes before it’s ready to avoid overcooking.
  • If you did over cook the pasta, rinse the pasta with cold water to stop the cooking process immediately.

Should you rinse pasta

  • Do not rinse pasta when serving it hot or with sauce.  Generally, you don’t want to rinse pasta after cooking, especially if you plan to use the pasta with the sauce.  Rinsing pasta removes the starch that helps hold and absorb the sauce.   After cooking pasta al dente, drain it in a colander without rinsing it with water.  This keeps the starch with pasta and allows the sauce to stick to pasta.
  • Do rinse pasta when serving it cold or in a salad, or in a stir fry.  Rinse the pasta if you want to prevent it from sticking together or if you want to use pasta in recipes, such as pasta salad or stir fries.   In other words, rinse the pasta with cold water for recipes where you don’t want your pasta to be gummy or clump together.

Chicken and Bacon Pasta Bake with Spinach Dip

How to make chicken and bacon pasta bake

1) First, prepare all the ingredients for the pasta bake: cooked sliced chicken, drained cooked pasta, chopped cooked bacon, spinach dip:


2) Mix everything together and add to the casserole dish:


3) Top with shredded Mozzarella cheese:

How long do you put pasta bake in the oven

Bake it at 375 F in the preheated oven for 15 minutes.  Then, broil for 3-4 minutes until golden brown on top.

spinach dip chicken and bacon pasta bake

More recipes that include pasta, chicken, and bacon

Chicken and Bacon Pasta with Spinach and Tomatoes in Garlic Cream Sauce 

Chicken and Bacon Ranch Pasta

Spicy Chicken Pasta with Bacon and Peas


Chicken and Bacon Pasta Bake

Chicken and Bacon Pasta Bake – this easy casserole dish is made with the homemade Spinach dip combined with elbow macaroni, chicken and bacon!   Everything is coated with the Parmesan and Mozzarella cheese sauce and baked in a casserole dish until the perfect golden crust forms on top.  The whole family will love this creamy and cheesy pasta dish!

Spinach Dip:

  • 8 oz cream cheese
  • 1/2 cup Mozzarella cheese (, shredded)
  • 1/2 cup Parmesan cheese (, shredded)
  • 5 oz frozen spinach (, thawed, drained)
  • 5 cloves garlic (, minced)
  • salt to taste

Remaining pasta bake ingredients:

  • 1 lb chicken (, diced)
  • 1 tablespoon olive oil
  • salt
  • 1/2 teaspoon Italian seasoning
  • 8 oz elbow macaroni (, uncooked)
  • 6 slices bacon (, cooked, drained, chopped)
  • 1 cup Mozzarella cheese (, shredded)

How to make spinach dip:

  1. Soften cream cheese. 

  2. Mix all spinach dip ingredients.

Prepare chicken:

  1. Heat olive oil in a large skillet. 

  2. Add sliced chicken. Sprinkle with salt and Italian seasoning. 

  3. Cook, stirring, on medium heat, until it’s no longer pink, about 2 minutes.

Cook pasta

  1. Cook elbow macaroni al dente.  Drain.

How to assemble chicken and bacon pasta bake:

  1. To the skillet with sliced cooked chicken, add chopped cooked bacon, cooked and drained pasta, and spinach dip.  Mix everything.  

  2. Top with 1 cup of Mozzarella cheese.

  3. Bake at 375 F in the preheated oven, uncovered, for 15 minutes. 

  4. Then, broil for 3-4 minutes, until nicely browned on top.  Make sure not to burn the top of the pasta bake

The post Chicken and Bacon Pasta Bake appeared first on Julia's Album.


from Julia's Album https://ift.tt/2OMayAc
via IFTTT

Ham and Cheese Chicken Bake

This easy Chicken Bake with Ham and Swiss Cheese takes only 30 minutes to make!  Super easy recipe with lots of flavors!  Dijon mustard, ham slices, and Swiss cheese are layered on top of the chicken breasts and then baked for about 30 minutes.

Chicken Bake with Ham and Swiss Cheese

This ham and cheese chicken bake is just like stuffed chicken but much easier. I love stuffed chicken but sometimes I want something REALLY simple.   In this recipe, you don’t need to roll the chicken meat, or use a toothpick to hold chicken together.   Everything is easy!  All you need is a casserole dish (or a deep baking dish) and the recipe ingredients.

Pile all the ingredients on top of one another in a casserole dish and bake!    The result is delicious!  Ham, Swiss cheese, and mustard on the chicken breast are an amazing combination!

Cook’s Tips:

  • Use thinly sliced chicken breasts.  If you have large chicken breasts, slice them horizontally in half to make them thinner.  You don’t even need to pound the chicken. This way, you have less chicken meat for all the good stuff on top, and, therefore, you get more flavor with each bite!
  • Thinly sliced chicken breasts should be cooked through in 20 minutes (in the preheated oven at 375 F).  However, keep in mind that your chicken may cook longer depending on your oven and the thickness of your chicken breasts.
  • Use any kind of mustard: Dijon mustard, grainy mustard, etc.  Use  1 tablespoon of mustard per each chicken breast.

Chicken Bake with Ham and Swiss Cheese

What to serve with Ham and Cheese Chicken?

Serve simple, comforting side dishes:

  • Mashed potatoes
  • Jasmine rice or flavored rice
  • Roasted veggies, such as asparagus, broccoli, bell peppers
  • Cauliflower “mashed potatoes” (made without actual potatoes) or cauliflower rice

I recommend these sides:

Chicken Bake with Ham and Swiss Cheese

Other chicken bake recipes

If you like the simplicity of this chicken with ham and cheese, then you’ll love these recipes:

Chicken Bake with Ham and Swiss Cheese

How to make chicken with ham and cheese

1)  Add chicken breasts to casserole dish.

add chicken breasts to a casserole dish
2) Spread Dijon mustard over the chicken breast.
Spread mustard over the chicken breasts in a casserole dish
3) Wrap ham slices over each chicken breast.
wrap ham slices over each chicken breast
4) Top chicken and ham with slices of Swiss cheese.
top with slices of ham cheese on top of chicken with ham and Dijon mustard
5) Wrap Swiss cheese slices around each chicken breast.
wrap Swiss cheese slices over each chicken breast
6) Bake for 30 minutes until the chicken with ham and cheese is cooked through.
bake Swiss cheese and bacon wrapped chicken in the oven
7) Top with chopped herbs and cooked crumbled bacon.
Top chicken with crumbled bacon and chopped herbs


Ham and Cheese Chicken Bake

This easy Chicken Bake with Ham and Swiss Cheese takes only 30 minutes to make!  Super easy recipe with lots of flavors!  Dijon mustard, ham slices and Swiss cheese are layered on top of the chicken breasts and then baked.

  • 4 chicken breasts
  • 1/4 cup mustard
  • 4 slices ham (, black forest)
  • 4 slices Swiss Cheese
  • 1/4 cup bacon (, crumbled, cooked)
  • 2 tablespoon parsley (, fresh, chopped)
  1. Preheat oven to 375 F.

  2. Add thinly sliced chicken breasts to the baking dish.

  3. Spread 1 tablespoon of mustard over each chicken breast. 

  4. Top with ham slices.  Fold slices of ham around the chicken breasts. 

  5. Top with sliced cheese.  Fold slices of cheese around the chicken breasts. 

  6. Bake at 375 F in the preheated oven for 20-30 minutes or until done. 

  7. Top with crumbled bacon and chopped fresh parsley.

The post Ham and Cheese Chicken Bake appeared first on Julia's Album.


from Julia's Album https://ift.tt/2Pt4m5k
via IFTTT

Pork Belly with Honey Garlic Sauce

Pan-fried Pork Belly Slices with Honey Garlic Sauce – easy appetizer that takes only 30 minutes from start to finish!   This recipe explains how to cook sliced pork belly in a frying pan until crispy and browned.  No need to turn on the oven.

crispy pork belly with honey garlic sesame seed sauce

Many pork belly recipes require slow cooking or oven roasting the unsliced pork belly for a long time (usually at least an hour).   This quick and easy recipe takes only 30 minutes, and that includes the time required to make the sauce!

In this recipe the uncooked pork belly is sliced into thick bites first, and then pan-fried in a frying pan on stove top until the texture is crispy on the outside, and soft on the inside.    Pork belly pairs exceptionally well with Asian flavors, which is why the sauce in this recipe features ingredients that are commonly used in Asian cuisine: honey, tamari sauce (or use soy sauce), garlic, and toasted sesame seeds.

Pork belly is a very fatty cut of pork, so don’t be surprised at the calorie count below in the recipe box.  Make sure to plan a good size side dish, since this recipe doesn’t make much volume-wise, but it’s surely a lot calorie-wise.

What to serve with pork belly

Because pork belly is so rich and fatty, serve it with green vegetables, such as oven-baked asparagus, roasted broccoli, roasted brussels sprouts, or sautéed spinach.   Also, mushrooms are good choice, such as oyster mushrooms or regular button mushrooms.

Or, serve Asian-flavored noodles alongside the pork belly. Here are some suggestions:

Pork Belly vs Bacon

Both bacon and pork belly come from the same cut of pork (pork belly).  The only difference between the two is that pork belly is fresh meat, while bacon has been sliced, cured, and smoked.

Pork belly looks very much like a very thick slice of bacon, uncut:

pork belly

Cook’s Tips

  1. Slice pork belly into cube-like pieces of medium size.  These pork slices don’t have to be perfectly shaped as cubes.  They also don’t have to be small – keep in mind that cubed pork belly will reduce in size considerably, once it’s cooked.
  2. Do not add cooking oil when cooking pork belly in the skillet – pork belly is obviously a very fatty cut and it will release its own fat.
  3. When pan-frying sliced pork belly, use splatter screen to prevent oil from splattering all over the kitchen.
  4. Start cooking sliced pork belly on high heat but watch closely: reduce heat to medium once the skillet gets too hot.

Crispy Pork Belly with Honey Garlic Sesame Seed Sauce

how to cook pork belly

1) Slice pork belly into small cube-like bites.

2) Add cubed pork belly to a large skillet and start frying on high heat. Do not add cooking oil.

3) Constantly move pork belly slices around the pan.

sliced pork belly
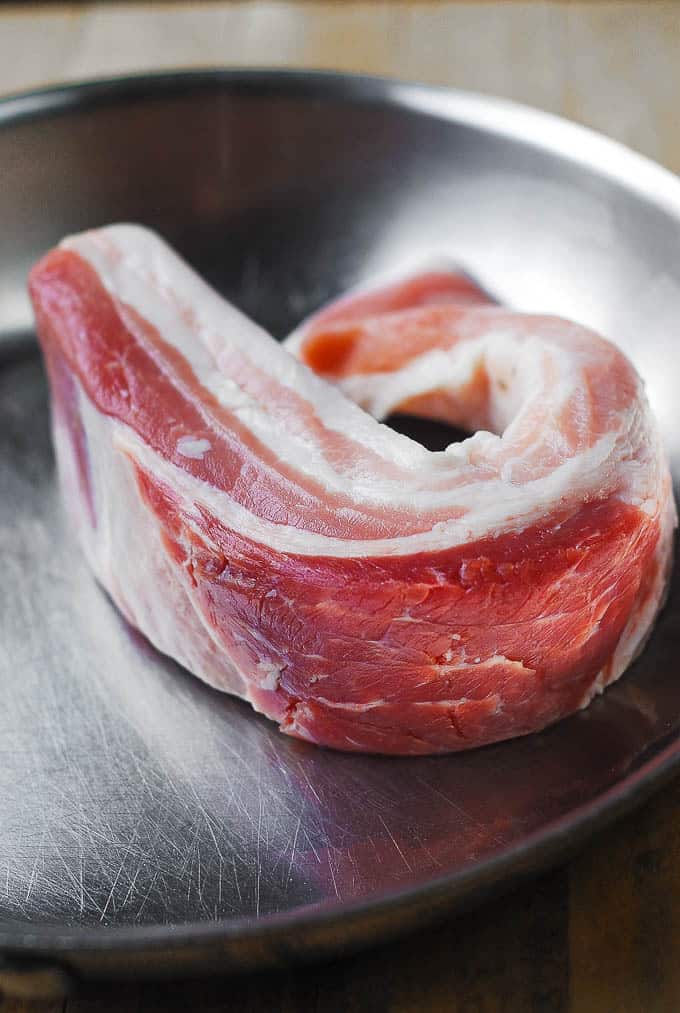
4)  Pan fry sliced pork belly 5 minutes on one side, 5 minutes on the other side until nicely browned and crispy. Total cooking time should be about 10 minutes.

5) Reduce heat from high to medium as the pan gets hot.

6) There shouldn’t be any burnt pieces or burnt pan on the bottom of the skillet.

7) Don’t crowd the pan. Cook pork belly in 2 batches, if necessary.

crispy pan-fried pork belly

8) Remove pan-fried pork belly slices from the cooking pan.

9) Remove extra fat from the pan.

10) Make the sauce by combining 1/4 cup honey with 3 tablespoons of tamari sauce, and minced garlic.

11) Heat it up the sauce and cook for about 1 minute.

12) Add back pan-fried pork belly slices. Sprinkle with toasted sesame seeds.

crispy sliced pork belly

Crispy Pork Belly with Honey Garlic Sesame Seed Sauce

Side dishes for pork belly

Serve pork belly with green vegetables or side dishes with creamy texture:

  • Mashed potatoes.
  • Cauliflower “mashed potatoes” – made from cauliflower, without using actual potatoes.
  • Scalloped potatoes.
  • Grilled asparagus.
  • Sautéed spinach.
  • Roasted broccoli.
  • Oven-roasted brussels sprouts.

Sliced Pork Belly with Honey Garlic Sauce

Easy Pan-fried Pork Belly with Honey Garlic Sauce – only 30 minutes from start to finish!  You’ll love crispy pork belly with the Asian-inspired sauce!  The recipe explains how to cook pork belly slices in a frying pan on stove top, without using the oven!  

  • 1 lb pork belly
  • 1/4 cup honey
  • 3 tablespoons tamari sauce (or soy sauce)
  • 4 cloves garlic (, minced)
  • 2 tablespoons sesame seeds (, toasted)
  • 2 green onions (, chopped)
  • salt (, to taste)

How to cook sliced pork belly

  1. Slice pork belly into small cube-like pieces. Slice off extra fat, if you wish.
  2. Add sliced pork belly to a large pan and start frying on high heat. Do not add cooking oil.  

  3. Constantly move pork belly slices in the beginning.  Cook them for about 5 minutes on one side on high heat, then 5 minutes on the other side on high-medium heat.   Use splatter screen.  The total cooking time should be about 10 minutes.   Reduce heat to medium, if the pan gets too hot. The sliced pork belly should get crispy and browned. 

  4. As you’re cooking you might have to reduce heat from high to medium as the pan gets hot. There shouldn’t be any burnt pieces and the pan should not get burned on the bottom (I used stainless steel pan). Don’t crowd the pan. Depending on the size of your frying pan, you might have to do this in 2 batches.

  5. Remove pan-fried pork belly slices to a plate.  Remove extra fat from the frying pan. 

Honey Garlic Sauce

  1. Add 1/4 cup honey and 3 tablespoons tamari sauce, and minced garlic. 

  2. Heat up the sauce until it boils, reduce heat, and cook for about 1 minute stirring. Remove from heat. 

  3. Add 1 tablespoon of sesame seeds and stir it in.  Add back the sliced pork belly.  

  4. Sprinkle the remaining 1 tablespoon of sesame seeds on top.  Top with chopped green onion, and serve.

The post Pork Belly with Honey Garlic Sauce appeared first on Julia's Album.


from Julia's Album https://ift.tt/2Fjowdo
via IFTTT

Baked Halibut and Asparagus

Garlic Parmesan Crusted Halibut and Asparagus baked on a sheet pan in the oven – easy, quick, and delicious! Minimal cleanup as everything is cooked on a baking sheet lined with parchment paper. This dish is high in protein, fiber, packed with omega 3 fatty acidsHealthy, gluten free, low-carb, KETO friendly recipe!

baked halibut and asparagus

The best and the easiest way to cook halibut is by baking it in the oven.   Only one pan is used (baking sheet).  In this recipe, both halibut and asparagus are crusted with garlic and freshly shredded Parmesan cheese, which adds wonderful flavor and a crunch to the dish.

Halibut is a lean fish with a firm yet soft texture and a mild taste.  Because it is a lean fish, it is easy to overcook as it dries out faster.  Tip:  Serve it immediately after cooking to prevent halibut from drying out.  Do not let the baked halibut sit on the counter.  Do not reheat it in the microwave.  Make sure the halibut is served right after it’s cooked.

Is halibut KETO friendly?

Halibut is rich in protein and has a good amount of omega 3 fatty acids, which makes it a perfect choice for a KETO diet!

If halibut is unavailable, you can use sea bass, cod, mahi mahi or flounder.

Combined with asparagus, garlic, olive oil, and Parmesan cheese, this baked halibut recipe makes an excellent KETO friendly main course.

Seasonings for halibut

Halibut requires basic seasonings, such as lemon juice, minced garlic, salt and pepper.

You can also use spice rubs made specifically for fish.

Or, use herbs (either dried or fresh), such as thyme, oregano, dill, rosemary.

baked halibut and asparagus

What to serve with halibut

  • Oven-roasted vegetables, such as asparagus or broccoli
  • Sautéed spinach
  • Mashed potatoes
  • Cauliflower rice
  • Jasmine rice or flavored rice

Here are some suggestions for flavored rice:

Cooking Tips

  • You don’t have to skin the halibut since it cooks better and keeps its shape better with the skin on one side.   Once cooked, the skin can be removed easily from the fish.
  • Use fresh halibut, preferably never frozen.
  • Line baking sheet with parchment paper to minimize cleanup.
  • Serve immediately after baking for best halibut texture. The longer the halibut sits, the drier it becomes.  Do not reheat in microwave.

How to bake halibut in the oven

Preheat oven to 400 F.  Line half sheet with parchment paper.  Place halibut fillets in the middle, and asparagus around it.  Brush halibut and asparagus with olive oil.  Generously sprinkle with salt and cracked black pepper.  Top with minced garlic and shredded Parmesan cheese.  Bake for 15 minutes until halibut is flaky.

Below are step by step photos showing the preparations process

Place halibut and asparagus on a baking sheet:
halibut and asparagus on parchment lined baking sheet

Brush with olive oil:

halibut and asparagus with olive oil on top on baking sheet

Sprinkle with salt and cracked black pepper.  Add minced garlic:

halibut and asparagus with garlic and olive oil on baking sheet

Add shredded Parmesan cheese:

halibut and asparagus with garlic and Parmesan cheese on a baking sheet

Bake for 15 minutes in the preheated oven at 400 F until halibut is flaky.

halibut and asparagus on baking sheet

Other seafood recipes to try

Baked Rainbow Trout with Lemon, Black Pepper, and Garlic

Trout with Garlic Lemon Butter Herb Sauce

Cilantro Lime Honey Garlic Salmon

Baked Halibut and Asparagus

Garlic Parmesan Crusted Halibut and Asparagus baked on a sheet pan in the oven. This easy recipe is high in protein, fiber, and packed with omega 3 fatty acids. Healthy, gluten free, low-carb, KETO friendly main course!

  • 1.5 lb halibut fillets
  • 1 lb asparagus
  • 4 tablespoons olive oil
  • 1/4 teaspoon salt
  • 1/4 teaspoon black pepper (, cracked)
  • 6 cloves garlic (, minced)
  • 1/2 cup Parmesan cheese (, freshly shredded)
  • 2 tablespoons fresh parsley (, chopped)
  1. Preheat oven to 400 F.  Line half sheet with parchment paper. 

  2. Place halibut fillets in the middle of the baking sheet, and asparagus around it. 

  3. Brush halibut and asparagus with olive oil. Generously sprinkle with salt and cracked black pepper.

  4. Spread minced garlic on top.
  5. Top with freshly shredded parmesan cheese.
  6. Bake for about 15 minutes until halibut is cooked through and flaky.

  7. Sprinkle with freshly chopped parsley.

The post Baked Halibut and Asparagus appeared first on Julia's Album.


from Julia's Album https://ift.tt/2PRzCKx
via IFTTT