Hot!

Other News

More news for your entertainment

Garlic Green Beans with Olive Oil and Parmesan

Garlic Green Beans are cooked in olive oil and tossed with lemon juice and freshly grated Parmesan cheese. This easy side dish will be a great addition to any dinner!


These also make the best green beans for the holiday menu!

Why make this recipe:

Easy and quick recipe. Only 6 ingredients and 20 minutes to make!

Nutritious food.  Green beans are a great source of fiber and potassium.  Green beans are also a good source of vitamins and minerals, including Vitamin C

Perfect match to any main course!  Garlic green beans are so basic and simple (yet flavorful) that they will work with any type of main dish.  Serve this with chicken and bacon pasta or broccoli bacon chicken bake.  This side dish will also go with bacon and mushroom pork chops.  Or, if you prefer fish, try parmesan salmon or trout.


How to boil green beans

How to steam green beans


Tips:

Use real garlic.

Boiling the green beans for 5 minutes will preserve their crunch.  If you prefer softer beans, boil the beans longer, for a total of 10 minutes.

You can use Asiago cheese or Romano cheese instead of Parmesan.

Additions

While garlic green beans taste great just as they are, you can easily enhance this recipe by making minor additions that will add a lot of extra flavor.  Here are some suggestions

Onion or shallots.  Finely mince onions (or shallots) and add to the skillet along with the minced garlic.  Saute for about 4 minutes until the onion softens.  You can use yellow onion, red onion, or shallots.

Lemon zest.  About 2 tablespoons of lemon zest to the skillet with green beans.

Coarsely ground black pepper.  Season the dish with coarsely ground black pepper at the very end.

Spice.  Spice up the garlic green beans by adding one of these spices: crushed red pepper flakes, cayenne pepper, chili powder.


Other green bean recipes

Garlic Green Beans with Olive Oil and Parmean

Garlic Green Beans are cooked in olive oil and tossed with lemon juice and freshly grated Parmesan cheese. This easy side dish will be a great addition to any dinner!   These are the best green beans as they are easy and quick to make.  There are only 6 basic ingredients and total 20 minutes of cooking time.

  • 1 pound green beans (fresh, rinsed, ends trimmed)
  • 1/2 teaspoon salt
  • 2 tablespoons olive oil
  • 6 garlic cloves (minced)
  • 1 tablespoon lemon juice (freshly squeezed)
  • 1/3 cup Parmesan cheese (grated)
  1. Bring a large pot of water to boil, add green beans and 1/2 teaspoon salt. Cook on medium-low heat for 5 minutes, drain the beans.
  2. Heat olive oil in a large skillet on medium heat. Add minced garlic and cooked green beans.
  3. Saute on medium heat for about 2 minutes to combine all ingredients.
  4. Remove from heat. Add freshly squeezed lemon juice and stir.  Add grated Parmesan cheese and stir. Taste and add more salt, if needed.

The post Garlic Green Beans with Olive Oil and Parmesan appeared first on Julia's Album.


from Julia's Album https://ift.tt/37oCwvu
via IFTTT

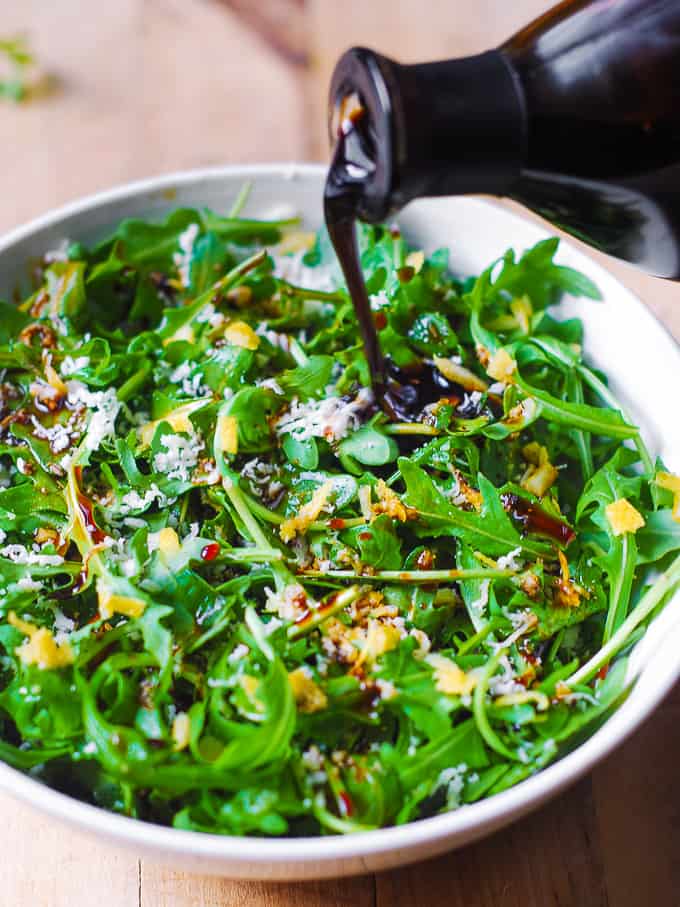
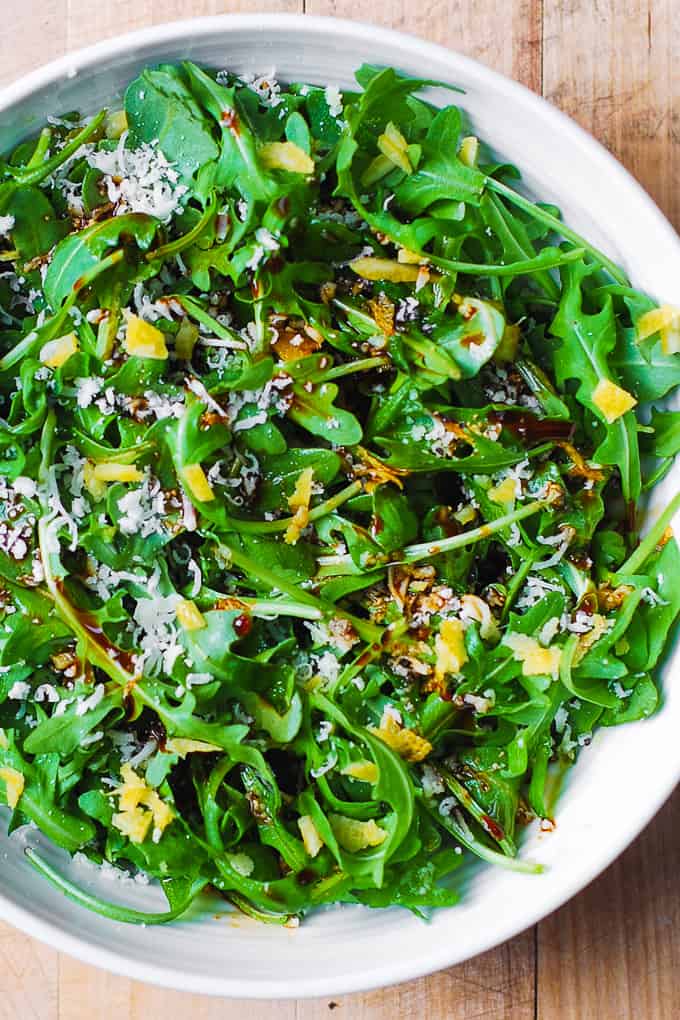
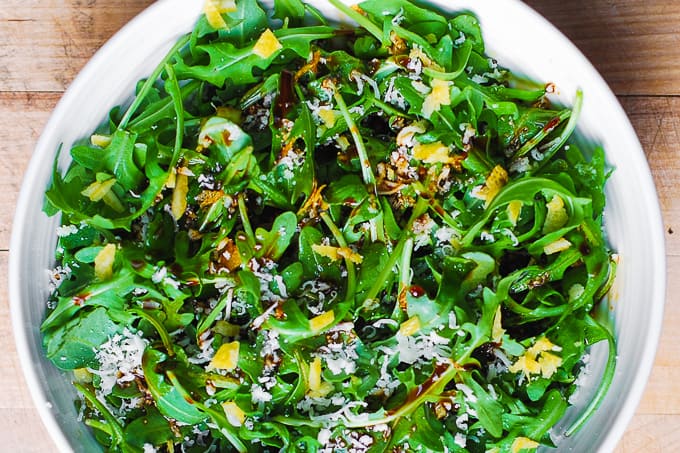
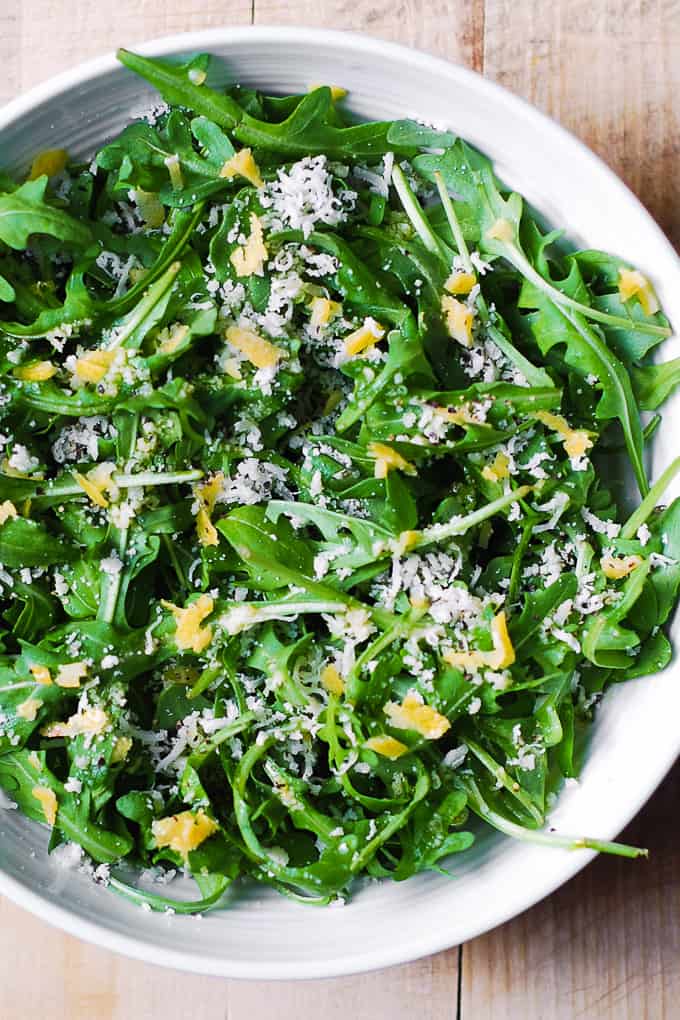
Arugula Salad with Lemon Zest, Parmesan, and Balsamic Dressing

Simple and basic arugula salad is a perfect addition to any dinner!  Garnished with lemon zest and Parmesan cheese, this fresh salad requires only 5 ingredients and takes just 15 minutes to make!

Arugula Salad

Fresh arugula salad is an excellent side dish to many types of main courses.  When you spend an hour or so on making dinner for your family, it’s likely you don’t want to invest much more time on a dinner salad.  Featuring only 5 ingredients, this simple arugula salad takes only 15 minutes to make!

If you like the idea of a basic salad with just a few ingredients but want to use a different green than arugula, then you might also like this simple spinach salad.

Arugula Salad

What is arugula?

Arugula is a delicious green leafy vegetable that works great in salads!  Mature arugula leaves have a spicy, peppery flavor with a light mustard-like taste.

Arugula is also called rocket salad, rucola, rugula, or roquette (among other names).

Tips

Because this arugula salad is so simple and features just a few ingredients, the quality of each ingredient makes a huge difference.  Using high-quality ingredients will take this basic salad to a whole new level!

  • High-quality Balsamic Vinegar.  I used a high quality Italian balsamic vinegar that I purchased when visiting Modena during my recent trip to Italy.  This balsamic vinegar has a thick consistency, and it pours more like a syrup.  The flavor is rich and sweet.
  • Extra Virgin Olive Oil. I recommend that you splurge on a high-quality extra virgin olive oil.  I purchase cold-pressed extra virgin olive oil, which means that no heat was used to extract oil out of the olives.  When purchasing olive oil, I always check that it says “cold-pressed” on the bottle.  With extra virgin olive oil, it’s important that you buy/use the bottle before its expiration date, for best quality. Store olive oil in a cool dark place (away from the light and heat, such as heat from the stove or the oven). Many high-quality olive oils have a strong spicy flavor.   A good quality olive oil tastes fresh and never rancid.
  • Parmigiano-Reggiano cheese. For best results, purchase a wedge of a good Parmigiano-Reggiano cheese, and grate it yourself right before serving with the salad.

Arugula Salad

Additions

While this arugula salad is all about simplicity, you can easily dress it up by adding one or more of the following ingredients:

  • Tomatoes.  Chop up the regular tomatoes into smaller bites and add to the salad. Grape tomatoes or cherry tomatoes will work great, too.  You can also use sun-dried tomatoes.
  • Mushrooms.  Add sliced mushrooms on top of the salad.
  • Avocado.  Adding freshly sliced avocado will add richness to the arugula salad.
  • Nuts.  Lightly toast pecans or slivered almonds.  You can also add walnuts and cashews.
  • Seeds.  Pine nuts are a great addition to an arugula salad.  You can also lightly toast some sunflower seeds or pumpkin seeds and sprinkle them over the salad.
  • Fruit.  Add sliced apple, pear, or mango.
  • Cooked Bacon Bits. Sprinkle bacon bits to add more salty and savory notes to this salad.

Substitutions

  • Don’t have arugula?  Use baby kale or baby spinach.
  • What other cheese can you use besides Parmesan?  Use Asiago cheese or Romano cheese.
  • Don’t have lemon zest?  Sprinkle the salad with a small amount of freshly squeezed lemon juice or lime juice instead.
  • Don’t like balsamic vinegar?  Skip it altogether and just use extra virgin olive oil.

Arugula Salad

Perfect dinner salad

This simple arugula salad takes only 15 minutes to make.  It’s one of the best dinner salads to prepare on a busy weeknight!  The salad has only 5 ingredients, including the ingredients for the homemade salad dressing, made with olive oil and balsamic vinegar.    You can also use your favorite salad dressing or a store-bought dressing.

If you enjoy pasta dinner, the arugula salad will go great with chicken and bacon pasta or tomato spinach shrimp pasta.  If you like chicken bakes, make this salad along with bacon cream cheese chicken or basil pesto tomato mozzarella chicken. If you prefer seafood, try Tuscan salmon or trout with garlic lemon butter herb sauce.

Arugula Salad with Lemon Zest, Parmesan, and Balsamic Dressing

This simple arugula salad requires only 5 ingredients and takes just 15 minutes to make.   Garnished with lemon zest and grated Parmesan cheese, the arugula salad is a perfect addition to any dinner!

  • 5 ounces arugula
  • 1/4 cup Balsamic vinegar
  • 2 tablespoons olive oil
  • 2 tablespoons lemon zest
  • 1/3 cup Parmesan cheese (grated)
  1. Add arugula to a large bowl.

  2. In a small bowl, mix Balsamic vinegar with olive oil, until emulsified.

  3. Drizzle the Balsamic vinegar and olive oil mixture over the salad. 

    Note: you don’t have to use the whole amount of salad dressing.  Use just enough to drizzle.  

  4. Top with lemon zest and grated parmesan cheese.

The post Arugula Salad with Lemon Zest, Parmesan, and Balsamic Dressing appeared first on Julia's Album.


from Julia's Album https://ift.tt/2Se9P0f
via IFTTT

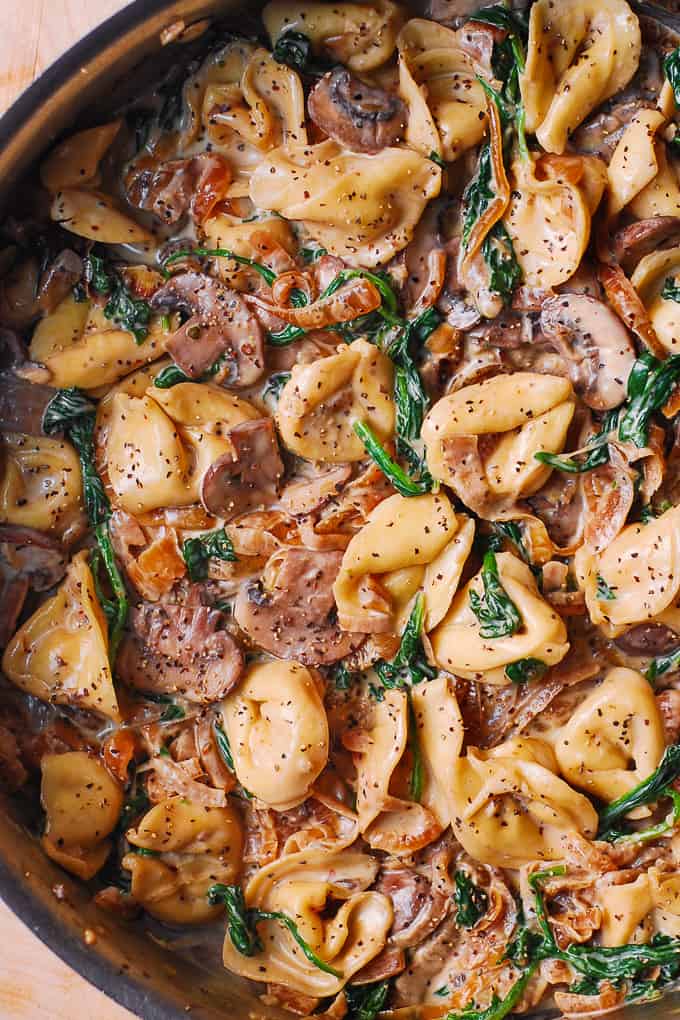
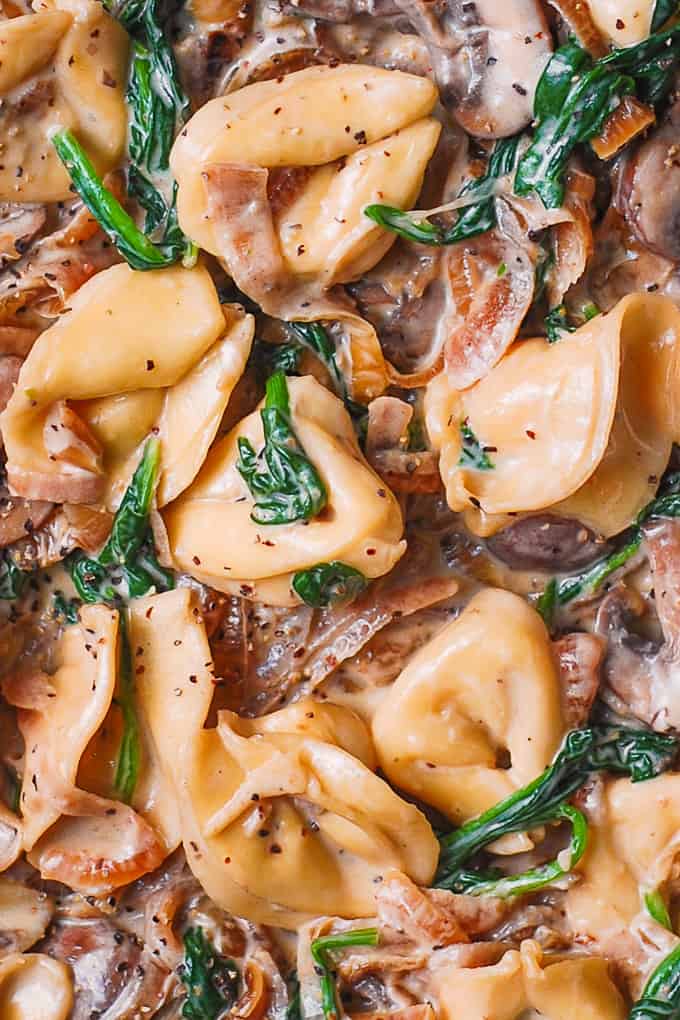
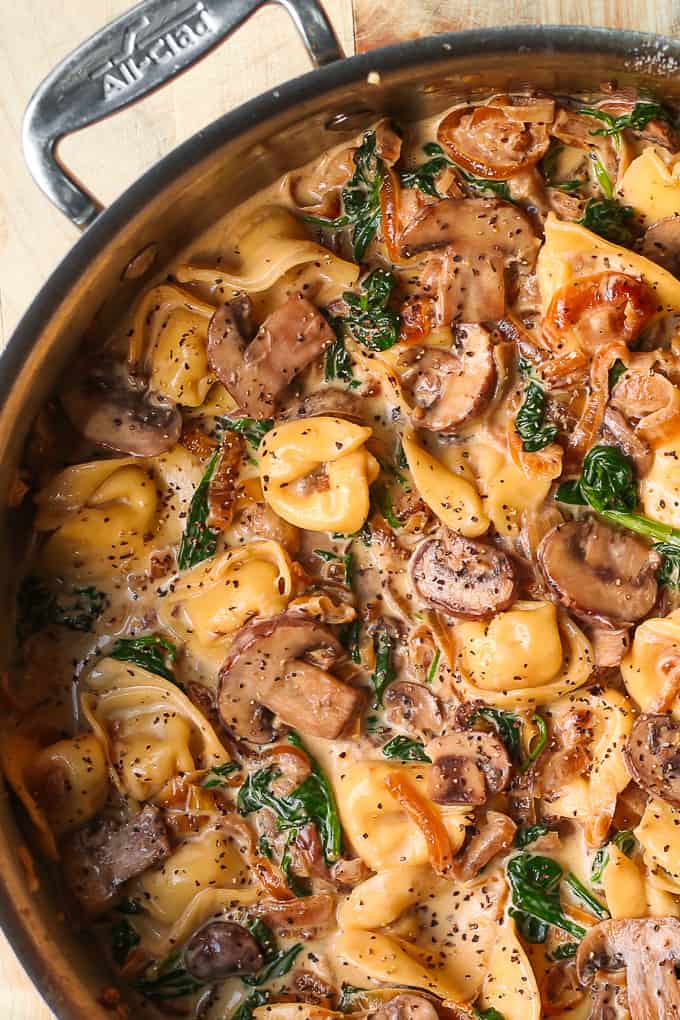
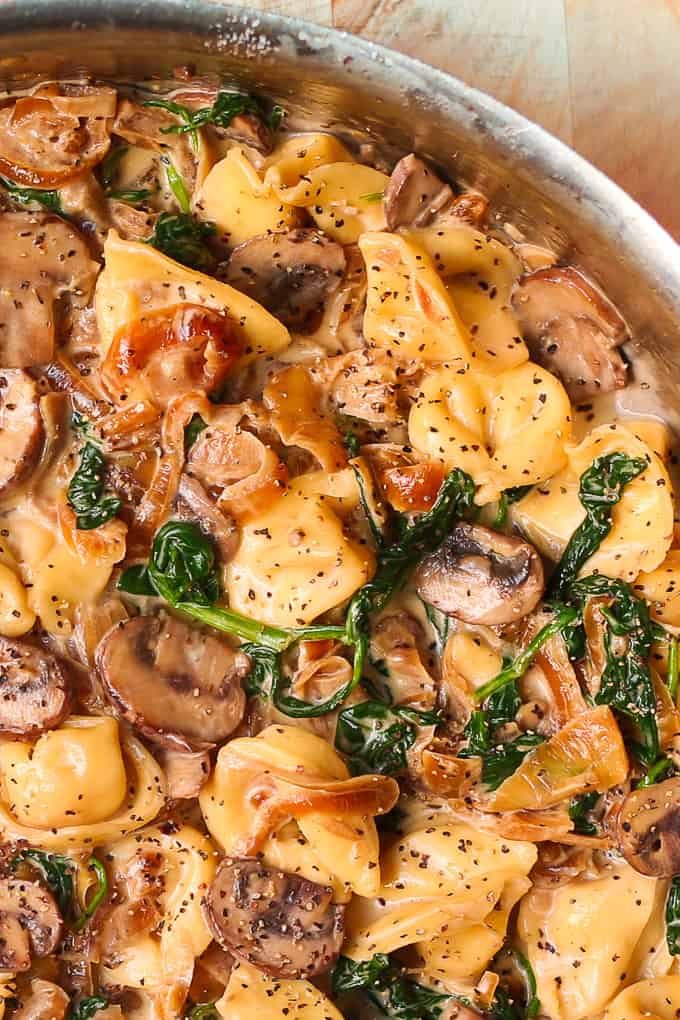
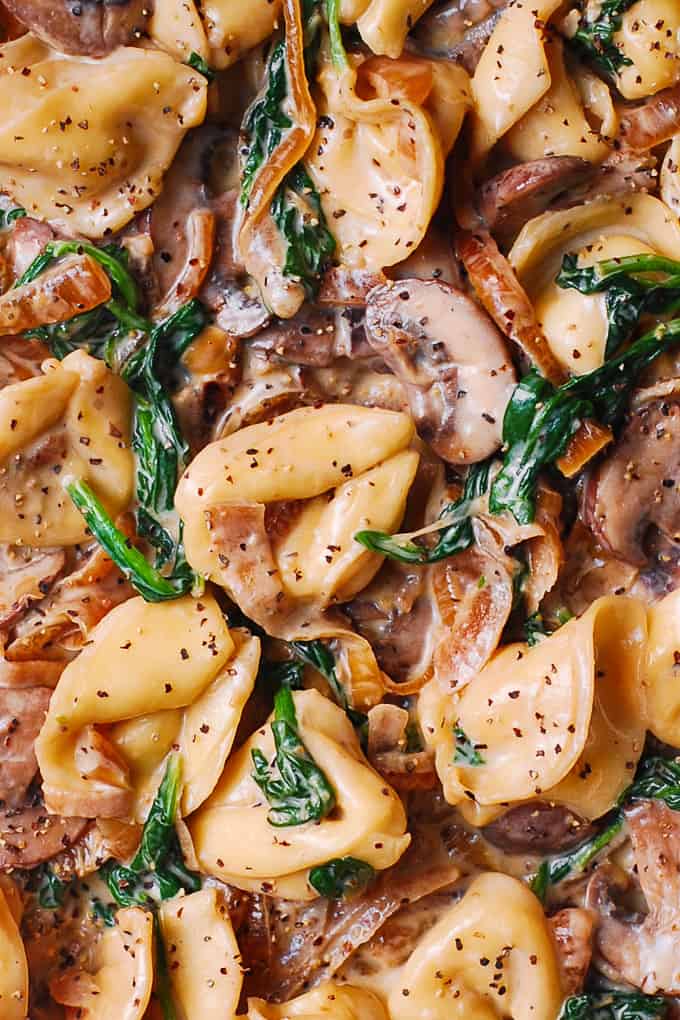
Creamy Spinach Mushroom Tortellini with Caramelized Onions

Creamy Spinach Mushroom Tortellini with Caramelized Onions is an Italian-style stuffed pasta dish packed with veggies.  This easy and delicious meatless pasta is a perfect weeknight dinner!

creamy spinach mushroom tortellini with caramelized onions

If you’re looking for a simple creamy tortellini recipe, this is it!  To make this, you will need basic ingredients, such as spinach, mushrooms, onions, cream, and store-bought tortellini.  This creamy pasta was inspired by my farfalle recipe.

If you like this type of easy-to-make, family-friendly weeknight pasta dishes, I also recommend the following recipes: Italian ravioli with spinach, artichokes, and capers, as well as pesto chicken tortellini with veggies.

What is Tortellini?

  • Tortellini is a stuffed pasta that features a distinctive ring shape.  Tortellini is traditionally served with broth.
  • Tortellini is usually stuffed with cheese and meat-based filling.
  • Tortellini originates from the Italian region of Emilia-Romagna, situated in northeast Italy.

Creamy Spinach Mushroom Tortellini with Caramelized Onions

Things I love about creamy spinach mushroom tortellini

  • Meatless recipe. This pasta dish creates rich, deep flavors without any meat.  Sauteed mushrooms, creamy spinach, and caramelized onions provide so much flavor to the pasta that it stands great on its own.
  • You can easily add protein if you prefer.  This pasta will make a perfect sidekick to any type of grilled meat, whether it’s steak, pork, or chicken.  Spinach mushroom tortellini will also work well with fish, shrimp, and scallops.
  • Simple ingredients.  This recipe uses basic ingredients, such as spinach, mushrooms, onions, cream, and store-bought tortellini.  There is no need to look for that special ingredient.  These basic ingredients, when combined, create an absolutely amazing flavor profile!
  • Easy recipe.  Because this recipe comes together so easily, it’s a perfect dish to make for a weeknight dinner.  Tip: make caramelized onions a day or two in advance to save time.
  • Versatile dish. Tortellini is not the only stuffed pasta you can use in this recipe.  Ravioli will work great as well!  You can also use regular pasta, such as bow-tie or penne pasta.

Creamy Spinach Mushroom Tortellini with Caramelized Onions

Substitutions

  • What kind of tortellini should you use? You can use any type of tortellini: three-cheese tortellini, spinach tortellini, beef-stuffed tortellini, etc.  I used refrigerated 3-cheese tortellini.
  • What can you substitute for tortellini?  Use ravioli, gnocchi or bow tie pasta.
  • What can you use instead of spinach?  Baby kale or arugula will work great in this recipe.
  • What kind of mushrooms will work well here?  You can use button mushrooms, portobello mushrooms, shiitake, crimini, porcini or oyster mushrooms.

What can you use instead of heavy cream?

  • Half-and-half. You can use 1 cup of half-and-half instead of heavy cream.  Bring half-and-half to boil, then add 1/s cup of shredded Parmesan cheese.  Reduce to simmer.  Keep stirring while the sauce simmers until the cheese melts.
  • Coconut milk. Use 1 cup of coconut milk to replace 1 cup of heavy cream.  Follow the recipe as is.

Can you make this recipe gluten-free?

Substitute tortellini with gluten-free ravioli or gluten-free short pasta, such as gluten-free bow tie pasta.  You can also use gluten-free gnocchi (be sure to check the packaging as not all gnocchi is gluten-free).

Creamy Spinach Mushroom Tortellini with Caramelized Onions

How long to cook tortellini?

Follow the package instructions.   The cooking times and instructions will depend on whether you buy refrigerated or frozen tortellini. If using the refrigerated type of tortellini (not frozen), usually you would bring a large pot of water to boil and then cook the tortellini for about 7 to 10 minutes in boiling water.

Cooking tips

  • Make-ahead tip.  Make caramelized onions ahead of time, refrigerate them in an air-tight container, and use within the next 3 days.  You can also freeze caramelized onions for up to 2 months and thaw them whenever you need them.
  • How to reheat.  Reheat gently, on low-medium heat.  Add a small amount of heavy cream or half-and-half to thin out the sauce.

Creamy Spinach Mushroom Tortellini with Caramelized Onions

SIDE DISHES

Spinach mushroom tortellini is a rich pasta dish that features a luscious cream sauce made with heavy cream. The best side dishes for this type of rich creamy pasta are fresh salads along with bread. Here are some ideas:

Add protein

If you crave to add protein to your dinner, this pasta is so versatile, there are many types of meat you can add.

  • Grilled steak.  This creamy spinach mushroom tortellini will make a worthy side dish to any steak: rib-eye, filet mignon, porterhouse, flank steak, or skirt steak.
  • Chicken.  Serve this pasta with grilled or sauteed chicken.  You can use chicken breasts, chicken thighs, or chicken legs.
  • Pork.  Grilled pork chops or pan-seared pork chops will work great.  You can also serve spinach mushroom tortellini as a side dish to pork tenderloin.
  • Seafood.  Add grilled or pan-seared salmon or trout.  This pasta goes well with seared shrimp and scallops.

Other Pasta Recipes

Other Tortellini Recipes

Creamy Spinach and Mushroom Tortellini with Caramelized Onions

Creamy Spinach Mushroom Tortellini with Caramelized Onions is an Italian-style creamy stuffed pasta dish.  This easy and delicious meatless pasta is a perfect weeknight dinner!  

Caramelized Onions

  • 2 tablespoons olive oil
  • 2 yellow onions (large)
  • 1/4 teaspoon salt

Creamy pasta sauce

  • 1 tablespoon olive oil
  • 08 oz mushrooms ((I used crimini mushrooms))
  • 8 oz spinach
  • 1 cup heavy cream
  • 1/4 teaspoon salt
  • 9 oz tortellini ((I used 3-cheese tortellini, refrigerated))
  • 1/4 teaspoon black pepper (when serving)

How to caramelized onions (this can be done a day or 2 in advance):

  1. Peel the onions, wash them and thinly slice them.

  2. Heat 2 tablespoons olive oil on medium-high heat in a large skillet. Add sliced onions and cook on high heat for about 10 minutes, constantly stirring with the spatula.

  3. Reduce heat to medium and continue cooking the onions for 10 more minutes, continuing to stir, as onions brown even more without burning. At this point add a pinch of salt over the onions.

  4. Continue cooking for 10 more minutes on medium or low heat, stirring occasionally to make sure onions don’t stick to the bottom of the pan or burn.

  5. In total, you should have cooked onions for 30 minutes.  Remove the onions from the skillet onto a plate. 

How to make the creamy sauce

  1. Heat 1 tablespoon olive oil in the same skillet on medium heat. Add sliced mushrooms. Sprinkle with a pinch of salt. Cook mushrooms for about 5 minutes, occasionally stirring, until mushrooms are soft.

  2. Add fresh spinach to the skillet and stir on low heat just until spinach starts to wilt.

  3. Add back the caramelized onions.

  4. Add 1 cup of heavy cream and 1/4 teaspoon salt to the mushroom and spinach mixture and bring to a quick boil. Immediately reduce to simmer.  Keep stirring while the sauce simmers for a couple of minutes. 

Add tortellini

  1. Cook tortellini according to package instructions.   Usually, that means to bring a large pot of water to boil.  Add tortellini and boil for 7 to 10 minutes.  Drain.

  2. Add cooked and drained tortellini to the creamy sauce. Stir on low heat for a couple of minutes to reheat.

  3. Top with cracked black pepper when serving.

Helpful Tips about Caramelized Onions.

  • Make-ahead tip.  Make caramelized onions ahead of time, refrigerate them in an air-tight container, and use within the next 3 days. 
  • You can also freeze caramelized onions for up to 2 months and thaw them whenever you need them.

Substitutions for heavy cream

  • Half-and-half. You can use 1 cup of half-and-half instead of heavy cream.  Bring half-and-half to boil, then add 1/s cup of shredded Parmesan cheese.  Reduce to simmer.  Keep stirring while the sauce simmers until the cheese melts.
  • Coconut milk. Use 1 cup of coconut milk to replace 1 cup of heavy cream.  Follow the recipe as is.

Other Substitutions 

  • Use button mushrooms, portobello, cremini, shiitake or oyster mushrooms.
  • Good substitutes for spinach are kale and arugula.
  • You can also use pre-made ravioli, gnocchi or short pasta (such as bow-tie or penne pasta) instead of tortellini.
  • Substitute tortellini with gluten-free ravioli or gluten-free short pasta, such as gluten-free bow tie pasta.  You can also use gluten-free gnocchi (be sure to check the packaging as not all gnocchi is gluten-free).
  • Protein.  You can add grilled steak, pork chops, or chicken.  You can also serve this with fish, shrimp, or scallops.


The post Creamy Spinach Mushroom Tortellini with Caramelized Onions appeared first on Julia's Album.


from Julia's Album https://ift.tt/2YsjEs9
via IFTTT

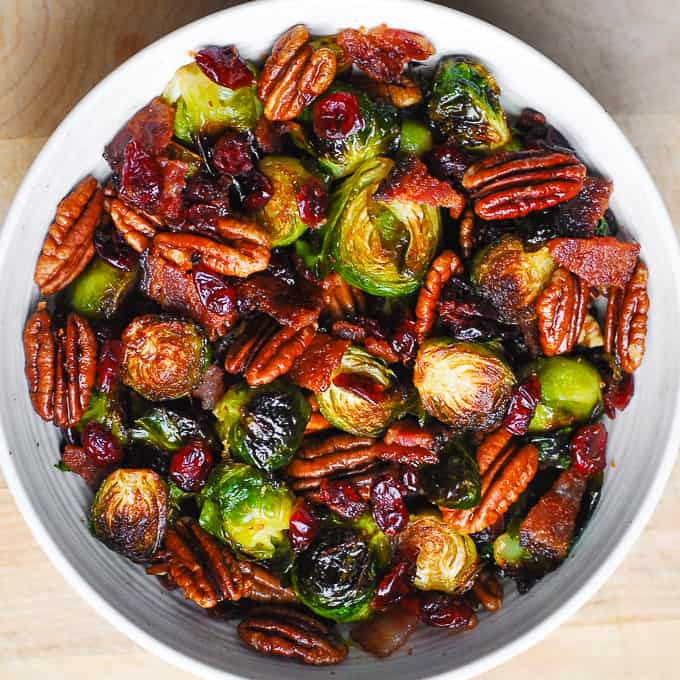
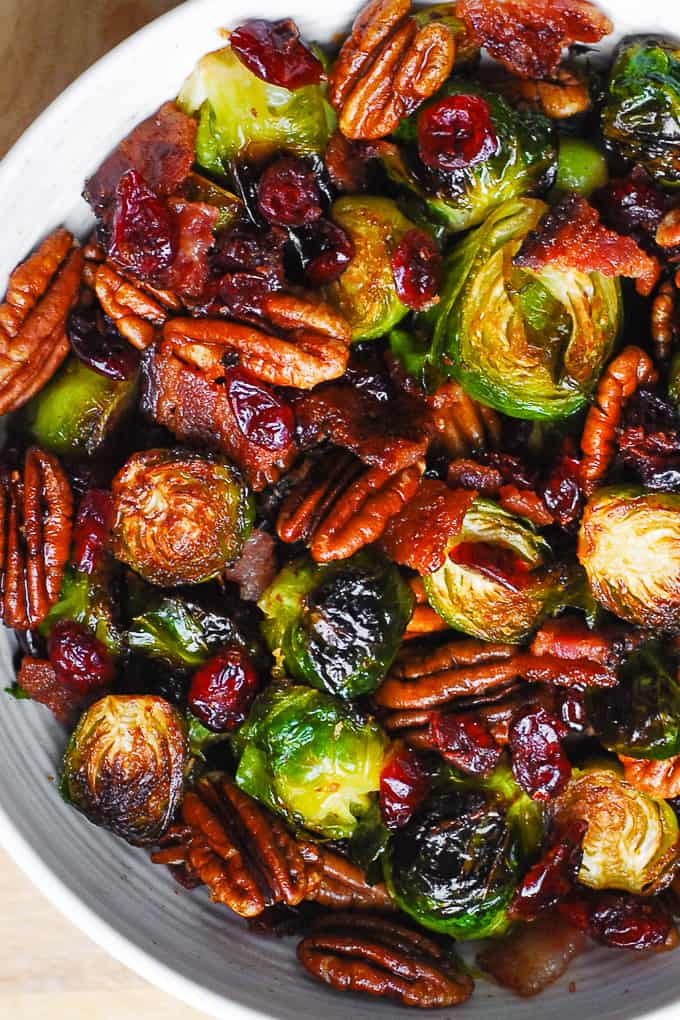
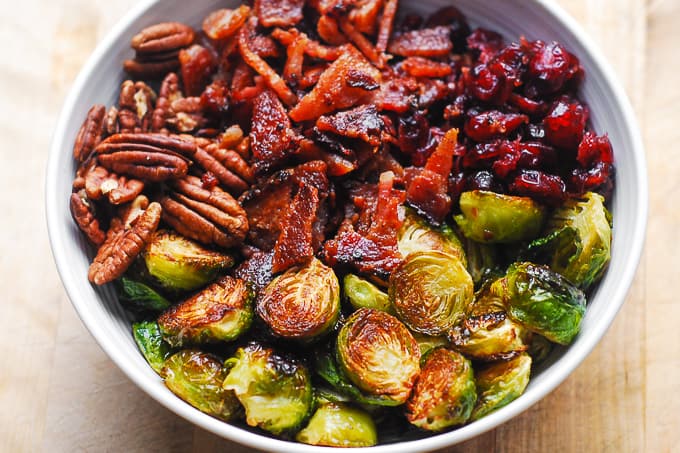
Brussels Sprouts with Bacon, Pecans, and Cranberries

Roasted Brussels Sprouts with Bacon, Toasted Pecans, and Dried Cranberries is an easy Christmas side dish that will add colors and vibrancy to your holiday menu!

Roasted Brussels Sprouts with Bacon, Pecans, and Cranberries

This is such a perfect Christmas recipe.  Roasted Brussels sprouts taste great combined with the classic holiday ingredients, such as pecans and dried cranberries.  Dried cranberries provide a nice, sweeter contrast to the Brussels Sprouts. And, there is a little bit of crunch from toasted pecans and chopped cooked bacon.  This side dish is bursting with colors!

If you enjoy colorful holiday recipes, you will also love green beans with bacon and butternut squash and Brussels sprouts.

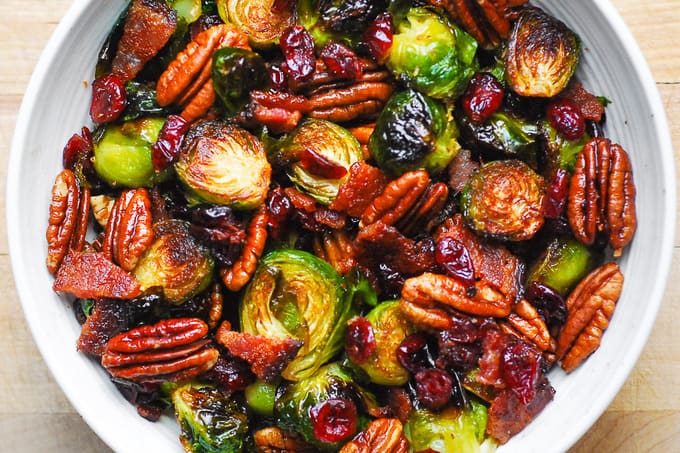
Roasted Brussels Sprouts with Bacon, Pecans, and Cranberries

What I love the best about this Christmas Brussels sprouts recipe is that it fits so well with the traditional holiday side dishes, such as green beans, potatoes, and stuffing.  It’s a perfect recipe for Thanksgiving, Christmas, New Year’s Eve or any other holiday!

This side dish is packed with vegetables and nuts. It’s healthy, gluten-free, and rich in fiber!

Roasted Brussels sprouts with bacon have become one of my favorite holiday recipes.

Christmas Brussels Sprouts and Bacon

OTHER HOLIDAY SIDE DISHES

If you want to discover other colorful and vibrant holiday side dishes, check out these recipes:

CHRISTMAS MAIN COURSES

Brussels sprouts and bacon will pair well with any Christmas main course.  I recommend that you try one of these recipes for your holiday dinner, especially the duck:

  • Roast Duck is a perfect holiday main course!  This Roast Whole Duck has tender and juicy meat, crispy skin, and it’s glazed with the honey-balsamic glaze to give the duck a beautiful roasted look.
  • Duck Breast with Cranberry Sauce – this recipe will make a perfect main dish for any special night, an anniversary celebration, or holidays, especially Christmas or New Year’s Eve.
  • Lamb Chops with Cranberry Balsamic Reduction – this recipe features holiday ingredients, such as pomegranate seeds and pecans. Simple lamb chops marinade is made of olive oil, lemon juice, garlic, salt, and pepper.
  • Roasted Cornish Hen is made with root vegetables (carrots, sweet potatoes) and onions.

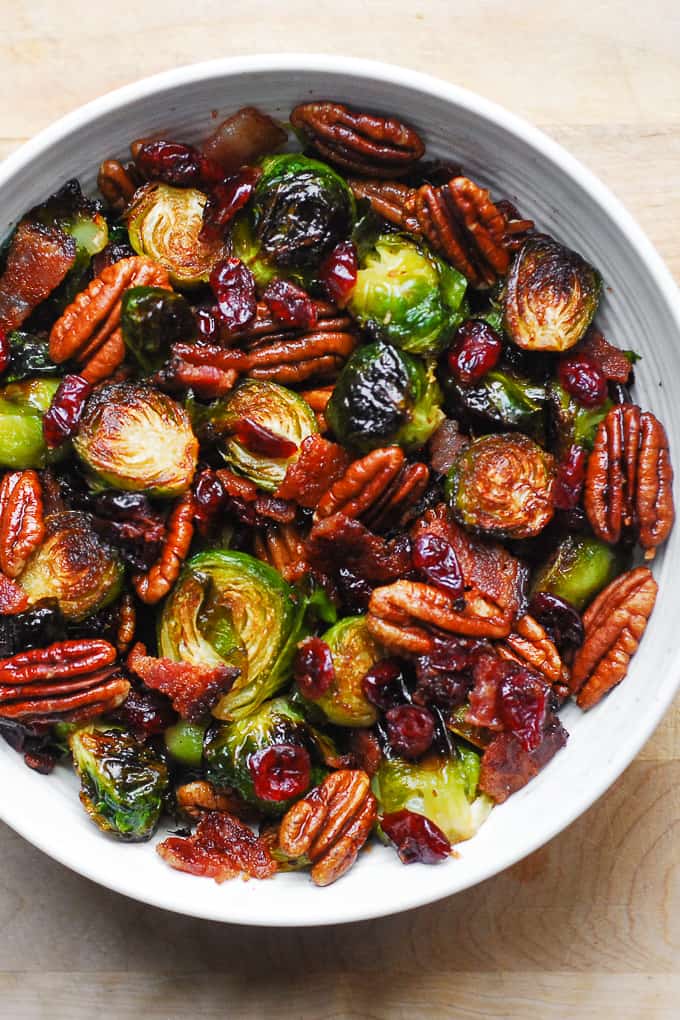
Roasted Brussels Sprouts with Bacon, Pecans, and Cranberries

HOW TO MAKE BRUSSELS SPROUTS WITH BACON

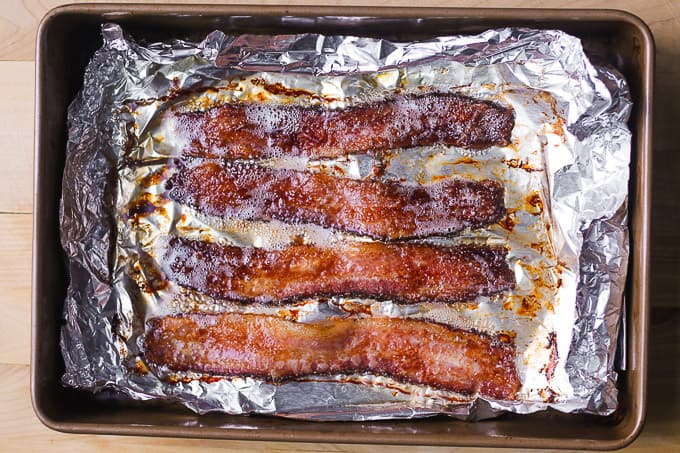
1) Start by cooking the bacon in the preheated oven at 400 F for about 20 minutes. After the bacon is cooked, drain it of fat and chop it up into smaller pieces.
cooking bacon

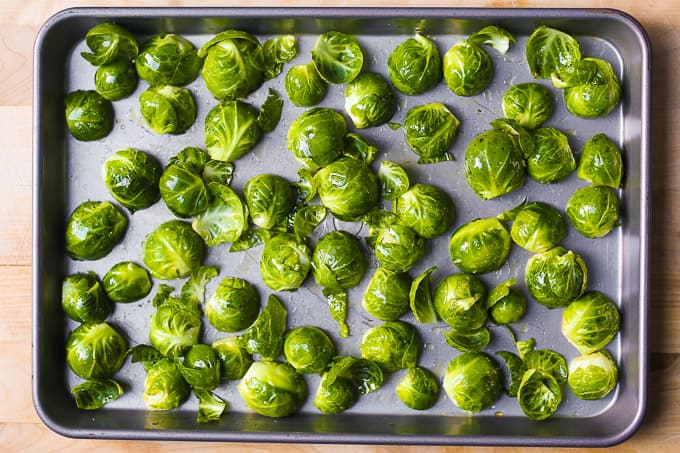
2) Next, prepare the Brussels sprouts by tossing them with olive oil and salt. Add them to a baking sheet.

brussels sprouts with olive oil

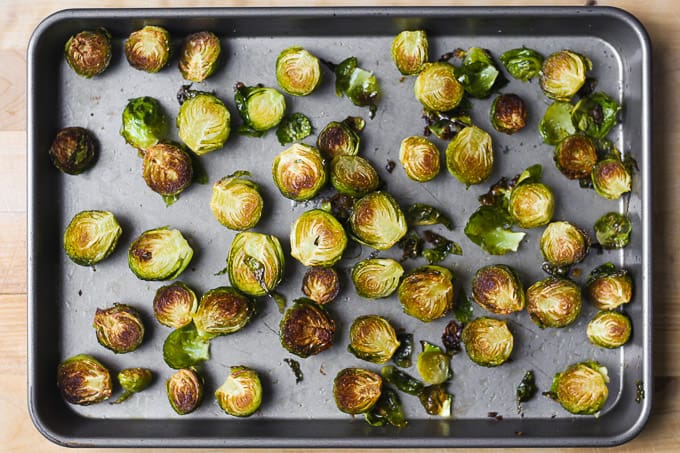
3) Roast the Brussels sprouts in the preheated oven at 400 F for about 20 minutes.

roasted brussels sprouts

4) Finally, in a medium bowl, combine together roasted brussels sprouts, chopped cooked bacon, toasted pecans, and dried cranberries.

Roasted Brussels Sprouts with Bacon, Pecans, and Cranberries

TIPS AND TRICKS

  • To save time, roast both Brussels sprouts and bacon on 2 separate baking sheets at the same time, on the same rack in the oven.
  • Optionally, add 1 tablespoon of olive oil to the final dish.  The dish should already have enough oil from Brussels sprouts and the cooked warm bacon.
  • Soak dried cranberries briefly in hot water to plump them up.  This will make dried cranberries juicier, softer, and more vibrant.

HOW TO MAKE IT AHEAD

  • If you plan to make this dish a day ahead, don’t add nuts. Add nuts only when ready to serve (to make sure they are crunchy).
  • Reheat this dish in a shallow pan, such as a sheet pan or a sheet cake pan lined with parchment paper. Spread the ingredients on a parchment paper-lined sheet pan. Reheat for about 15 minutes in the preheated oven at 350 F. Then add toasted pecans, when ready to serve.

SERVE THIS COLD OR HOT?

  • This dish is best served immediately, warm or at room temperature.

SUBSTITUTIONS

  • Don’t want to use pecans?  Use pumpkin seeds, walnuts, or pine nuts.
  • You can use dried cherries, raisins, or chopped dried figs instead of dried cranberries.
  • What is a good substitution for regular bacon?  Use prosciutto, duck bacon, or turkey bacon.

Brussels Sprouts with Bacon, Pecans, and Cranberries

Christmas Brussels Sprouts with Bacon, Pecans, and Cranberries will add color and vibrancy to your holiday table!   This crispy and crunchy salad might become one of your family’s favorite Christmas side dishes!  Dried cranberries provide a sweet contrast to the savory Brussels Sprouts.  There is a bit of crunch from toasted pecans and chopped cooked bacon.  

  • 12 oz Brussels sprouts (ends trimmed, yellow leaves removed)
  • 2 tablespoons olive oil
  • 1/4 teaspoon salt
  • 4 slices bacon (cooked and chopped)
  • 1 cup pecans
  • 1/2 cup dried cranberries

How to Roast Brussels Sprouts

  1. Preheat oven to 400 F. 

  2. Slice all Brussels sprouts in half.

  3. In a medium bowl, combine halved Brussels sprouts, 2 tablespoons of olive oil, salt, and toss to combine.

  4. Place Brussels sprouts on the baking sheet, cut side down. 

  5. Roast in the oven at 400 F for about 25 minutes. During the last 5-10 minutes of roasting, turn them over for even browning, the cut sides should be partially charred but not blackened.

How to Cook Bacon in the Oven

  1. Line the separate baking sheet with foil.  Add the bacon slices in one layer.  Bake in the preheated oven at 400 F for about 20 minutes or until the bacon is done.  You can do it at the same time as roasting the Brussels sprouts.

  2. Drain bacon of fat and slice the bacon into small bites.

How to Toast Pecans

  1. Line a baking sheet with parchment paper.  Add pecans in one layer.

  2. Toast the pecans for about 5 minutes (maybe a bit longer) in the preheated oven at 350 F until they get darker in color.

Prepare Dried Cranberries

  1. For best results, briefly soak the dried cranberries in hot water.   Bring a small pot of water to boil.  

  2. Add dried cranberries to a medium bowl.  Pour hot water over the cranberries and soak them for about 10 minutes.  Drain.

Assembly

  1. In a large bowl, combine roasted Brussels sprouts, warm chopped cooked bacon, toasted pecans, and soaked dried cranberries.   Toss everything together.  The olive oil from Brussels sprouts and fats from bacon should be enough to coat the ingredients.  If desired, add 1 tablespoon of olive oil to mix with the salad (optional). 

The post Brussels Sprouts with Bacon, Pecans, and Cranberries appeared first on Julia's Album.


from Julia's Album https://ift.tt/2OTLxXf
via IFTTT

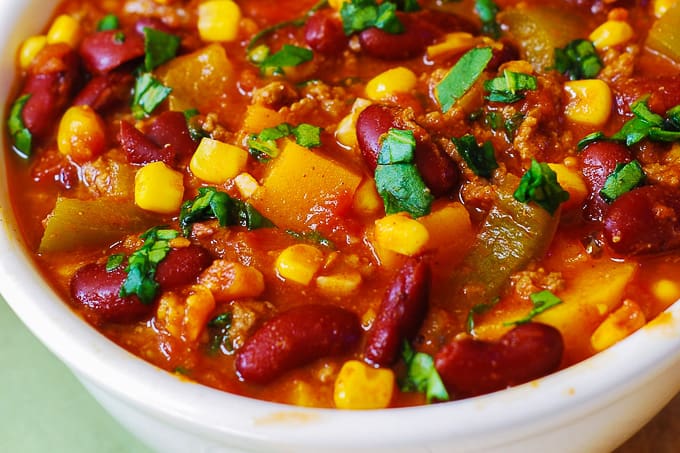
Butternut Squash Chili with Beef and Beans

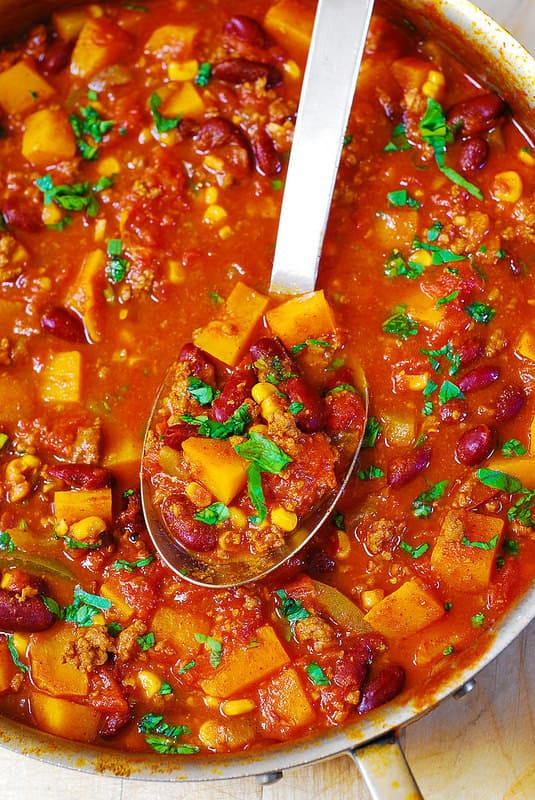
Delicious Butternut Squash Chili with Beans and Beef – healthy alternative to traditional chili.  The ingredient list includes red kidney beans, green bell pepper, corn, garlic, and tomatoes.

Butternut Squash Chili

Butternut squash is a winter squash with a sweet and nutty flavor, and it works great in a chili recipe!  Did you notice that many recipes for a classic chili include a pinch of sugar?  It’s usually done to offset the flavor of the tomato sauce or tomato sauce.  Well, the butternut squash adds just the perfect amount of subtle sweetness to contrast the tomatoes perfectly.   Butternut squash is a perfect addition to any chili recipe.

If you like butternut squash, it’s likely that you enjoy pumpkin as well.  In which case, take a look at pumpkin chili with chickpeas and black beans and pumpkin quinoa chili.

Butternut Squash Chili Recipe

This gluten-free chili is packed with protein, fiber, and nutrients.   It’s healthy comfort food – and makes a hearty dinner in the fall and winter.   The butternut squash chili will also make a great addition to your holiday menu, including Thanksgiving, Christmas, and New Year’s Eve.

Butternut Squash Chili is Winter Comfort Food

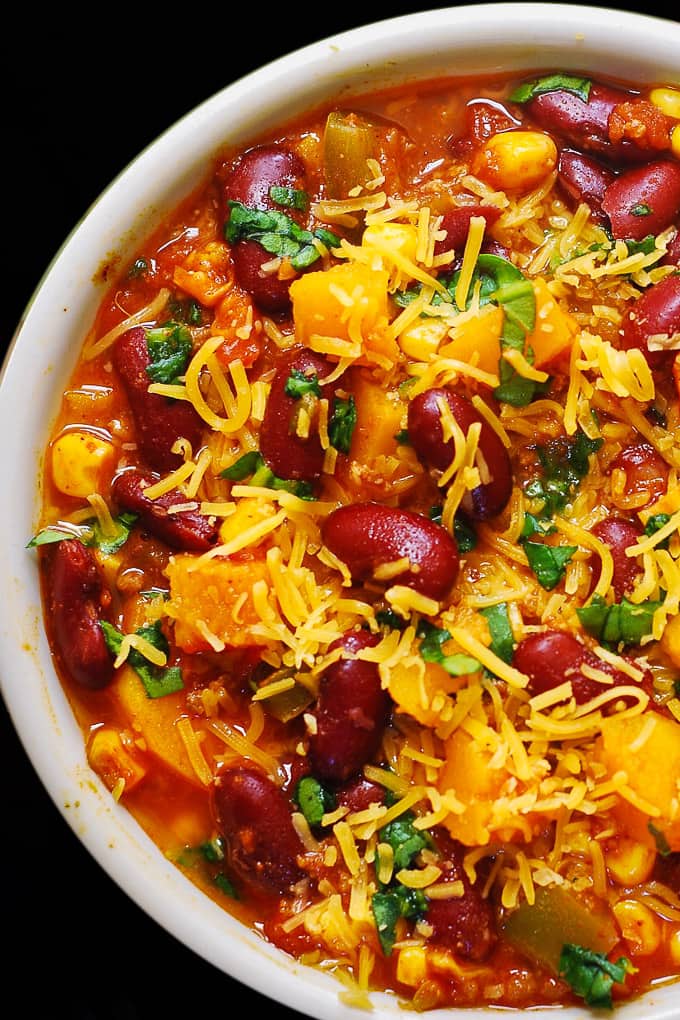
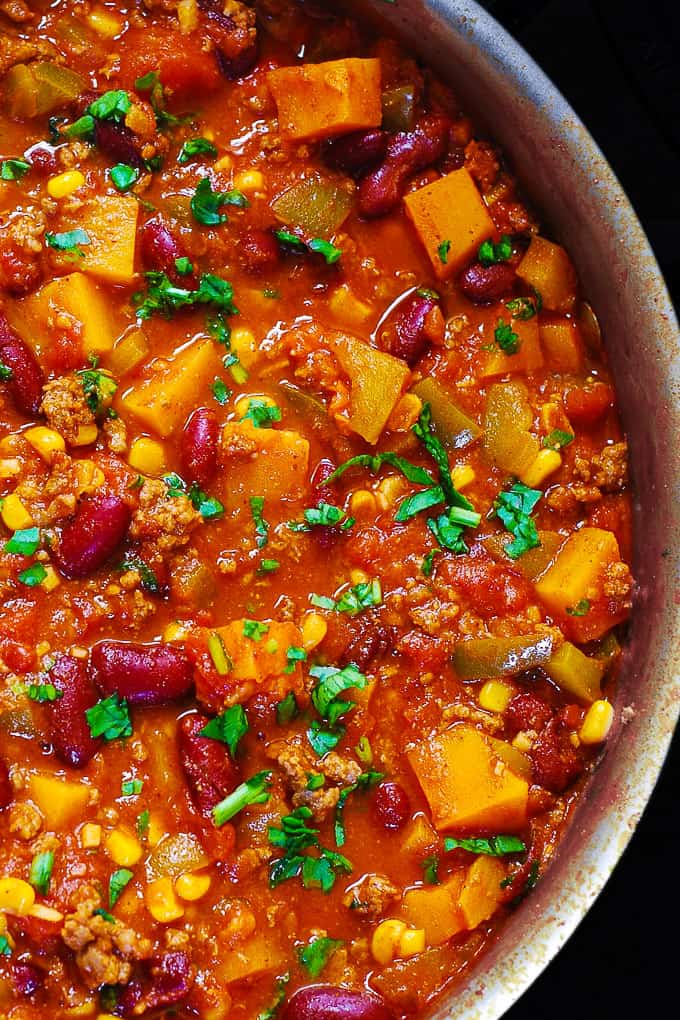
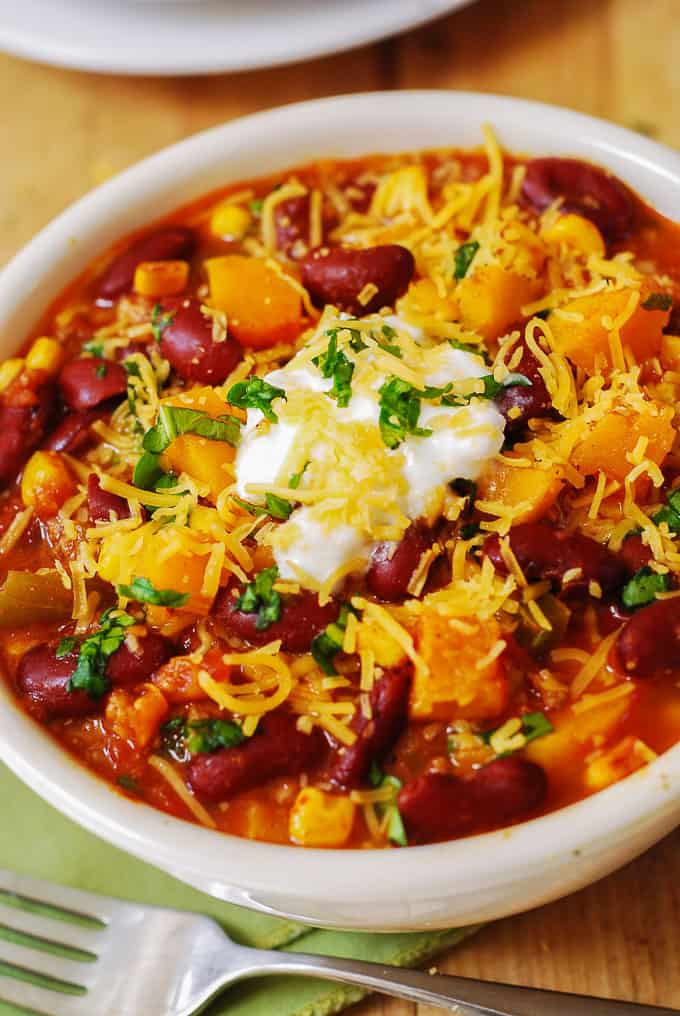
This chili combines cooked beef with cubed butternut squash, chopped green bell pepper, minced garlic, kidney beans, corn, and canned tomatoes. It’s seasoned with chili powder and cumin. Then, it’s topped with shredded cheddar cheese, chopped green onions, and a dollop of Greek yogurt (or sour cream). It’s perfect comfort food on the cold winter nights.

This butternut squash chili is very filling.  It’s a great choice for dinner or lunch to take to work the next day.

Butternut Squash Chili

Healthy Chili Recipe

  • This chili has tons of veggies (butternut squash, bell pepper, garlic, tomatoes).  It’s made with quality ingredients, and it’s gluten-free!
  • Butternut squash is a great source of fiber and potassium.
  • The recommended topping for the butternut squash chili is plain Greek yogurt – a good source of probiotics and calcium.

Butternut Squash Chili Recipe

Toppings for Chili

I garnished the butternut squash chili with a dollop of Greek yogurt and shredded cheddar cheese, and everybody agreed that it was even better than topping the chili with sour cream!

Here are more ideas:

  • Shredded Cheddar Cheese
  • Greek Yogurt
  • Sour Cream
  • Sliced Avocado
  • Guacamole
  • Chopped Tomatoes
  • Salsa
  • Crushed Tortilla Chips

How to store butternut squash chili

  • Cooked chili tastes even better the next day, after being refrigerated overnight.
  • Refrigerate the chili in airtight containers and store in the refrigerator for up to 4 days.

How to make butternut squash chili

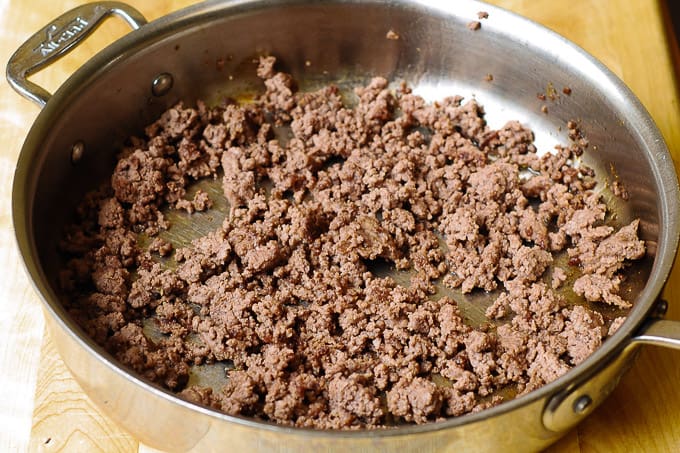
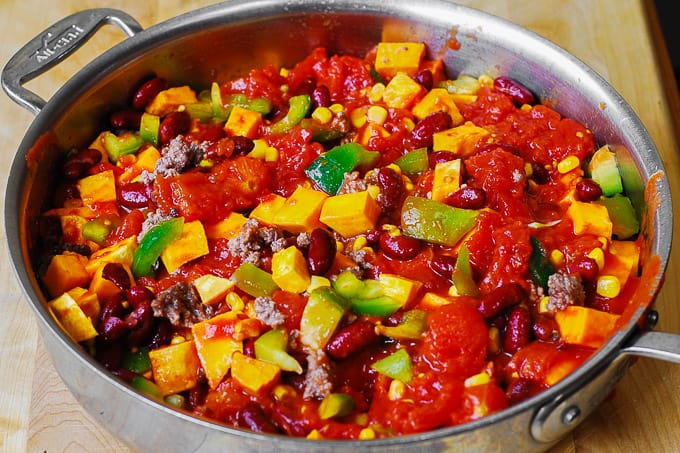
1) Cook ground beef in olive oil in a large skillet until no longer pink. Drain the ground beef of any fat.

Cooking ground beef in a skillet

Cooking ground beef in a skillet

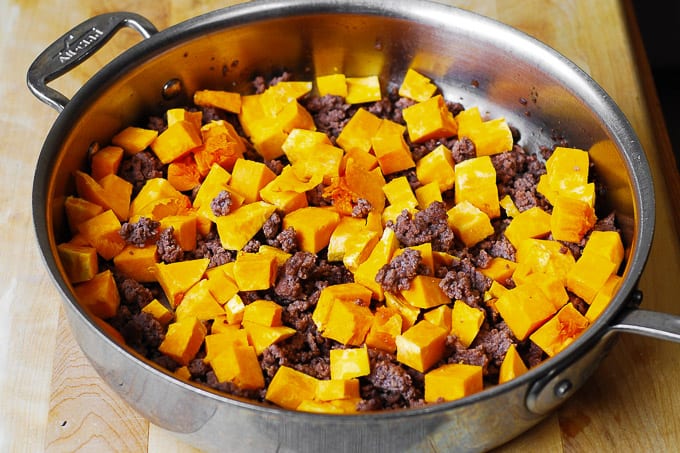
2) To the same pan with cooked ground beef, add cubed butternut squash.

Adding cubed butternut squash to the skillet with cooked ground beef

Adding cubed butternut squash to the skillet with cooked ground beef

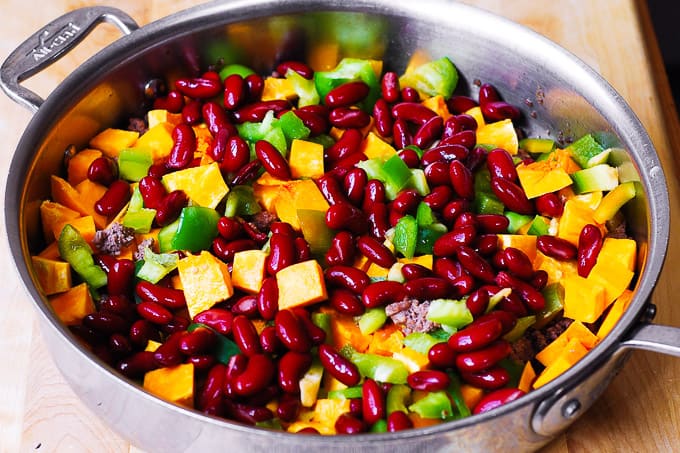
3) Add chopped green bell pepper, minced garlic, and kidney beans.

Adding minced garlic, chopped green bell pepper, kidney beans

Adding minced garlic, chopped green bell pepper, kidney beans

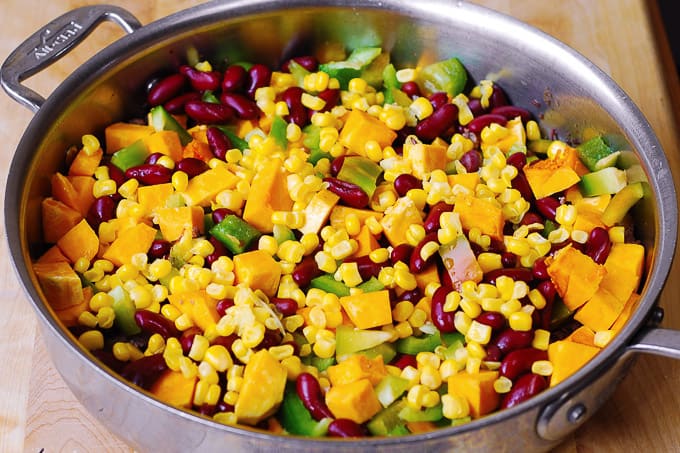
4) Add corn kernels.

Add corn kernels to the skillet

Add corn kernels to the skillet

5) Add canned tomatoes. Use a spoon to break all tomatoes into small bites.

Adding tomatoes

Adding tomatoes

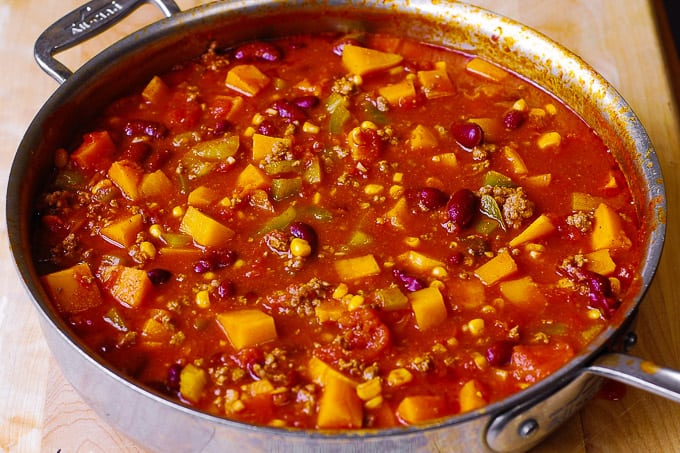
6) Add 2 cups of water. Season with chili powder, cumin, sugar, and salt to taste (at least 1/2 teaspoon of salt). Mix everything well, and bring to boil. Reduce to simmer.

Cooking butternut squash chili on low simmer

Cooking butternut squash chili on a low simmer

7) Cook on a low simmer for about 25 minutes until the butternut squash is tender. Remove from heat. Season with extra spices and extra salt, if needed.

8) Serve butternut squash chili topped with shredded cheddar cheese, chopped green onions, and a dollop of Greek yogurt.

Butternut Squash Chili Recipe

What to serve with Butternut Squash Chili?

Butternut Squash, Bean, and Beef Chili

Other Chili Recipes

Butternut Squash Recipes:

Butternut squash is an amazing vegetable, and it works well in many other recipes, such as salads, lasagna, tortellini, and a casserole. Here are my favorites:

Butternut Squash Chili with Beef and Beans

This healthy chili recipe features butternut squash and beef as the main ingredients.   The chili is gluten-free, packed with veggies, and rich in fiber and protein.  The ingredients include red kidney beans, green bell pepper, corn, garlic, and tomatoes.  This healthy comfort food makes a hearty dinner in the fall and winter.   The butternut squash chili will also be a great addition to your holiday menu, including Thanksgiving, Christmas, and New Year’s Eve.

  • 1 tablespoon olive oil
  • 1 pound ground beef
  • 1 lb butternut squash (peeled and chopped into 3/4 inch cubes (1/4 of whole squash or 2 cups chopped squash))
  • 1 green bell pepper (chopped)
  • 4 garlic cloves (minced)
  • 15 oz red kidney beans (from the can, rinsed)
  • 7.5 oz corn (from the can, rinsed)
  • 28 oz tomatoes (from the can (I used peeled tomatoes Cento San Marzano brand))
  • 2 cups water
  • 1 tablespoon chili powder
  • 1 tablespoon cumin
  • 1 teaspoon sugar
  • 1/2 teaspoon salt (at least )

For garnish:

  • 1/4 cup cheddar cheese (shredded)
  • 4 green onions (chopped)
  • 1/4 cup Greek yogurt
  1. Heat olive oil in a large skillet. Add ground beef and cook until no longer pink. Drain the ground beef of any fat.
  2. To the same pan, add cubed butternut squash, chopped green bell pepper, minced garlic, kidney beans, corn, and canned tomatoes. 

  3. Use a spoon to break all tomatoes into small bites. 

  4. Add 2 cups of water. 

  5. Season with 1 tablespoon chili powder, 1 tablespoon cumin, 1 teaspoon of sugar, and salt to taste (at least 1/2 teaspoon of salt). 

  6. Mix everything well, and bring to boil. Reduce to simmer. Cook on low simmer for about 20-25 minutes until squash is tender. Remove from heat. 

  7. Add extra chili powder, if you want more heat. Season with more salt, if necessary.

  8. Serve topped with shredded cheddar cheese, chopped green onions, and a dollop of Greek yogurt.

This recipe was originally published on October 21, 2014, and republished with updates in November 2019.

The post Butternut Squash Chili with Beef and Beans appeared first on Julia's Album.


from Julia's Album https://ift.tt/34N2Kqc
via IFTTT

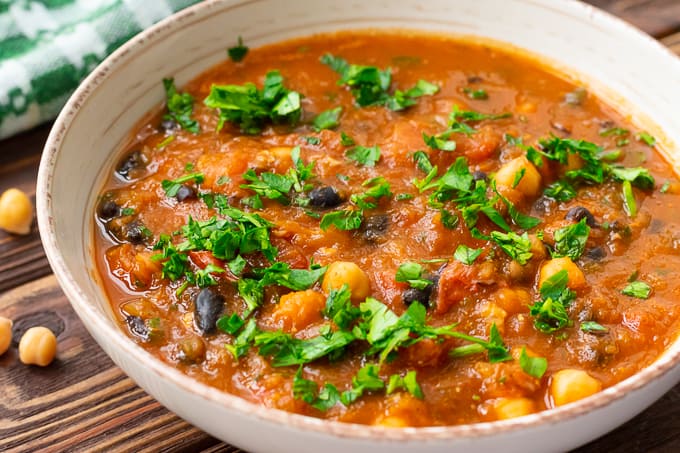
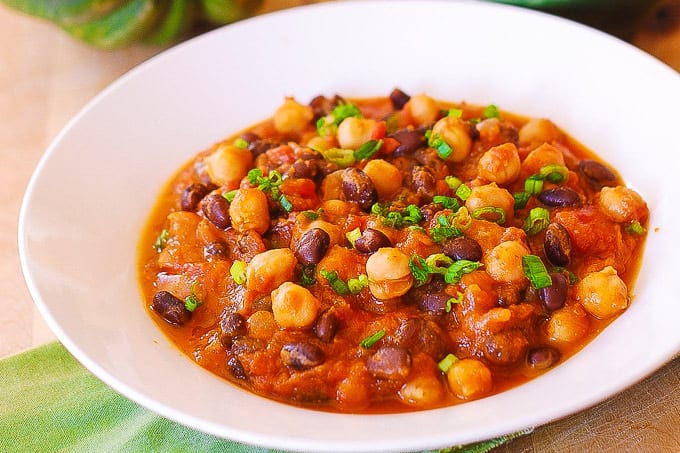
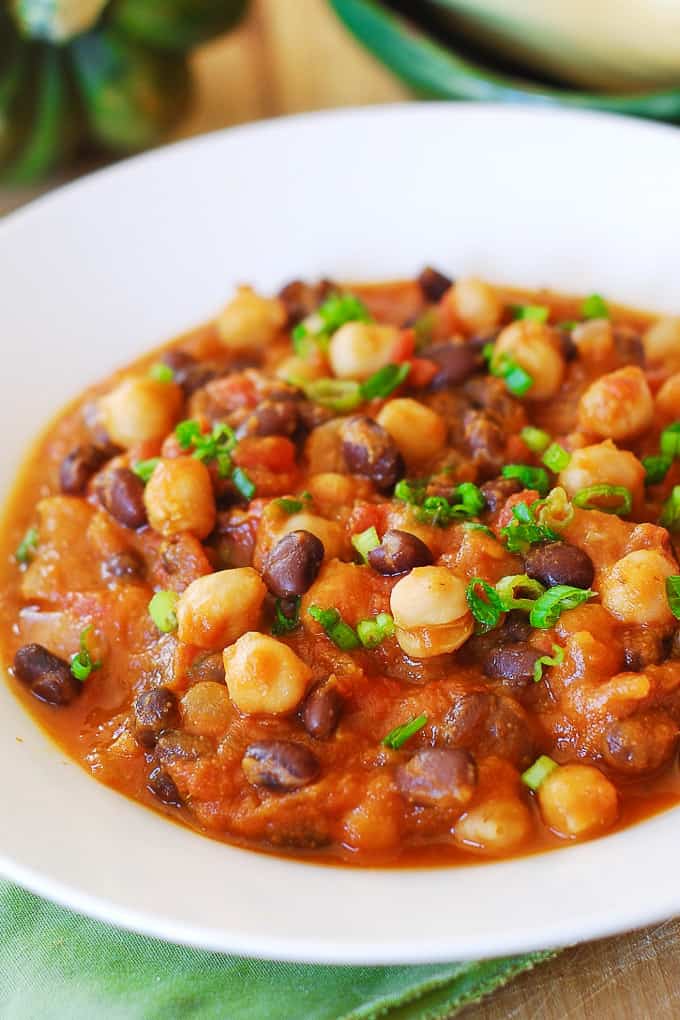
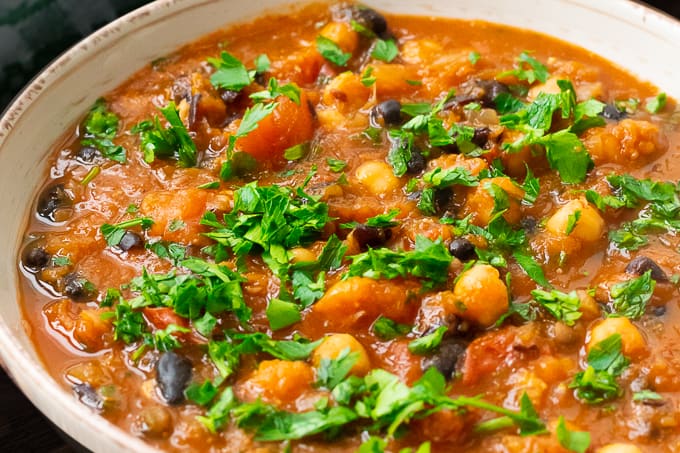
Pumpkin Chili (Healthy and Gluten-Free Recipe)

Pumpkin Chili with Black Beans and Chickpeas is a great alternative to a regular chili!  This healthy and gluten-free stew is a perfect family weeknight dinner for those cold days in the Fall or in the Winter.

Pumpkin Chili Recipe

What could be better than healthy comfort food on a cold night? This pumpkin chili is so good – it will disappear fast from your table.  I am so happy to share this recipe because it is such a winner and is so different from a regular chili!

This recipe features black beans and garbanzo beans (chickpeas) instead of meat.  However, you can add any type of cooked ground meat (beef, pork, or chicken) to this chili if you like. The recipe is super versatile.  This pumpkin chili is healthy, vegetarian, and gluten-free.

If you want to try other interesting versions of regular chili, check out butternut squash chili and pumpkin quinoa chili.

Pumpkin Chili – Savory Recipe

  • This is definitely a SAVORY pumpkin chili, without any sweetness or spices that are usually associated with pumpkin.
  • This is chili, first and foremost, so the only spices here are chili powder and cumin, just like in a regular chili.
  • There is no cinnamon, no nutmeg, no pumpkin pie spices in this recipe.

pumpkin chili

Healthy and Gluten-Free

  • This pumpkin chili is packed with fiber and protein and rich in nutrients.
  • Garbanzo beans (or chickpeas) contain some key vitamins and nutrients, such as iron, zinc, phosphate, and vitamin K.
  • Black beans are a source of manganese, zinc, copper, calcium, and magnesium.
  • Tip: when buying beans, get the variety with no salt added to reduce your sodium intake.

Pumpkin Chili with Black Beans and Chickpeas

Substitutions

  • This recipe includes 2 types of beans: black beans and garbanzo beans.  You can also use any other type of white beans instead of garbanzo beans.
  • This recipe does not have meat, however, you can include any type of meat of your choice, such as cooked ground beef, chicken, turkey, or pork.  You can also add finely shredded cooked beef, chicken or turkey.

Pumpkin Chili Recipe


Tips for making the best pumpkin chili

  • Just like with any chili recipe, the spiciness is a very individual thing.  This recipe provides the exact amount of spices to use, however, use your own taste as a guide.  Add extra cumin or chili powder, depending on how spicy and flavorful you like your chili.
  • Don’t add 2 tablespoons of chili powder all at once to the pumpkin chili.  Add 1 tablespoon of chili powder first, taste the chili, and then proceed with the second tablespoon.
  • Make sure to add salt at the same time when adding spices.  This will help you to get the right amount of seasoning and spiciness.
  • The recipe produces 4 medium-size servings.  You might have to double the recipe if you plan to serve this for dinner as the only meal for 4 people.

Pumpkin Chili Recipe with Garbanzo Beans and Black Beans

Other Pumpkin Chili Recipes

What to serve with Pumpkin Chili?

Pumpkin Chili (Gluten-Free Recipe)

Pumpkin Chili with Black Beans and Chickpeas is a great alternative to a regular chili recipe!  It makes a perfect Autumn recipe, especially during the holiday season.  An excellent recipe to make for Thanksgiving and Christmas!  

  • 1 tablespoon olive oil
  • 1 onion (chopped)
  • 4 garlic cloves (minced)
  • 1 cup pumpkin puree (from the can or homemade)
  • 1 cup tomatoes (from the can)
  • 1 cup vegetable stock (or water)
  • 15 oz black beans ((425 g), from the can)
  • 7.5 oz garbanzo beans ((212 g), from the can)
  • 1 tablespoon cumin powder ((start with half the amount, and add more, to taste))
  • 2 tablespoons chili powder ((start with 1 tablespoon, and add more, to taste))
  • salt and pepper
  1. In a large pot or skillet, cook chopped onion and minced garlic in olive oil for about 5 minutes on medium heat until soft.

  2. Add pumpkin, canned tomatoes (chop them up into smaller chunks), vegetable stock (or water), black beans and garbanzo beans. 

  3. Add half the cumin and half the chili powder, stir everything well, and season with salt and pepper. 

  4. Taste your chili, season some more with salt and pepper if needed. 

  5. Add the remaining cumin (or more) and remaining chili powder (or more), if desired. 

  6. Bring to boil, make sure to stir all ingredients well together to combine flavors and spices. 

  7. Reduce to simmer and cook for 20 minutes on simmer.

  8. Serve in soup bowls, garnished with chopped green onion.

This recipe was originally published on November 4, 2013, and republished with updates in November 2019.

The post Pumpkin Chili (Healthy and Gluten-Free Recipe) appeared first on Julia's Album.


from Julia's Album https://ift.tt/32setc7
via IFTTT

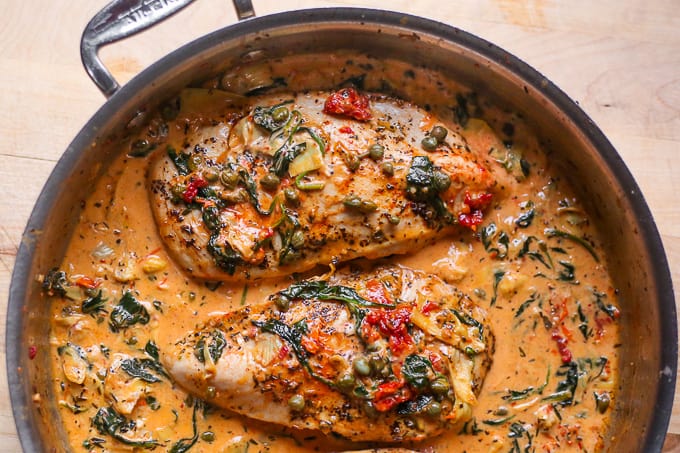
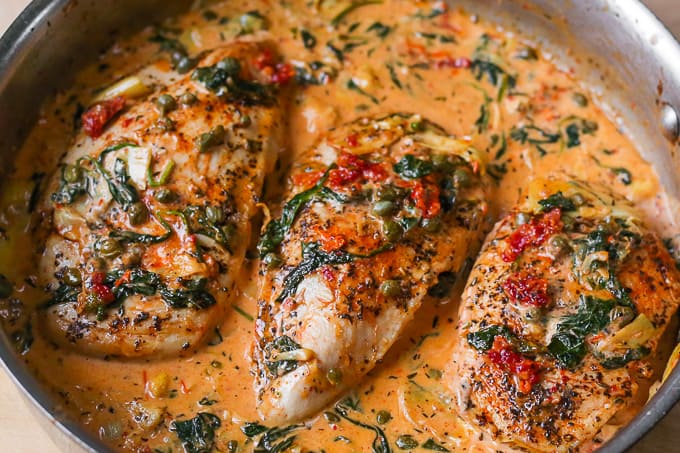
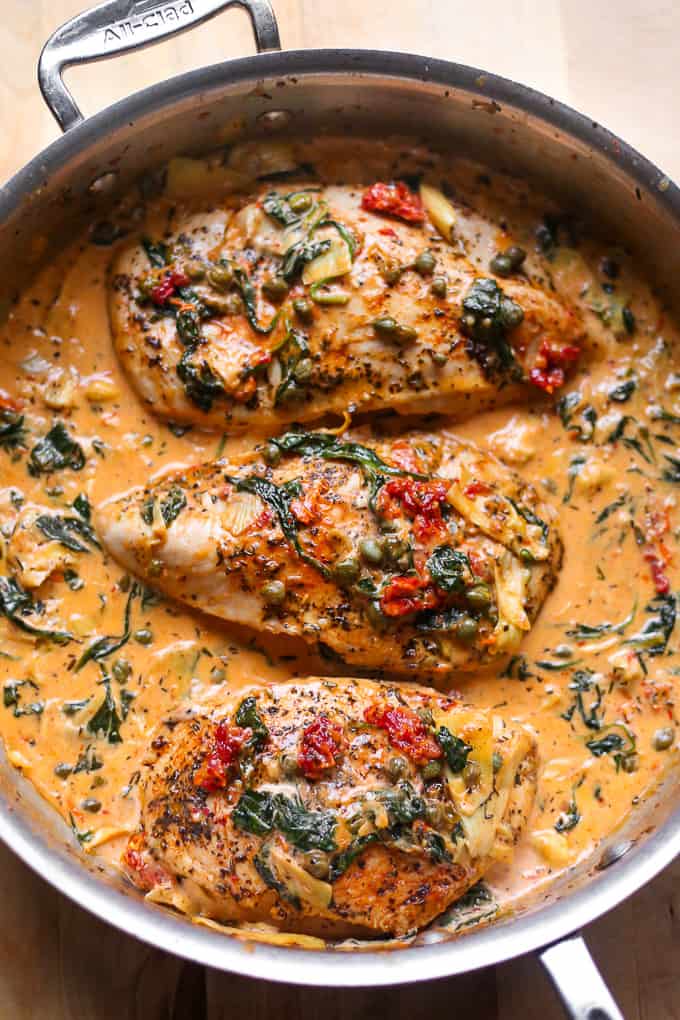
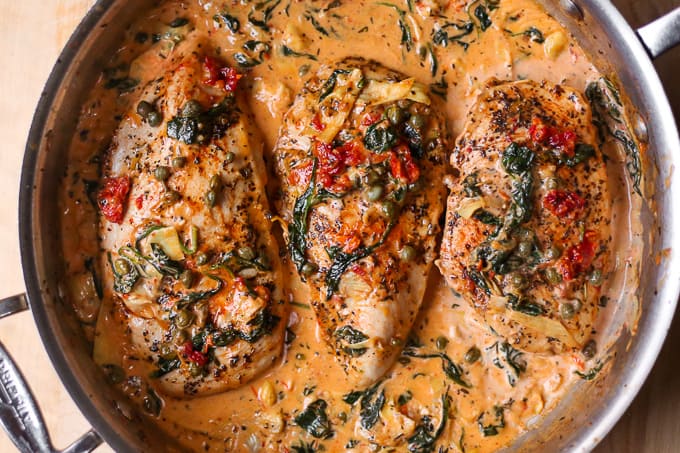
Creamy Tuscan Chicken with Spinach and Artichokes

Creamy Tuscan Chicken is a quick and easy one-pot meal that will become one of your favorite dinners!  The garlic cream sauce is made with spinach, artichokes, sun-dried tomatoes, and capers.  The recipe takes only 30 minutes – it’s a perfect choice for a family weeknight dinner.

Creamy Tuscan Chicken with Sun-Dried Tomatoes, Spinach, Artichokes, and Capers

If you love Italian-style recipes, give a try to this pan-seared Tuscan chicken.  What makes it special and different from many other recipes is that the creamy garlic sauce uses a wide array of vegetables: spinach, artichokes, sun-dried tomatoes.  Capers add a little tang to the already flavorful sauce.

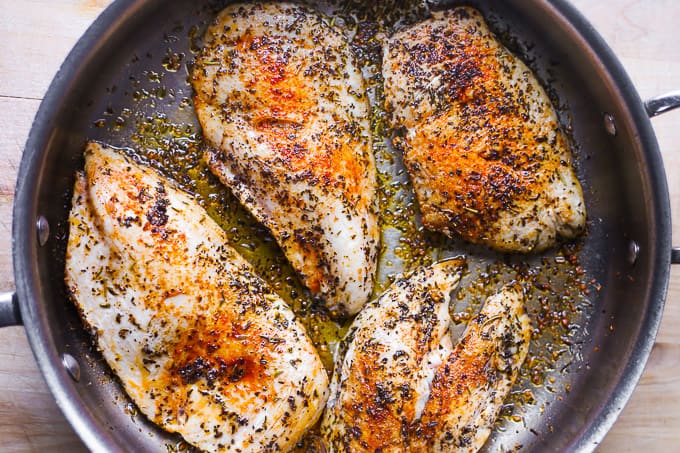
In this one-pan recipe, the boneless and skinless chicken breasts are coated with Italian seasoning and then quickly seared before being smothered in a silky garlic Tuscan cream sauce. The cooked chicken has a perfect texture: soft and juicy, without a hint of dryness.

It’s a great family-friendly dinner that incorporates many veggies and tastes like something from a high-end restaurant.  This is a keto-friendly and gluten-free recipe.

Creamy Tuscan Chicken with Spinach, Artichokes, Sun-Dried Tomatoes, Capers

This recipe is similar to the Tuscan salmon recipe I posted a while back – it features a similar sauce with the same veggies.  If you love veggies, serve this creamy Tuscan chicken with sautéed spinach or Asiago roasted broccoli (you can also use Parmesan instead of Asiago).

Creamy Tuscan Chicken

Tips for searing chicken

  • What type of chicken to use? Use thinly sliced skinless boneless chicken breasts.
  • Pat dry chicken. Make sure the chicken breasts are completely thawed.  Pat dry the chicken with paper towels to get rid of extra moisture.
  • What pan to use. Use a large skillet (stainless steel, cast iron, or non-stick).
  • What temperature? Heat the pan on medium-high heat until hot, and then add olive oil.  Immediately add seasoned chicken breasts.
  • How long to sear? Sear for about 4 minutes on one side on medium-high heat, then turn over to the other side and sear for another 4 minutes.  In this particular recipe, the chicken will continue cooking in the sauce until it’s completely cooked through.

Garlic cream sauce for chicken

The cream sauce is made with heavy cream, garlic, and veggies.  There is no flour or cheese used.   It’s a gluten-free, keto-friendly sauce.   Chicken breasts are generously coated with the sauce which helps to keep the chicken moist, tender, and flavorful.

Creamy Tuscan Chicken

How to make creamy Tuscan chicken

1. Season chicken on both sides with Italian seasoning, salt and pepper, and other spices.

2. Sear the chicken in 2 tablespoons of olive oil in a large skillet on medium-high heat, about 4 minutes on each side.

Seared chicken in a skillet

Sear the chicken in a large skillet

3. Remove the chicken from the skillet.

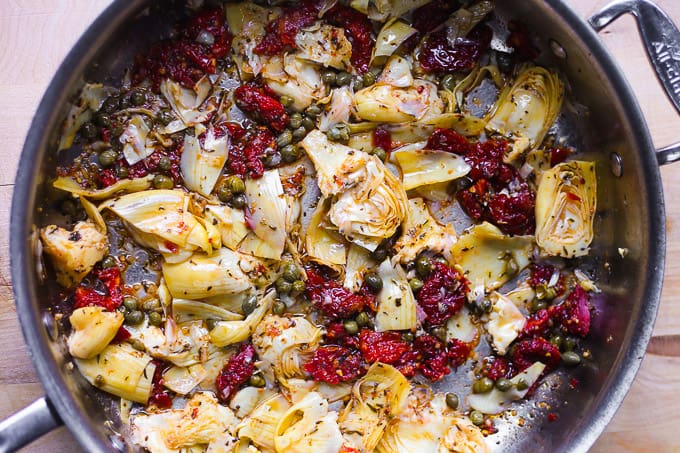
4. To the same, now empty, skillet, add minced garlic, chopped sun-dried tomatoes, chopped artichokes, capers. Cook, stirring, for 1 minute on medium heat.

Sun-dried tomatoes, artichokes, capers in a skillet

Sun-dried tomatoes, artichokes, capers in a skillet.

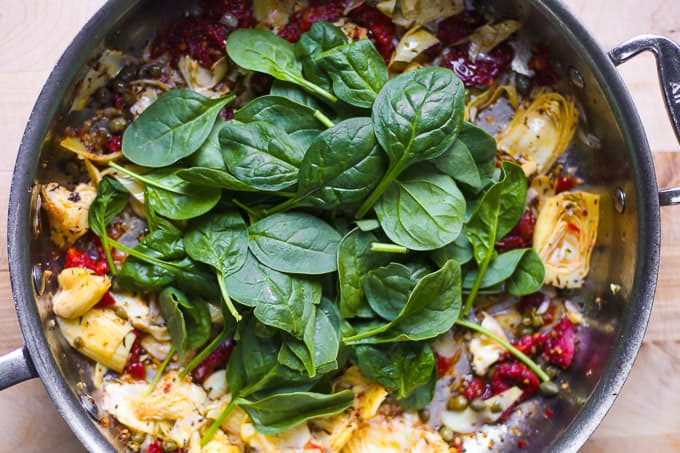
5. Add fresh spinach.

Spinach, artichokes, sun-dried tomatoes, capers in a skillet

Spinach, artichokes, sun-dried tomatoes, capers in a skillet

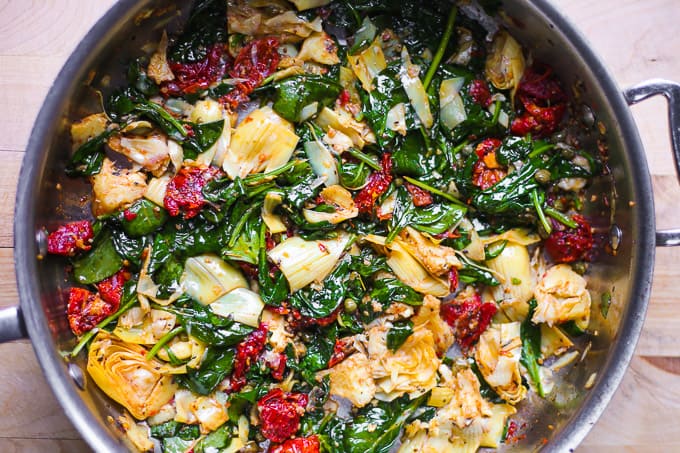
6. Cook until the spinach wilts, for a couple of minutes, on medium heat.

Wilted spinach with other veggies in a skillet

Wilted spinach with other veggies in a skillet

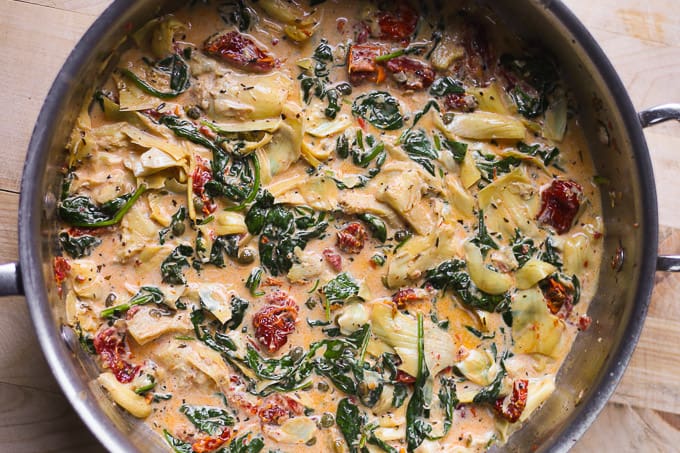
7.  To make the sauce, add 1 cup of heavy cream and paprika to the skillet with sautéed vegetables. Bring to simmer. Simmer for about 1 minute, stirring. Season with salt, if desired. Add more paprika, if you like.

Cream sauce in a skillet

The cream sauce in a skillet

8. Add cooked chicken to the skillet with the cream sauce.

9. Spoon the sauce over the chicken, and simmer for about 2 minutes (or more), until the chicken is warmed up and completely cooked through. Season with salt, if needed.

Creamy Tuscan chicken

Creamy Tuscan chicken

What to serve with creamy Tuscan chicken

  • Green Veggies.  The garlic cream sauce will work great over roasted green veggies.  I recommend roasting or steaming broccoli, asparagus, or green beans.  You can also serve the chicken over sauteed spinach, kale, or Swiss chard.
  • Pasta.  What can be more perfect than pairing some pasta or ravioli with the delicious Tuscan cream sauce and the chicken?  Use thin pasta, such as angel hair or spaghetti.  You can use many types of store-bought ravioli with this recipe.  You can also make your own homemade ravioli if you like.
  • Spaghetti Squash.  For a healthier side dish, roast spaghetti squash in the oven and then scrape out the spaghetti squash strands with the fork.
  • Zucchini Noodles.  Another healthy alternative is to use zucchini noodles.  You can buy those in the store or make them yourself!

Other creamy chicken recipes

Chicken is an excellent source of protein, and when prepared appropriately it makes a great addition to your diet.   Here are some ideas for your next weeknight dinner:

Other Italian-inspired recipes

Italian recipes are always flavorful and often feature a cream sauce and/or lots of veggies.  That’s why they are a great choice for a delicious family dinner!  Below are my favorites:

Creamy Tuscan Chicken with Spinach and Artichokes

Creamy Tuscan Chicken with Spinach, Artichokes, Sun-Dried Tomatoes and Capers.   The chicken is coated with Italian seasoning,  is quickly pan-seared and then covered in a delicious garlic cream sauce.  The chicken breasts are moist and tender.  This family weeknight dinner is ready in just 30 minutes!

Chicken

  • 4 chicken breasts (boneless, skinless (thin))
  • 1/4 teaspoon salt
  • 1/4 teaspoon black pepper (coarse)
  • 1/4 teaspoon paprika
  • 1/4 teaspoon garlic flakes
  • 1/2 teaspoon Italian seasoning ((dried herbs: thyme, basil, oregano, rosemary))
  • 2 tablespoons olive oil

Garlic Cream Sauce

  • 3 cloves garlic (minced)
  • 1/4 cup sun-dried tomatoes (chopped)
  • 1 cup artichoke hearts (drained and chopped)
  • 2 tablespoons capers (drained)
  • 6 oz spinach (fresh)
  • 1 cup heavy cream
  • 1/4 teaspoon paprika
  • salt (to taste)

How to sear chicken

  1. Season the chicken on both sides with salt, paprika, coarse black pepper, garlic flakes, Italian seasoning.  

  2. Heat the large skillet on medium-high heat until hot.  Add 2 tablespoons of olive oil.

  3. When the oil is hot, add the chicken. Sear for about 4 minutes on medium-high heat.

  4. Reduce heat to medium.  Flip the chicken to the other side. Sear for another 5 minutes on medium heat.

  5. Remove the chicken from the skillet.

How to make garlic cream sauce

  1. To the same, now empty, skillet, add minced garlic, chopped sun-dried tomatoes, chopped artichokes, capers. Cook, stirring, for 1 minute on medium heat.

  2. Add fresh spinach.  Cook until the spinach wilts, for a couple of minutes, on medium heat.

  3. To the skillet with sautéed vegetables, add 1 cup of heavy cream and paprika. Bring to simmer. Simmer for about 1 minute, stirring. Season with salt, if needed. Add more paprika, if you like.

Assembly

  1. Add cooked chicken to the skillet with the cream sauce.

  2. Spoon the sauce over the chicken, and simmer for about 2 minutes (or more), until the chicken is warmed up and completely cooked through. 

  3. Season with salt, if needed.

The post Creamy Tuscan Chicken with Spinach and Artichokes appeared first on Julia's Album.


from Julia's Album https://ift.tt/2NxEIZy
via IFTTT

10 Things To Do in NYC in December

New York City is one of the most beautifully and skillfully decorated cities around Christmas and New Year’s Eve.  Spending some time in December in New York is a great way to get into the holiday mood. Discover the Top Things To Do in NYC in December!

10 Things To Do in NYC in December

10 Things To Do in NYC in December

New York City is one of the most fun cities in the world during the holiday season. The activities abound, the whole city gets decorated with holiday lights, Christmas decorations, and intricate window displays.

Spending holidays in NYC can get expensive, but there are SO MANY fun free things to do (and to see!) in New York City in December.   And, that’s what this post is all about.  Here is my list of Top 10 Things To Do in NYC during the winter holiday season:

Rockefeller Center skating rink, Rockefeller Center Christmas Tree, Rockefeller Center people skating

10 Things To Do in NYC in December

1.  Gigantic Christmas decorations and lights in midtown Manhattan

Giant red ornaments at 1251 Sixth Avenue, near Rockefeller Plaza in NYC are a spectacular sight.   If you let your imagination run wild, these Christmas ornaments will remind you of huge caramelized apples or gigantic pomegranates, quite appropriately for the season!  Very shiny and deliciously looking, aren’t they?

gigantic ornaments in New York City, NYC at Christmas

When visiting NYC in December, be sure not to miss the gigantic Christmas lights on 6th Avenue. They look like huge lipsticks of different colors or rockets ready to launch, don’t they?

gigantic Christmas tree lights in New York City, NYC Christmas

There are beautiful lights everywhere in midtown Manhattan:

Christmas lights in midtown Manhattan, NYC, New York City

Christmas lights and flags in Rockefeller Plaza NYC, New York City

2. Christmas Tree at Rockefeller Plaza

Rockefeller Center is one of the main attractions in NYC.  Especially in the winter.  It is home to the iconic Christmas Tree, that’s over 70 feet tall this year.

Christmas tree at Rockefeller Center

The tree is placed right in front of the Rockefeller building.

Christmas Tree - Rockefeller Center

Christmas Tree – Rockefeller Center

This iconic NYC Christmas tree is topped with the Swarovski star topper composed of multiple precision-cut crystals.    A replica of the Swarovski star is also on display in the Rockefeller Center – and you can see all the intricate detail, crystals and facets up-close, which is pretty cool:

a replica of the Swarovski star, star topper to NYC Rockefeller Center Christmas tree

A little further, you can see a famous bronze statue of Atlas in front of Rockefeller Center. In Greek mythology, Atlas was forced by Zeus to hold up the heavens as a special punishment – as we can see on this photo:

Atlas statue at Rockefeller Center NYC

3. The Rink at Rockefeller Center

One of the most world-famous ice rinks is located right at the Rockefeller Center.  Constructed in the 1930’s, the ice rink is very popular with tourists and visitors.  If you are in NYC in December, be sure to walk by the Rockefeller Center and watch the people skate on this spectacular rink.

skating rink at Rockefeller Center NYC, Prometheus bronze gilded statue New York City

This skating rink is right underneath the Christmas tree and the bronze gilded statue of Prometheus.

Christmas tree at Rockefeller Center

A little further from the Christmas tree, there is a cute alley decorated with the wire-sculpted angel figures.  Each herald angel holds six-foot-long brass trumpet:

angels at Rockefeller Center

Giant toy soldier at Rockefeller Center NYC:

gigantic Christmas toy soldiers, Rockefeller Plaza NYC

4. Radio City Music Hall

Radio City Music Hall is home to the traditional NYC Christmas show – The Radio City Christmas Spectacular featuring the women’s dance team known as the Rockettes.

Radio City Music Hall, Christmas

The front of the music hall is decorated with a huge Christmas tree that constantly changes colors.

Radio City Music Hall, Christmas

5. The Saks Fifth Avenue Holiday Windows

Every Christmas season, Saks Fifth Avenue’s flagship store in NYC unveils the store’s iconic holiday windows. Besides the holiday windows, the entire facade of the iconic luxury retailer is also decorated with intricate light display:

Saks fifth avenue Christmas

6. Strolling along 5th avenue from the Rockefeller Center towards Central Park

Take a stroll from the Rockefeller Center towards Central Park, along the 5th avenue and you’ll see many beautifully decorated buildings and displays in December. This is how the world’s premier jeweler Tiffany & Co. is decorated during the holiday season:

Tiffany store on 5th avenue NYC decorated for Christmas

And here is Harry Winston jewelry store decorated with elegant Christmas lights:

Harry Winston store on fifth avenue decorated for Christmas

7. Giant Snowflake in NYC

As you continue walking along the Fifth avenue from the Rockefeller Center towards the Central Park, you will see a giant snowflake above the intersection of 5th avenue and 57th street. This snowflake is known as UNICEF snowflake, and it’s a beautifully illuminated crystal ornament that lights up the Fifth Avenue at night.

giant snowflake in NYC, snowflake above the intersection of 5th avenue and 57th street, UNICEF snowflake

8. Plaza Hotel

Right by where the Central Park starts at the 5th avenue, you can see The Plaza Hotel, an iconic century-old luxury hotel.

Plaza hotel NYC

Right next to the Plaza hotel, is the Pulitzer Fountain in Grand Army Plaza. During the winter holiday season, the basin of the fountain is decorated with lighted trees.

Pulitzer Fountain Central Park NYC, near Plaza Hotel and Apple Store

9. Hanukkah Menorah

And here is the World’s largest Hanukkah Menorah.  It’s a 32-foot-high, gold-colored, 4,000-pound steel structure at Grand Army Plaza. It’s located on Fifth Avenue and West 59th Street, across the street from The Plaza hotel.

World's largest Hanukkah Menorah, Grand Army Plaza, Fifth Avenue and West 59th Street, across the street from The Plaza hotel

10. The Empire State Building Tower Lights

The Empire State Building tower lights are visible from many points in the city. The building has a computer-driven LED light system capable of displaying different kinds of lights. The Empire State Building looks especially spectacular in December during the holiday season.

The Empire State Building tower lights

The Empire State Building tower lights

Extra Things To Do in NYC in December

If you are still not tired from walking along Fifth Avenue, visiting the Rockefeller Plaza, and watching stunning holiday windows displays, there are 5 more things for you to do in NYC in December!

1.  Saint Patrick’s Cathedral

Saint Patrick’s Cathedral is another popular attraction in NYC that attracts millions of people each year.

St. Patrick's Cathedral NYC, New York City

2. The Frick Collection Museum and The Metropolitan Museum of Art

There are many amazing art museums in NYC. If you’re cold or tired from walking, visit The Frick Collection Museum and The Metropolitan Museum of Art.

3. Broadway Theaters & Times Square

Finally, no December visit to NYC is complete without watching a holiday Broadway show. Get yourselves tickets to shows, such as the Phantom of the Opera, Big Apple Circus, or How the Grinch Stole Christmas, among many others!

4. Apple Fifth avenue

Across from the Plaza Hotel, is an iconic Apple Store glass cube on Fifth Avenue. This Apple retail location is open 24 hours a day, 365 days a year.

Apple Store glass cube New York City across from Plaza hotel

Apple Store glass cube at the base of the General Motors building

5. Walking in Manhattan

New York City turns into a magical place in December. The buildings get beautifully decorated, the city is beautifully lit, and walking in Manhattan becomes an experience in itself. The city looks joyful and stunning both during the day and at night in December.

Rockefeller Plaza, toy soldiers, Christmas in NYC, New York City Christmas

This post was originally published in December 2014. It was updated and republished in October 2019.

The post 10 Things To Do in NYC in December appeared first on Julia's Album.


from Julia's Album https://ift.tt/32YI0vi
via IFTTT