Honey Lime Chicken Thighs
Pan-Roasted Honey Lime Chicken Thighs – one of the best chicken thigh recipes you’ll ever try! Easy, delicious, simple ingredients.
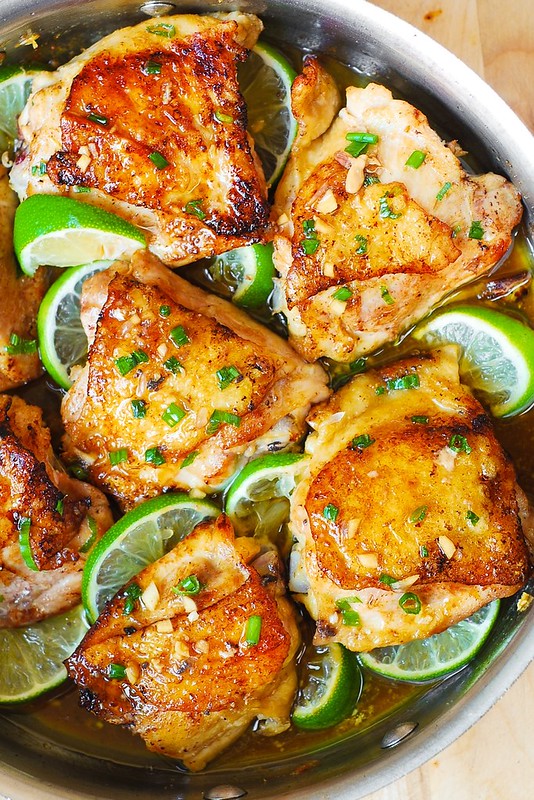
I love cooking chicken thighs – they are so easy to handle, and always come out moist and juicy. Can’t really go wrong with this cut of meat. You’ll love this simple recipe – perfect for a quick, weeknight dinner, and very budget-friendly too!
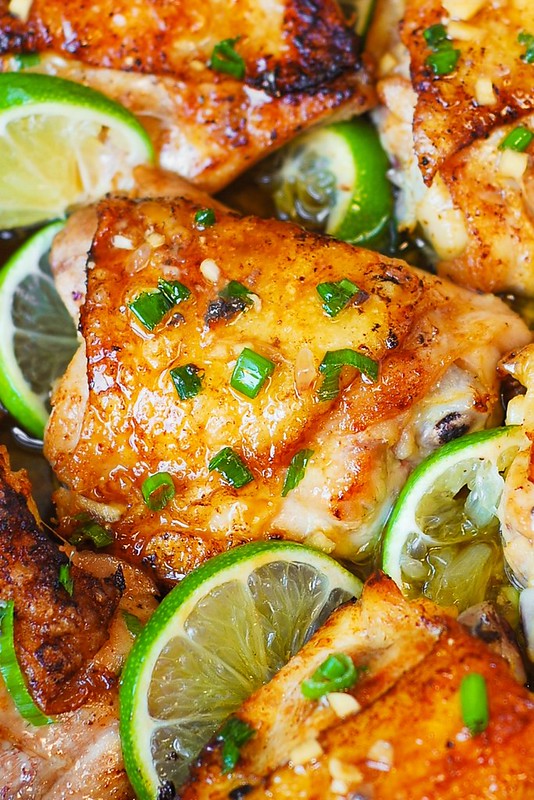
Often, chicken thigh recipes involve baking the thighs in the oven, but here I am browning the chicken in a large skillet on the stove top, then add honey-lime mixture to the same skillet and let the thighs cook in its own juices on lower heat for about 20 minutes. During the cooking process the chicken thighs release their juices which get mixed in with the honey-lime mixture to produce really delicious sauce which you will then drizzle over the chicken before serving. You can also drizzle these pan juices over a side dish, such as rice. YUM! By the way, if you need an idea for a yummy side dish recipe, here is a rice recipe which will be perfect with these chicken thighs: Cilantro-Lime Black Bean Rice.
Also, many people really like chicken thigh recipes with cilantro and lime, and I have a great recipe for you that has all the ingredients you’ll love, everything is cooked in one-pan, which makes the clean-up a breeze. Check it out: Chicken Thighs with Cilantro-Lime Black Bean Rice.
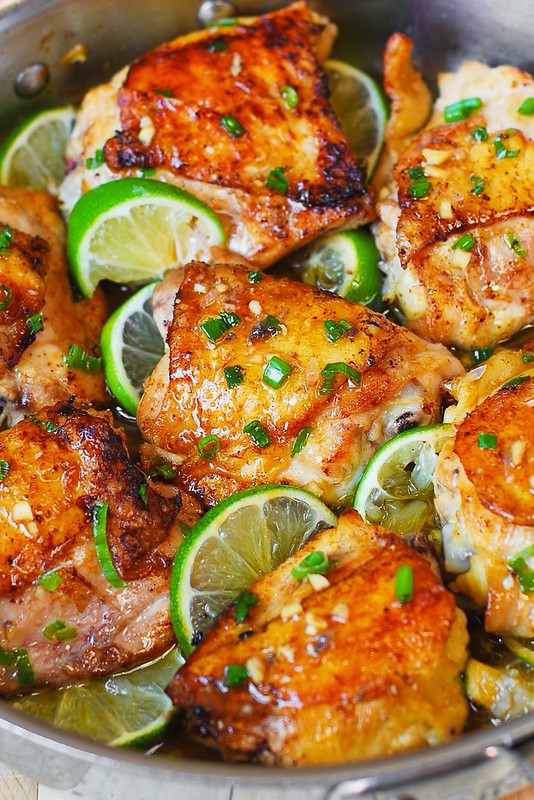
Honey Lime Chicken Thighs

Pan-Roasted Honey Lime Chicken Thighs – one of the best and the easiest chicken thigh recipes you’ll ever try!
- 4 tablespoons lime juice (freshly squeezed)
- 2 tablespoons honey
- 1 tablespoon soy sauce
- 7 chicken thighs ((about 7 or 8 chicken thighs, depends on the size of your skillet))
- 1/2 teaspoon salt
- 2 tablespoon olive oil
- 2 green onions (chopped)
- 1 lime (sliced (for garnish only))
- In a small bowl combine lime juice, honey, soy sauce.
- Salt the chicken thighs with 1/2 teaspoon of salt (or more) thoroughly, all over, including under the skin.
- In 12-inch skillet, heat olive oil over medium-high heat. Add chicken thighs, skin side down, and cook for about 5 minutes until the chicken skin side gets nicely browned (make sure to get really nice brown, not just pale brown – it makes a difference in presentation).
- Turn chicken, so that skins sides are up and add lime-honey mixture to the skillet. Reduce heat to low; cover and cook 14 to 18 minutes longer or until done (chicken should register 180 degrees F on instant thermometer). While cooking, covered, chicken thighs will release their own juices, as well.
- Transfer chicken to plates. Drizzle chicken with pan juices. Top with chopped green onions and serve with lime slices.
You might also enjoy these chicken thigh recipes:
Best Baked Maple-Dijon Chicken Thighs
Skillet Chicken with Bacon Cream Sauce
The post Honey Lime Chicken Thighs appeared first on Julia's Album.
from Julia's Album http://ift.tt/2GLEfha
via IFTTT
Triple Berry Breakfast Smoothie
Healthy breakfast smoothies like this Triple Berry Breakfast Smoothie are an easy way to start your morning off right. It’s a no-cook meal that is ready in no time, fills you up with superfood nutrition and is easy to take on-the-go. Fruity Strawberry Shakeology is blended with two kinds of dark berries, and rich Greek yogurt gives it a boost of extra protein. The recipe calls for frozen blueberries and blackberries but if they are in season you can opt for fresh berries.
If you love to change up your breakfast routine, check out these other healthy breakfast smoothies.
Don’t have Shakeology yet? Get all of the Shakeology flavors here!
Triple Berry Breakfast Smoothie

One of our favorite healthy breakfast smoothies, this Triple Berry Breakfast Smoothie features Greek yogurt and tangy dark berries.
- 1 cup unsweetened almond milk
- 1 cup ice
- 1 scoop Strawberry Shakeology
- ¾ cup reduced-fat (2%) plain Greek yogurt
- ½ cup fresh (or frozen) blackberries
- ½ cup fresh (or frozen) blueberries (reserve a small amount for garnish)
-
Place almond milk, ice, Shakeology, yogurt, blackberries, and blueberries in blender; cover. Blend until smooth.
-
Pour into serving glass (or Mason jar); garnish with reserved blueberries.
The Nutrition Facts box below provides estimated nutritional information for this recipe.
P90X/P90X2 Portions
1½ Protein
1 Dairy
1 Fruit
P90X3 Portions
1½ Carb
2½ Protein
Portion Fix Containers
1 Purple
2 Red
1 tsp.
Not familiar with Portion Fix? Find out how Portion Fix can make losing weight simple.
If you have questions about the portions, please click here to post a question in our forums so our experts can help. Please include a link to the recipe.
from The Beachbody Blog http://ift.tt/2ordWWa
via IFTTT
Diet Hacks for Weird Work Hours
Whoever invented the concept of “breakfast, lunch, and dinner” deserves a hearty handshake from anyone who has ever tried to get their diet under control.
After all, a little structure — be it three squares daily (and maybe a couple snacks), intermittent fasting, or more involved plans such as Beachbody’s 80 Day Obsession Timed Nutrition — goes a long way toward giving us the right foods at the right time to help us reach our goals, whether it’s weight loss, performance, or plain ol’ good health.
Unfortunately, one caveat of this structure is that you keep a fairly normal 9-5 schedule.
When and how much to eat gets confusing quickly if you don’t sleep seven or eight hours at night and stay awake during the day.
This can happen for a few reasons: Typically it’s because you work the night shift, the swing shift, the 24-hour-shift, or some other terrible shift your employer has devised to torture you.
(Another reason for irregular hours is that you’re a vampire. If this is the case, you typically have your diet sorted out, so this article isn’t much use to you.)
But if you’re among the living, we’re come up with a few guidelines to help you figure out how and when to eat when you work weird hours.
But First, Sleep
Before we dig in, though, let’s go slightly off-topic and discuss sleep. It’s important to get seven to eight hours of sleep every night for so many reasons.
Among other benefits, sleep is prime time for muscle recovery and building. It also helps regulate the hunger hormones leptin and ghrelin, both which are important to appetite control.
If seven to eight hours a night can’t happen, at least try to take naps. While nothing truly makes up for a good night’s sleep, a 2008 British study shows naps to be more effective in dealing with afternoon drowsiness than caffeine.
Naps can also ward off fatigue for those forced to stay awake for long hours.
Got it? Cool. Now here are those guidelines:
If you wake up at odd hours but still keep a consistent schedule….
Start your eating day when you wake up. If you crawl out of bed at 6pm, that’s your morning. Eat accordingly.
This is ideal for people who consistently work the night shift. Just like the rest of your life, day becomes night and night becomes day with your diet.
If your schedule shuffles around but you still get eight (or so) hours of sleep daily…
Reset your plan at midnight. In other words, just make sure you get all your meals for each day in within a 24-hour period, starting at 12:01am.
This might mean that some days are breakfast, sleep, lunch, and dinner while others are breakfast, lunch, sleep, and dinner. Just make it work for the day and reboot at midnight.
If you need to stay awake for a prolonged period (18-24 hours)…
You need to be a little more strategic. Here’s a six-step plan.
- Eat normally for the first 12 or so hours.
- Don’t eat for the next four to six hours. Normally, this is part of the time you would be sleeping, so if you can work a short nap in here, great.
- After that, start eating the next day’s meals. It should be one or two meals.
- Unless you’re going for a Guinness World Record, you should be done working, so go to sleep!
- When you wake up, finish the rest of the meals for the day you started before you slept.
- Make a point of going to bed early this day.
The Bottom Line
There’s no one-size-fits-all hack for dealing with unusual working hours. Just like other aspects of your life, you’ll need to improvise and learn as you go, but hopefully, with this set of tips, you should be able to find the right solution for you.
from The Beachbody Blog http://ift.tt/2C9u7Aw
via IFTTT
9 Exercises for Your Best Upper Body Workout
If crafting the perfect upper body was simple, we’d all be walking around with rock-star guns, and performing everyday feats of strength (like getting that couch out of the moving truck) would be a non-issue. But push-ups are hard. And pull-ups are even harder. And that can be discouraging when so many upper body workout routines include both of those moves. Luckily, they’re not the only upper body exercises you can do to get defined arms and a built back. By incorporating other upper body exercises into your routine, you can work even more muscles groups to create the best upper body workout yet.
How do you build upper body strength?
Push-ups and pull-ups are highly functional exercises to help you build upper body strength, and they certainly can have their place in any upper body workout routine. But if you’re not very good at them, there are plenty of other exercises that can help you build strength and size. Even if you are a fan, you should still round out your routine with a variety of upper body exercises to keep challenging your body.
Plus, if you want to build muscle definition or size, you can’t discount the value of doing an upper body workout with dumbbells. Although bodyweight exercises are an excellent way to build muscle, adding weight to your routine allow you to challenge your muscles in new ways.
To build bigger, stronger muscles (upper body or otherwise), here are some things you should keep in mind:
- Keep challenging your muscles. You can do that by adding more weight, doing more reps, or reducing rest periods between sets. You don’t need to change a lot every single work out – even minor tweaks can help keep your muscles progressing.
- Do more sets. Instead of going as hard as you can for just one set, research has found that lifters who performed three to five sets saw more strength gains, muscle endurance, and hypertrophy than those who just did one set per exercise.
- Eat right. Protein is essential when it comes to building muscle. Make sure you’re eating enough and that you’re eating it at the right time (hint: try after you exercise). Beachbody Performance Recover offers 20 grams of high quality protein to help your muscles grow and repair after a challenging workout.
Get even more tips on how to build muscle in this guide.
9 of the Best Exercises for Your Next Upper Body Workout
This list of upper body exercises will help you build the upper body you’ve always wanted. Plus, you can do them from the comfort of your own home – all you need for this upper body dumbbell workout are dumbbells (or resistance bands) and a bench or stability ball.
1. Bent-over row
Appears in: The 20’s – Rachel – I Do: Strength
Benefits: “No one can ever do enough rows,” says Tony Gentilcore, C.S.C.S, owner of CORE gym in Boston. By offsetting many of the postural issues associated with sitting hunched over a computer all day, rows can help eliminate back pain and correct your posture, giving your entire body a visual lift, he says.
- Stand tall with holding a set of dumbbells at your sides, with your palms facing your body. (You can also use a resistance band: Loop the band around each foot. Hold the left handle in your right hand and the right handle in your left hand so that that the band forms an “X.”)
- Keeping your back flat, core braced, and knees slightly bent, bend at the waist so that your back is just above parallel with the floor. Your arms should hang toward the floor.
- Row the dumbbells to the sides of your ribs, squeezing your shoulder blades together at the top of the movement. Pause, then slowly lower your arms back down, and repeat.
2. Arnold press
Appears in: Clean Week – Resistance
Benefits: “Arnold Schwarzenegger was smart in the gym, and this exercise remains a weight-room favorite after decades,” says Kourtney Thomas, C.S.C.S. Why? Because it hits all three sections of the deltoid muscle at one time: the anterior (front), medial (side), and posterior (rear).
- Hold two dumbbells in front of your chest with your palms facing toward your body, keeping your elbows close to your body. This is your starting position.
- Press the dumbbells up above your head, rotating your palms out so that when you reach the overhead position, they face away from your body.
- Reverse the motion to lower the dumbbells back down, corkscrewing your hands so your palms end facing your body, and repeat.
Tip: You can perform this exercise seated or standing. “Seated, you’ll be able to press a little more weight,” Thomas says. “Standing, you’ll get more core engagement because you’re being forced to stabilize your entire body throughout the move.”
3. Dumbbell bench press
Appears in: The Master’s Hammer and Chisel – Max Hammer Strength
Benefits: For those who struggle with push-ups, the bench press allows you to train the pecs, triceps, and shoulders in a different way. For push-up masters, the bench press allows you to use more than just your body weight to work these muscles, which is vital to adding significant strength or definition, Gentilcore explains.
- Lay with your back on a flat bench holding a dumbbell in each hand directly above your chest. Raise your arms straight above your chest, palms facing forward.
- Bend your elbows to lower the dumbbells until your upper arms are parallel with the floor.
- Pause, then press up and slightly in so that you end with your arms fully extended, and repeat.
4. Pullover
Appears in: The Master’s Hammer and Chisel – Total Body Chisel
Benefits: This move might look simple, but there’s actually a lot going on—specifically when it comes to building your lats and pecs, Thomas says. Bonus: You’ll feel your core fire up with every rep, too.
- Lay with your back on a flat bench holding a set of dumbbells.
- With your feet planted on the ground and your core engaged, extend your arms to the sky, holding the dumbbells together above your chest.
- With a slight bend in your elbows, slowly lower your arms overhead until your biceps reach your ears.
- Slowly bring your arms back to above your chest and repeat.
Tip: You might be tempted to drop the dumbbells overhead by arching the back and lifting the ribs, Thomas says. Avoid this by keeping your core engaged throughout the exercise.
5. Dumbbell rear-delt fly
Appears in: Clean Week – Resistance
Benefits: Speaking of the delts, the posterior delt (a.k.a rear delt) is sorely undertrained—one reason why shoulder injuries are so common. If you only train the section of the delts you can see head-on, you’ll alter the shoulder positioning. This limits certain movements and causes the joint to work inefficiently.
- Stand tall holding a set of dumbbells down at your sides.
- Keeping your back flat, push your hips back to hinge forward and lower your chest until it is almost parallel with the ground. Allow the weights to hang straight down at arm’s length, palms facing each other.
- Maintaining a slight bend in your elbows and keeping your back flat, lift the dumbbells to the side by squeezing the shoulder blades together. Stop when the dumbbells are in line with your body.
- Pause, then slowly lower the dumbbells back to start, and repeat.
Tip: Be careful not to use momentum to help you raise the dumbbells. Perform each rep slowly and with control. Imagine squeezing an orange between your shoulder blades each time you lift the bells.
6. Standing biceps curl
Appears in: SHIFT SHOP – Strength: 25
Benefits: Apart from building the biceps – everyone’s favorite vanity muscle – biceps curls are actually excellent for promoting shoulder stability, Gentilcore says. The trick is to focus on keeping your shoulders stationary with very rep.
- Stand tall with your feet shoulder-width apart, holding two dumbbells at your sides, palms facing away from your body.
- Keeping your back straight and your elbows locked at your sides, slowly curl the weights as close to your shoulders as possible.
- Slowly lower back to start and repeat.
Tip: Fight the “ego lifting” urge. Choose weights that you can lift by only bending your elbow, not allowing any movement elsewhere in your body. If your shoulders move, elbows flare, torso leans, or you find yourself bouncing, you need to go down in weights. You can also perform this exercise by holding onto and standing on a resistance band.
7. Skull crusher press
Appears in: Insanity: The Asylum Vol. 1 – Strength
Benefits: Biceps may get most of the glory when it comes to arm muscles, but the triceps can be equally impressive when you build them up. Not only does this move help you build triceps that will pop, but the press action also activates the shoulders.
- Stand holding a single dumbbell with both hands by the weighted ends at shoulder height, with your elbows tucked.
- Press the weight straight overhead.
- Without moving your upper arms, lower the weight behind your head.
- Reverse the movements to return to the starting position, and repeat.
Tip: You might be surprised how light of a weight you need to perform this exercise. Start with lighter weight to maintain proper form, and add weight as you become more experienced with the move.
8. Seated overhead triceps extension
Appears in: Body Beast – Bulk Arms
Benefits: Round out the triceps exercises with this exercise. It isolates the triceps muscle, making the most out of every rep.
- Seated at the end of a bench, hold one end of the dumbbell with both hands behind your head, arms bent at 90 degrees.
- Keeping your back flat and your elbows tucked, slowly push the weight up, stopping just short of full extension.
- Pause, and then lower the weight slowly back down, and repeat.
Tip: Keep your torso straight throughout the movement and resist the urge the urge to lean forward. You can also perform this move standing, which will require you to use your core more for added stability.
9. Floor chest fly
Appears in: P90X3 – Incinerator
Benefits: This move targets the chest muscles in ways other exercises like push-ups and bench presses can’t, Thomas says. And you don’t even need a bench – just a set of dumbbells!
- Lay with your back on the floor with your knees bent and your feet flat, holding a pair of dumbbells directly over your chest with your palms facing each other. Allow a slight bend in your elbows.
- Slowly lower the dumbbells out to your sides, creating a wide arc with your arms until your upper arms lightly touch the floor.
- Pause, then slowly reverse the movement to return to the top, and repeat.
from The Beachbody Blog http://ift.tt/2sKJgo8
via IFTTT
Instant Pot Beef Stew
Thank goodness for this Instant Pot Beef Stew recipe. A traditional beef stew, with fall-apart tender beef, silky vegetables, and rich broth, is almost impossible to pull off on a weeknight. It can take two to three hours of slow simmering for the tough cubes of stew meat to begin to soften, and for complex flavors to develop in the broth. That’s fine – and oh so rewarding – if you’ve got the time, but this Instant Pot Beef Stew recipe takes stew from a cumbersome, special occasion weekend dinner to totally doable on a weeknight.
Instant Pot is a brand name, but you can use any electric pressure cooker to make this recipe. Start by browning your meat right in the pressure cooker, then add chopped aromatic vegetables, broth, and spices, secure the lid and set the cook time for 35 minutes. You don’t even have to watch the pot while it cooks. When time is up, release the pressure valve and enjoy!

Instant Pot Beef Stew

This Instant Pot Beef Stew recipe makes a richly flavored, hearty stew in less than half the time of a traditional recipe.
- 2 Tbsp. olive oil
- 1½ lbs. raw lean beef stew meat
- 3 Tbsp. whole wheat flour
- 1 medium onion (sliced thin)
- 2 medium celery stalks (cut diagonally into 2-inch pieces)
- 6 medium carrots (cut in half lengthwise, cut into 2-inch pieces)
- 2 bay leaves
- ¾ tsp. sea salt ((or Himalayan salt))
- ½ tsp. ground black pepper
- 3 cups low-sodium organic beef broth
-
Turn Instant Pot to sauté. Add oil and beef; cook, stirring frequently, for 5 to 6 minutes, or until beef starts to brown.
-
Add flour; cook, stirring frequently, for 1 minute.
-
Add onion, celery, carrots, bay leaves, salt, pepper, and broth to Instant Pot. Cover and seal Instant Pot; cook, on stew/meat setting, for 35 minutes. Release pressure to vent immediately. Let sit for 10 minutes. Remove lid and discard bay leaves.
The Nutrition Facts box below provides estimated nutritional information for this recipe.

P90X/P90X2 Portions
½ Fat
1½ Protein
1 Vegetable
P90X3 Portions
½ Carb
1½ Protein
1 Fat
Portion Fix Containers
1½ Green
1 Red
1 tsp.
Not familiar with Portion Fix? Find out how Portion Fix can make losing weight simple.
If you have questions about the portions, please click here to post a question in our forums so our experts can help. Please include a link to the recipe.

Instant Pot Beef Stew photographs by Anguel Dimov
from The Beachbody Blog http://ift.tt/2ol8rZ5
via IFTTT
Female Beachbody Challenge Winners, Jan 2018
Male Beachbody Challenge Winners, Jan 2018
Guys of all ages are transforming their bodies and their lives at home with Beachbody’s system of fitness, nutrition, and support. In the month of January 2017 alone, more than 3,000 satisfied customers submitted their inspirational transformation stories to the Beachbody Challenge, where healthy lifestyle changes are rewarded with prizes all year long. In addition to the free gifts that all qualifying contestants receive, these four diligent dudes (below) recently won $1,000 each as a reward for their hard work and their inspirational stories. Check out their mind-blowing “before” and “after” photos…
Yehoshua Shapiro Lost 27 Pounds
It doesn’t take a gym full of equipment to get great results, just look at Yehoshua. Armed with a BOD membership, Shakeology, and the support of his Challenge Group, he has lost 27 pounds, feels great, and is excited to share his fitness secret with you!
He says: “Body Beast is the first program I started with and it has become my bread and butter. The first couple weeks of the program were challenging because I was getting used to the structure and consistency of the workout schedule. Then, it became a habitual process in my daily schedule, along with drinking Shakeology everyday, and also being part of a team of some of the most amazing, motivated individuals. I felt like there really wasn’t anything else to do but succeed! Since beginning, I’ve lost 27 pounds, went from a size 34 waist to a 30, and feel much better about myself. I’m just amazed with how incredible my results have been, and, with Beachbody on Demand, I can pick any workout I’m able to find in the amazing catalog do them wherever and whenever I want. Now, I have something I can always start a conversation with and be able to share the amazing opportunity for people to do the same thing for themselves.”
Freddy Acevedo Lost 22 Pounds
With two young boys at home, a full-time job, and a handful of extra curricular activities, Freddy was beginning to slow down and was not happy about it. That’s when he found P90X. Fast forward 90 days and 22 lbs later and it looks like he’s found more than his missing energy, he picked up 6 abs and some serious muscle along the way!
He says: “I have two boys with a lot of energy and I wanted to be able to have the endurance to play with them as well as the energy spend time with my wife too. I began looking into P90X because it seemed challenging and like it could be the something that I needed to help me get the results that I wanted. The intensity is great and Tony just keeps you going! The program made me realize how much I was missing out by not having a workout routine like I used to. Now, I feel happier, more energetic, I have more patience, and a different way to look at life. If you can make a difference for the people that are around you by just working out to give them the best of you, then the question is “why not?” By doing so, I have been able to inspire other people to make an impact in their lives as well.”
L W Bolton III Lost 100 Pounds
As a pastor, it was important for L W to practice what he preached. By committing to daily exercise, good nutrition, and following the expert advice of Mr. Tony Horton, he was able to lose 100 pounds in just 9 short months!
He says: “I’ve struggled with my weight all of my adult life. As a pastor, I wanted to look healthy while standing before the congregation. If you think about it, the Bible is a book that teaches us about discipline in our everyday lives. Weighing over 300 lbs says nothing about “discipline” and I was tired of looking contradictory to what I preach. Before starting with P90, I was able to lose 40 lbs by changing my diet and drinking a lot of water. Once I began the program, I had to use a lot of modifications, but I hung in there. Tony Horton made working out exciting and easy for anybody with a made up mind to do it. After doing P90 and P90X, I’m down 100 lbs and words cannot describe the confidence that I have! Not only has my life changed, but my wife, daughter, and my Church have been inspired to change as well. Now that I’ve conquered this giant in my life, I feel like there’s nothing I can’t do.”
James Hough Lost 8 Pounds
Think the only six pack you can get after age 50 is the liquid kind? Think again! After just 90 days of following the Body Beast program, James gained an inch of muscle on his arms and chest and chiseled out some noticeable abs. Fierce!
He says: “Before I started Body Beast, I was overweight and out of shape so bad that I was embarrassed to be seen in public. At 5’8″ and 205 lbs I thought I looked like a bowling ball. One night I was watching TV and saw a commercial for Body Beast. I told my wife I was going to order it, and I decided to make a life change and get back in shape. In just one round I lost 8 lbs, dropped 2 pants sizes, gained an inch in my arms and chest, and I have a six pack! Not to mention, my eating habits are so much better and I have the energy of a 30 year old again. At 51, I have a new outlook on life and look forward to each mornings workout.”
You can change your life, too. Get started here for the tools you need to Decide, Commit, and Succeed! Complete any Beachbody program, and enter your results for a free gift and a chance to win cash and prizes. Ready to pick a program and get started?
The Beachbody Challenge contest is currently open only to legal residents of the 50 United States (incl. DC), Puerto Rico, and Canada (excluding Quebec) who are at least 18 or the age of majority at time of entry. Residents of Quebec and the UK are not currently eligible to compete in the Beachbody Challenge transformation contest. However, they can earn free gifts after completing a Beachbody program by submitting this application form online.
from The Beachbody Blog http://ift.tt/2EEIwCo
via IFTTT
How to Cook Sweet Potatoes (Plus 8 Ways to Eat Them!)
Sweet potatoes aren’t just for pies anymore.
Like regular potatoes, they’re one of the most versatile veggies out there: You can add them to a breakfast scramble, toss them on a salad for lunch, or stuff them for a quick and satisfying dinner. Sweet potatoes can even satisfy your sweet tooth as part of a healthier dessert.
Before we get into the nitty-gritty cooking details, let’s take a closer look at this tasty tuber.
Yam vs. Sweet Potato
First things first: A yam is not a sweet potato, and a sweet potato is not a yam.
Sweet potatoes and yams are from two different plant families. Sweet potato skin and flesh come in a variety of colors, but most people are familiar with the red skin/orange flesh combo.
Yams often have dark brown, bark-like skin (they can also come in purple), with white flesh that’s more firm and starchier than sweet potato flesh, which is more moist and sweeter.
Yams are generally imported to the U.S. from Africa and Asia, and usually found in specialty grocery stores, rather than your market down the street.
So why do people use the terms interchangeably? The most common theory is that in the 1800s, sweet potatoes were called “yams,” short for “nyami,” the African word for “to eat.”
Sweet Potato Nutrition
A medium baked sweet potato (114 g) contains 2 grams of protein, 24 g of carbohydrates, less than 1 g of fat, and 4 g of fiber.
In addition, one medium sweet potato delivers 438 percent of the daily recommended value of vitamin A and 37 percent of the daily recommended value of vitamin C.
It contains minerals such as potassium, calcium, magnesium, and phosphorus.
(Pro tip: A serving of sweet potato fits in the yellow Portion Fix container.)
How to Buy, Store, and Prep Sweet Potatoes
How long do sweet potatoes stay fresh? How can you spot a “good” one? Here are the sweet potato basics you need to know.
Buying Sweet Potatoes
- Look for firm sweet potatoes with clean, relatively smooth skin.
- Avoid potatoes that are soft, or brown/black spots.
Storing Sweet Potatoes
- At room temperature, sweet potatoes will most likely last one to two weeks. Ideally, store sweet potatoes in a cool, dark, well-ventilated space; they can be safely stored this way for three to four months.
- Don’t refrigerate them, because cold temperatures will convert the potatoes’ starch into sugar, which may affect the flavor.
Prepping Sweet Potatoes
- Wash them right before you cook with them. Don’t wash them sooner — water may get trapped in the eyes of the potato and get musty or moldy.
- Use a food-safe scrub brush — not the same one you use to clean around the house, obviously — to dislodge any dirt.
- If your sweet potatoes have “eyes,” or sprouts, don’t toss them — just scoop them out with your peeler or a knife.
How to Cook Sweet Potatoes
For optimal texture, baking sweet potatoes in the oven — or toaster oven, if you’re only making one or two — is your best bet.
How to Bake Sweet Potatoes in the Oven
- Preheat oven to 400° F.
- Place sweet potatoes on a baking sheet.
- Pierce each sweet potato three to four times with a fork.
- Bake for 35 to 45 minutes, or until tender.
Pro tip: If you want to get fancy, cut your sweet potatoes into small cubes and toss with oil, herbs, and spices before you roast them. Or slice them and spice them for homemade sweet potato fries.
How to Cook Sweet Potatoes in the Microwave
Note: You can cook a sweet potato in the microwave — but it may cook unevenly, and the result can be a “gummy”-like texture if you get the timing wrong.
Depending on how fancy/not fancy your microwave is, you may want to experiment with cooking time until you get your preferred texture. But in general:
- Place sweet potatoes on a microwavable plate.
- Pierce each sweet potato three to four times with a fork.
- Microwave on HIGH for 5 to 8 minutes, rotating halfway through.
How to Bake Sweet Potatoes in Foil
When you bake a sweet potato in foil, it traps the potato’s moisture — so it’s more like steaming it than baking it.
This can leave you with slightly soft potato skins, but it’s great in a pinch — for example, if you’re cooking a big meal and your oven is already full.
If you wrap each potato in aluminum foil, you can place them right on the rack around or between large pans that hog precious oven real estate.
Cooking a sweet potato in foil is the same as baking it on a sheet:
- Preheat oven to 400° F.
- Pierce each sweet potato three to four times with a fork. Wrap each individually in foil.
- Place directly on the oven rack and bake for 35 to 45 minutes, or until tender.
8 Creative Ways to Eat Sweet Potatoes
Did we mention the sweet potato is super versatile? Here are a few fun ways to eat this veggie.
1. Mashed Sweet Potatoes
There’s a reason mashed potatoes are considered a comfort food: they’re warm, delicious, and filling.
Swap in this mashed sweet potato recipe and you’ve got the same warm comfort, minus the added calories and fat from butter, sour cream, and milk.
Everything you do with regular mashed potatoes you can do with mashed sweet potatoes: Spread it on top of a shepherd’s pie, add it to baked goods, or use it as a thickening agent in gravies and sauces.
2. Sweet Potato Smoothie
Similar to the way bananas thicken smoothies, baked sweet potatoes make them super creamy and thick.
Try this sweet potato pie smoothie, which includes Vanilla Shakeology, cinnamon, allspice, and nutmeg for a healthy take on the classic fall dessert.
3. Sweet Potato Egg Cups
Who knew that the humble muffin tin would turn out to be such a clutch kitchen player?
In addition to cooking more traditional sweet breakfast muffins, you can use muffin tins to bake savory “muffins,” like these sweet potato egg cups.
Cook one batch (12 egg cups, two per serving) and you have a delicious grab-and-go breakfast (or snack!) for six days.
Bonus: Here are 12 egg cup recipes with five ingredients or less!
4. Sweet Potato Latkes
When you hear “potato pancake,” you might immediately think of the beloved Hanukkah mainstay — and you can use sweet potatoes for a healthier latke recipe.
With just sweet potatoes, onion, egg, flour, breadcrumbs, and garlic, you’ll want to eat these crisp, savory latkes any time of year.
5. Sweet Potato Hash With Eggs
This sheet-pan breakfast recipe couldn’t be easier: Simply combine all the ingredients, spread it on a sheet pan, crack some eggs on it, and bake.
6. Sweet Potato Salad
Sweet potatoes are a delicious way to add heft to your salads. Bake an extra with dinner, then cube it and toss it on top of your favorite greens the next day.
Try this apple, arugula, sweet potato, and pumpkin seed salad — or for something heartier, try this more substantial winter superfood bowl, which features beets, sweet potatoes, Brussels sprouts, avocado, bulgur, and more.
7. Stuffed Sweet Potatoes
Baked sweet potatoes can quickly transform last night’s leftovers into a full-on entree. Try these filling barbecue chicken baked sweet potatoes: With just five ingredients — sweet potatoes, shredded chicken, barbecue sauce, red onions, and fresh parsley — prep is a cinch.
8. Sweet Potato Pie
It would be a sin to overlook desserts when we’re talking about a veggie with “sweet” in its name. Sweet potato pie is a classic — but traditional recipes tend to include lots of sugar and butter.
This healthier spin on sweet potato pie incorporates Medjool dates and pure maple syrup (or raw honey) for sweetness, and pecans for a little crunch.
The Bottom Line
Sweet potatoes are an easy-to-cook, healthy base for just about any meal. Bake a few at the start of the week to save time and then chop, mash, or puree them when you’re ready.
from The Beachbody Blog http://ift.tt/2EIhP44
via IFTTT
How to make crepes in a regular skillet
This is my time tested recipe for how to make crepes in a regular skillet, from scratch, at home. Step-by-step photos and instructions on everything about crepes: how to make crepe batter, how to flip crepes, how to make sure they don’t stick to the pan, etc. Easy crepe recipe for French-style crepes!
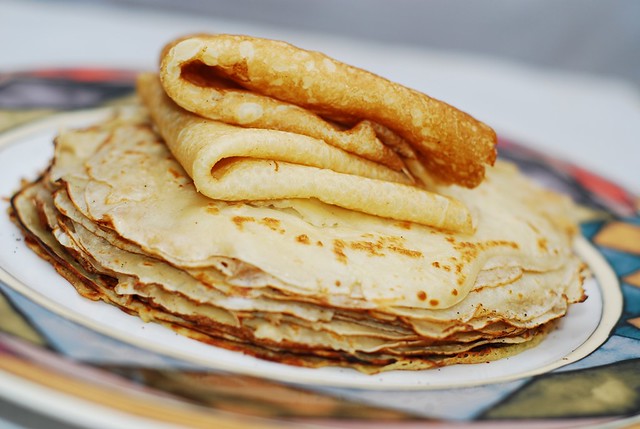
Because I make the crepes so often at home, I became somewhat of an expert in my family on how to make crepes, and mind you, being an expert in crepes does not amount to many privileges here, except for the privilege of making lots of crepe batter and practicing flipping them (the crepes) on a frying pan. I literally could flip them with my eyes closed. The easy crepe recipe I have below is for French style crepes: thin, slightly sweet, perfect for all kinds of delicious crepe fillings!
Crepes and I go back together long ways. You see, I grew up eating crepes on a weekly basis: my mom would usually cook them during the weekend, and my sister and I would eat them for breakfast, almost always with home-made sour cherry preserves. The sour cherry preserves were prepared by our parents during summer, with cherries from huge sour cherry trees in our garden. My sister and I would pit the cherries.
And, yes, the crepe batter recipe and the process of making crepes are so easy. In fact, the only “hard” part is using the right frying pan and a little bit of practice to flip the crepes. If you never made crepes, I highly recommend using non-stick pan, which will virtually guarantee that crepes won’t stick to the pan. I personally like to use stainless steel skillet, as it results in a much better crepe texture, but using stainless steel will require some practice (as far as how hot you need to get that pan to make sure crepes won’t stick). With non-stick, it’s easier.
The below crepe batter recipe and tutorial describe how to make crepe batter from scratch, without lumps, how to get just the right batter thickness. For crepes, the less thick the batter is, the better. If the batter is not thick enough, though, you will end up with crepes that will be very hard to flip to the other side – they will be too thin. So, it’s a fine balance: just how thick the crepe batter should be. Below I provide precise measurements that I use for my easy crepe recipe that always result in amazing crepes that are slightly sweet, soft, easy to flip and easily moldable in various shapes (pockets, tubes, etc., more recipes to come!). One of my most favorite ways to serve crepes as a dessert is crepes with agave-ricotta cheese filling, topped with pears roasted in honey.
Ingredients you’ll need for this easy crepe batter recipe:
2 cups milk
1 1/3 cup flour
1 egg
1 tablespoon vegetable oil
1/2 teaspoon baking powder
2 tablespoons sugar
How to make crepes:
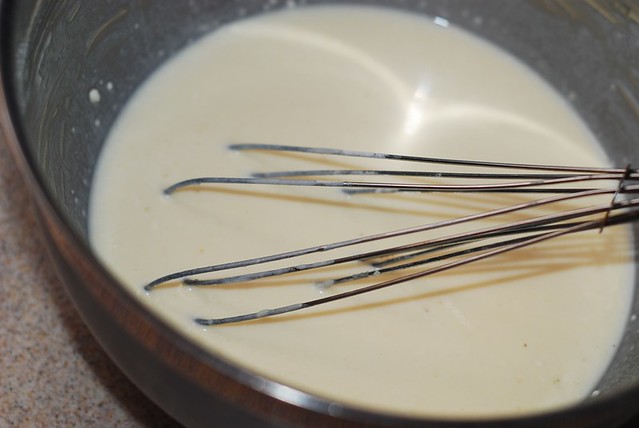
First, make the crepe batter:
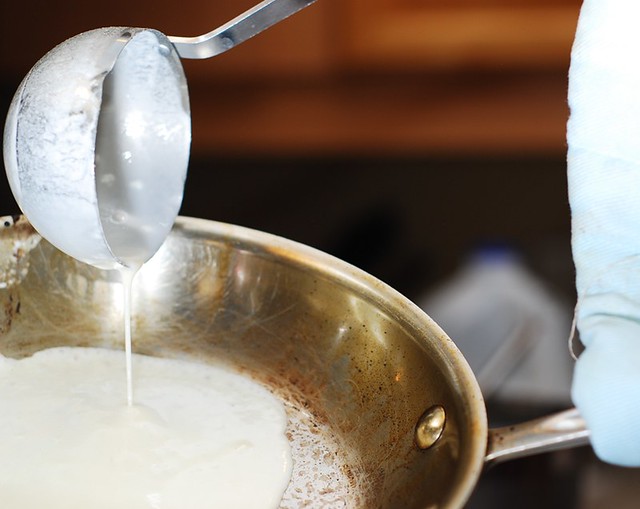
Pour crepe batter onto the heated and greased frying skillet (grease the skillet only once, for the first crepe)

That’s what it looks like when you pour the crepe batter onto the heated and greased stainless steel skillet

Cook a crepe on one side until the liquid crepe batter becomes more solid:
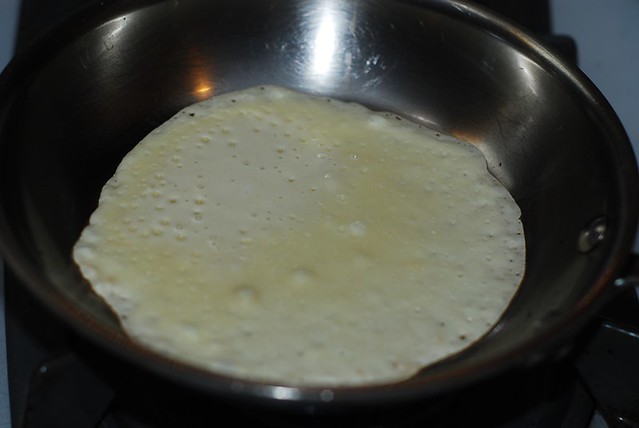
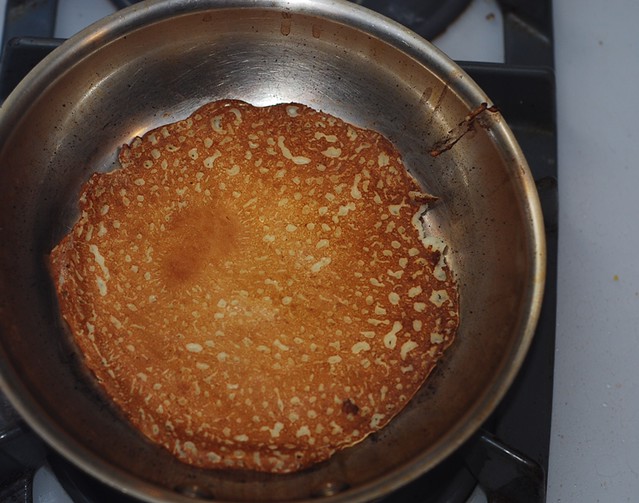
Here, you’re cooking a crepe on one side until the crepe becomes more solid. Here is the crepe almost ready to be flipped over:
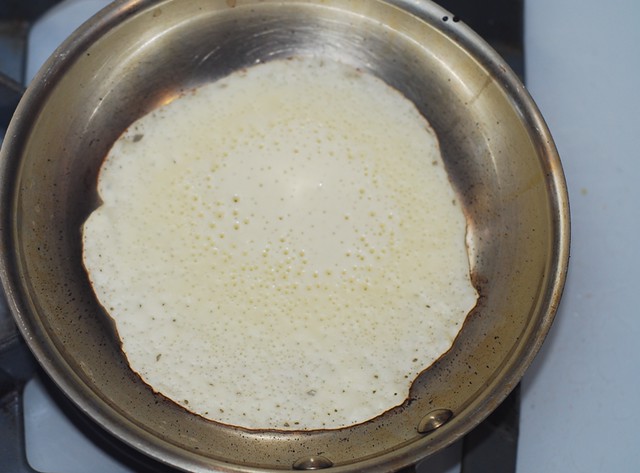
All liquid crepe batter is gone, now you have just a nice bubbled side of the crepe:
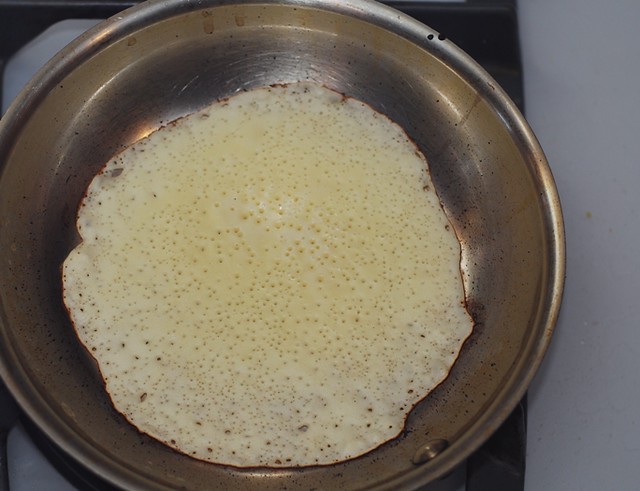
Now it’s time to flip the crepe to the other side:
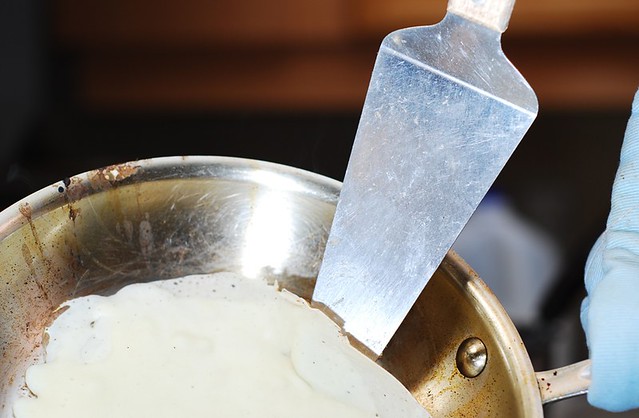
Gently pick up the crepe around its circumference:
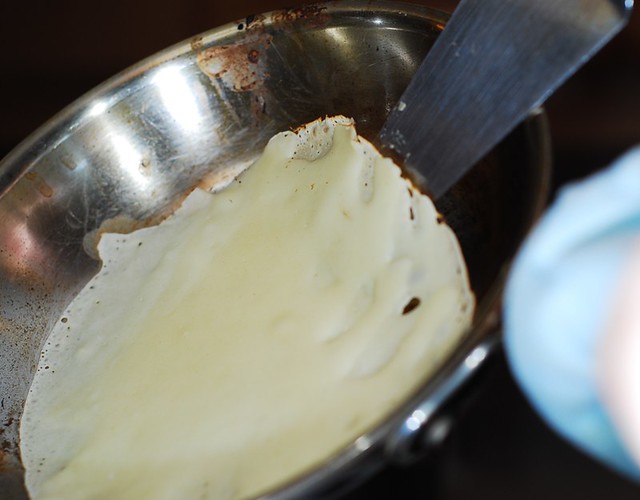
And … flip it!
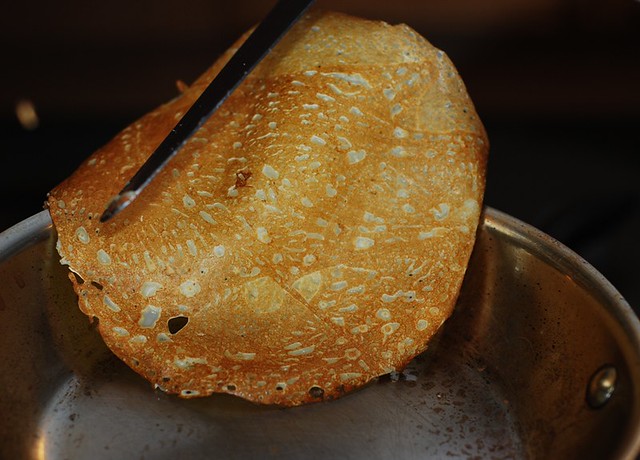
Crepe successfully flipped to the other side:

Crepe is cooking on the other side
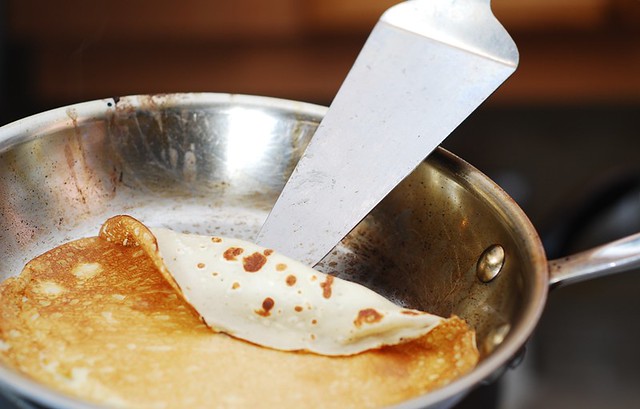
Pick up the sides of the crepe around its circumference to check for doneness
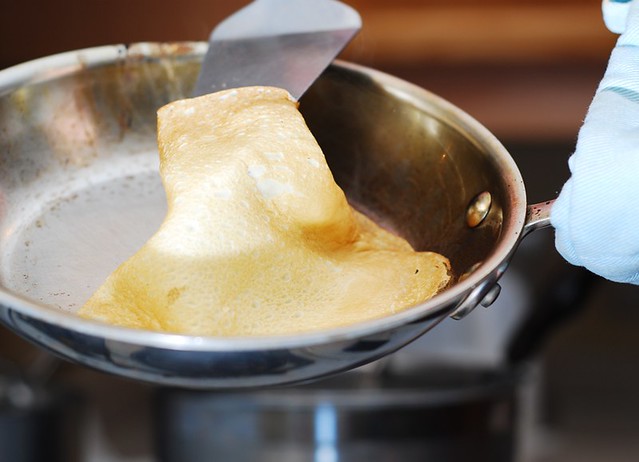
Pick up the whole crepe and transfer it onto the plate
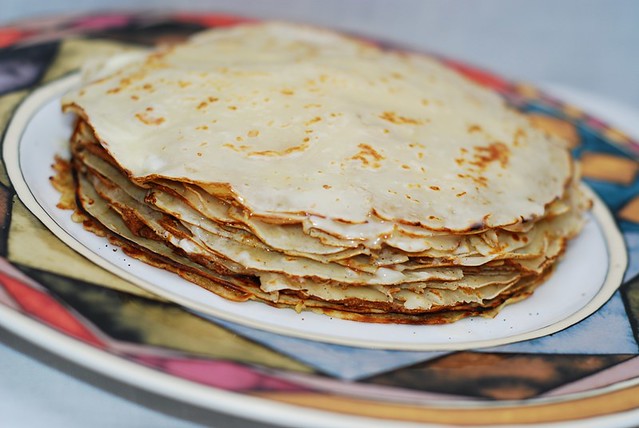
Enjoy the crepes! So, yes, making crepes in a stainless steel skillet is definitely possible! I’ve been doing it for years. It just takes practice. Of course, if you’re new to making crepes, it’s probably easier to stick to non-stick skillets. 🙂 I really hope you find this easy recipe and my instructions for how to make crepes useful!
How to make crepes in a regular skillet

Step-by-step photos and instructions on how to make French-style crepes from scratch in a regular frying pan. This easy crepe recipe has everything you need: ingredients on how to make crepe batter, step-by-step photos, and detailed instructions for how to flip crepes, how to make sure they don’t stick to the pan, etc.
- 2 cups milk
- 1 1/3 cup flour
- 1 egg
- 1 tablespoon vegetable oil
- 1/2 teaspoon baking powder
- 2 tablespoons sugar
-
Mix all the ingredients for crepe batter in a large bowl and whisk the mixture until lumps dissolve.
-
Heat frying pan until very hot (on high heat on stove top), spray it with oil spray and, using a soup ladle, pour small amount of batter into the frying pan as you roll the pan from side to side just enough to cover the bottom of the pan evenly with a thin layer of crepe batter. Depending on the size of your soup ladle, you could use a whole ladle-ful, or less. It also depends on the diameter of your skillet. The key is to cover the bottom of the pan with just a slightly thick layer of batter, don’t coat it too thickly, do it slowly.
-
Let this thin layer of crepe batter cook for 1, 2 or 3 minutes, depending on your pan. The subsequent crepes will require much less time to cook than the first time as the pan heats up even more with each crepe.
-
After cooking the crepe batter on one side for 1 to 3 minutes, flip the crepe to the other side, using the spatula, and let it cook for another minute on the other side. This way, you cook each crepe 1-2 minutes on each side.
-
To flip the crepe, use the spatula and pick up the sides of the crepe around its circumference, gradually reaching towards the center of the crepe from all sides, until the crepe separates from the pan.
-
How to know when it’s time to flip the crepe? When you first pour the crepe batter, it will be wet in the frying pan but gradually bubbles will be forming and the crepe batter will start to get dry. When it’s all bubbles on top and no liquid crepe batter – it’s time to flip! You can see it on my photos above.
-
Your subsequent crepes might require much less time to cook, and the more of them you have to make, the faster you will have to flip the crepes, because the frying pan will get more and more heated up. When you cook crepes, your stainless steel skillet is always on high heat. This will minimize sticking. If you use non-stick, you can keep it on medium heat.
-
As each crepe gets done, transfer it to the plate and add each new crepe on top of previous crepe in the stack. Sometimes I like to brush each crepe with softened butter and then top it with the next one. It tastes really good, and also helps crepes not stick to one another.
Follow Julia on Pinterest and Facebook to get more recipes and dinner ideas for your weekly meal planning!
The post How to make crepes in a regular skillet appeared first on Julia's Album.
from Julia's Album http://ift.tt/2HxCcyy
via IFTTT
Get Pumped With Megan Davies’ High Energy Workout Playlist
Fitness runs in the family with Megan Davies. She started weight training to prepare for gymnastics and fitness competitions when she was 14. Today, she helps run the Training For Warriors gym in Coral Springs with the people who have known her the longest. “I’m a trainer, my brother and dad are trainers, and my mom is like our office manager,” she says. “We’ve been open for seven years now – it’s awesome.”
Although she loves working with her close-knit family at their gym, Davies broke into the Beachbody in world in 2016. She entered into the “The 20s” competition – a reality show on Beachbody On Demand aimed at finding the next Beachbody Super Trainer. She was at first resistant to the idea of trying out for a reality show, but she changed her mind when she realized that Tony Horton was involved. Davies admired him from his iconic P90X workouts, and “that’s when I started to put in all my effort. I ended up getting on the show, and I ended up winning,” she says.
“Clean Week” became Davies’ first program as a Beachbody Super Trainer. “It’s a week-long program designed to meet people at any fitness level,” she explains. “We start with a base move, and then we have an intensifier if you want to take it up a notch. It’s really made for somebody who wants to either start their fitness journey or get back into fitness.” You can check it out for yourself by trying it for free on Beachbody On Demand today.
When Davies gets back to the gym at Training For Warriors, the entire family takes turns picking the music during the workouts. When it’s her turn, you’re likely to get a little bit of everything. “I think my music taste is pretty far and wide,” she says. “I have a dance and gymnastics background, so I grew up liking pop music, but my brother really liked heavy metal and my dad liked country music, so I also listened to that. It’ll go a little bit in every direction.”
Listen to Davies’ full Spotify playlist below, and follow Beachbody On Demand on Spotify for more great playlists to pair with any kind of workout.
Megan Davies’ Empowered Pop Workout Playlist

“Confident”
Artist: Demi Lovato
Album: Confident
“[Demi Lovato’s] songs have a way of making you feel really empowered and ready to take on the world. And I think she’s kind of gone through a big transformation herself, which comes out in her songs.”
“Sorry Not Sorry”
Artist: Demi Lovato
Album: Tell Me You Love Me
“I think whenever you’re listening to her songs, you feel amped up – like you could do anything.”
“Thunder”
Artist: Imagine Dragons
Album: Evolve
“This is just catchy, and I don’t know a single person who doesn’t like it.”
“B.O.B.”
Artist: OutKast
Album: Stankonia
“This one just has so much energy, which is typical of OutKast and their songs. It’s fast paced, gets you singing, and gets you working. That’s why I love them.”
“Born for Greatness”
Artist: Papa Roach
Album: Crooked Teeth
“I put this on my playlist not too long ago, and then Papa Roach came out with the music video. I’m not big into music videos, but there’s an aerialist named Jen Bricker who’s in it. She was born with no legs, but she’s incredible at tumbling and aerial work, so I’ve been following her on Instagram and have been inspired by her since I was into gymnastics. Ever since I’ve watched the music video, I’m super amped-up to workout to this song.”
“Don’t Be So Hard On Yourself”
Artist: Jess Glynne
Album: I Cry When I Laugh
“It sort of has a fast-paced beat, but the lyrics of this song help remind you that you’re getting the workout done and you’re doing your best. It’s a, ‘get rid of any negative thoughts and don’t hold yourself back,’ kind of thing. I think the lyrics are really powerful – it’s a reminder that a lot of people need.”
“You Can’t Stop Me”
Artist: Andy Mineo
Album: Never Land
“There’s a bunch of parts where he stops and screams, ‘You can’t stop me,’ and I think at that point, every single time I just want to scream along with him. ‘You can’t stop me!’ It’s a song that really gets me in the zone, and when I need to push through a difficult part of my workout, this would be the song I want to listen to.”
“I Slept with Someone in Fall Out Boy and All I Got Was This Stupid Song Written About Me”
Artist: Fall Out Boy
Album: From Under the Cork Tree
“I just really like this song, and kind of for a corny reason. It’s from the movie Stick It – a gymnastics movie that came out when I was in college. [The main character] is doing all these ridiculous tricks and stuff [during this song], and I always equate this song to that moment in the movie. It always pushes me.”
“A Warrior’s Call”
Artist: Volbeat
Album: Beyond Hell/Above Heaven
“This one is definitely inspired by my brother. It’s some crazy metal music. I don’t sit in my car and listen to metal music, but when I’m working out, sometimes this song just comes on, and it’s a little edgier, and all of a sudden it’s the thing that you need to get you through that workout.”
“Till I Collapse”
Artist: Eminem featuring Nate Dogg
Album: Real Steel – Music From The Motion Picture
“Really, [I like] anything by Eminem. A lot of his songs talk about rising up from nothing, haters who are trying to hold you back, or mistakes you’ve made in your past that you’re moving on from. He doesn’t always say it in such a positive, rainbows-and-butterflies kind of way, but I think that’s the overall message of his songs, and I think that’s why people connect with them so well.”
“Heartbreaker”
Artist: Mariah Carey featuring Jay-Z
Album: Rainbow
“This one is here to represent any ’90s pop music that I can sing along to while I’m running. Even if it’s a slower pop song from back then, I get into this happy singing mode and I push myself more. I don’t really realize the pain of the workout or what I’m going through at that moment because I’m so uplifted and focusing on the music.”
from The Beachbody Blog http://ift.tt/2syFNZz
via IFTTT



Pop quiz: Is a salad still a salad if it doesn’t have greens in it?
(Short answer: YES.)
“People think you need lettuce to call something a salad,” says Chelsey Amer, a registered dietitian based in New York City.
Your bowl or plate can contain any variety of ingredients — with or without dark, leafy greens — and it’s still a salad.
If you’re struggling to learn to like vegetables or if greens gross you out, don’t write off salads — they’re an easy way to bump up your vegetable and fruit intake each day, even without the green leafy stuff.
Here’s our foolproof formula for building a healthy, no-greens salad, along with some tips that may help you learn to like greens — some day!
How to Make a Salad Without Greens
Easy peasy: Just skip Step 1 in our Foolproof Formula for a Healthy, Delicious Salad or the vegetarian version. (For creative, delicious green alternatives, see our list below).
The non-starchy vegetables that are usually considered add-ins or toppings can replace lettuce or greens as the base of your salad.
Though she likes greens, Amer sometimes bypasses them herself.
“One of my favorite salads is an Israeli salad that’s made from chopped cucumbers and tomatoes, plus sometimes onion,” she says. This becomes the base of her salad in place of greens.
(Pro tip: If you’re not a huge fan of raw veggies, steam your favorite vegetables or roast them in the oven.)
Once you have your base, start adding your protein, carbs, and healthy fats, says Alyssa Cohen, R.D.
“When you build a salad, make sure to include all three macronutrients,” she says. This ensures your salad provides enough calories and other nutrients to keep you satisfied until your next meal or snack.
The other rules of building a healthy salad — and the most common mistakes we share in those formulas — still apply.
You’ll want to keep portion sizes in mind, especially with healthy fats, condiments, and tasty toppings like nuts and seeds.
The Best Alternatives to Greens
There are so many alternatives to lettuce in a salad — almost anything in the produce aisle can be the base of your no-greens salad bowl.
“The truth is, you can create a salad any way you want,” says Cohen. (Remember that if you burn out on kale, lettuce, and spinach.)
Check out some of the options:
Cauliflower rice (or broccoli rice)
Cauliflower rice (and now broccoli rice) is available pre-riced at most supermarkets, or you can make it yourself in a flash by pulsing fresh florets in a food processor.
Cauliflower rice tabbouleh is a fresh spin on a Mediterranean classic, and broccoli rice can be tasty with leftover Ginger Soy Flank Steak as your protein choice.
If you prefer cauliflower whole, you can make Buffalo Cauliflower Bites and use them as a salad topper.
Broccoli slaw
Broccoli slaw is a genius way to use up the stalks that many people toss in the garbage.
Buy it pre-shredded or use a vegetable peeler to remove the tough outer layer, then shred the inner stems using a food processor or spiralizer.
Broccoli slaw can be tough and dry, so toss it with a pre-measured amount of dressing, massage well, and refrigerate for up to a day. Try it with Creamy Dill Dressing.
Shredded or spiralized vegetables
How you prepare vegetables can affect the way you feel about them, as the texture can influence your sensory experience.
Salads involve a lot of chewing, so starting with smaller pieces may make certain vegetables more appealing.
Using a box grater, slicing attachment on a food processor, or spiralizer, you can turn unlikely vegetables into the stars of your salad.
Shredded carrots and beets sweeten up salads (and are more fun to eat than giant raw chunks), while thinly sliced or shredded Brussels sprouts and cabbage disperse their strong flavor throughout your bowl. You can also grate or slice bitter radishes.
Spiralized veggies make salads more fun — who doesn’t love twirling noodles?
“Zoodles” made from zucchini are an obvious choice, but cucumbers, carrots, and even beets can be used in addition to or in place of noodles like soba.
(Fun Fact: Like kale, Brussels sprouts and cabbage are both members of the cruciferous family of vegetables.)
Massaging these tough, dry veggies with a tiny bit of salt and acid (like vinegar or citrus juice) can tenderize them.
Even if you’re adding dressing, don’t skip this step. Sprinkle with a small amount of salt and acid, then use your hands to squeeze and massage until they soften slightly, give off some liquid, and appear shiny.
For best results, refrigerate for at least a few hours before eating.
Diced vegetables
Turn common veggie toppings — like tomatoes, celery, cucumbers, carrots, onions, or peppers — into your base by finely dicing them.
Keep all pieces uniform for a fun, confetti-like salad, and opt for a mostly clear dressing (like Lemon Tarragon Vinaigrette) to show off the rainbow colors of your veggies.
Portion Fix: A serving of non-starchy vegetables is one green container.
Grains
Remember how you can chill down anything, put it in a bowl, and call it a salad? That means grain bowls are technically salads.
“You can also replace the greens with a starchy base such as farro, quinoa, or brown rice,” says Cohen.
Build your own Buddha Bowl, try a Grilled Peach Panzanella salad, or enjoy leftover Roasted Fennel and Farro Salad chilled.
Portion Fix: A serving of carbs is one yellow container. This includes whole grains as well as starchy vegetables — like corn, roasted white or sweet potatoes, or green peas.
5 Ways to Make Salad If You Hate Greens
Research proves trying new foods is hard. When introducing kids (and adults!) to a new food, for example, it can take between eight and 15 tries, so cut yourself some slack — and don’t give up!
If you’re working to overcome a distaste for greens, here are five things you can do to a salad if you hate greens or lettuce.
1. Wrap it
This tip puts a food you know and like between you and your salad.
Place a serving of salad inside rice paper wrappers (like spring rolls), nori (like sushi), or a whole-grain tortilla. If you’re feeling brave, wrap your salad in a collard leaf or lettuce cups!
2. Chop it
Sometimes eating a salad can feel like a workout, and facing down huge lettuce leaves may feel intimidating. (We’re looking at you, kale).
One solution? Chop your greens and other ingredients finely so they’re generally all bite-sized. Avoid any mess by chopping your ingredients before adding any dressing.
No more lettuce leaves flopping off your fork or dangling out of your mouth!
3. Scoop it
Once you’ve chopped your greens, use a serving of baked chips or healthy versions of crackers to give your salad some crunch — and make it more fun to eat!
4. Dress it
Dry greens appeal to very few people, so try tossing them with dressing before making the rest of your salad.
Place a portion of dressing in the bottom of your bowl, add your greens, and use tongs to toss and coat every leaf. Then add the rest of your ingredients.
Try these Portion Fix-approved dressing recipes:
Honey Mustard Dressing
Healthier Ranch Dressing
Thousand Island Dressing
5. Hide it
Start small. There’s no rule that says you must fill your entire bowl with greens.
In Portion Fix, a serving of greens is one green container, so start with that and mix them in.
No one likes soggy, watery greens. Be sure to dry them well, using a salad spinner or using paper towels or a dish (clean!) towel to absorb as much moisture as possible.
You can chop the greens to further hide them, or use any of these other tricks. Chances are, once they’re in the bowl, you won’t notice them.
Pro Tip: If you’re really, REALLY not down with greens, a daily Shakeology is a great way to get your greens in without having to hold your nose or hide them. Get your bag here!
The Takeaway
A salad sans lettuce or any greens can still be a filling, nutrient-dense meal.
Get creative with your ingredients and your preparation techniques, and you can eat the rainbow without ever including greens that you don’t like.